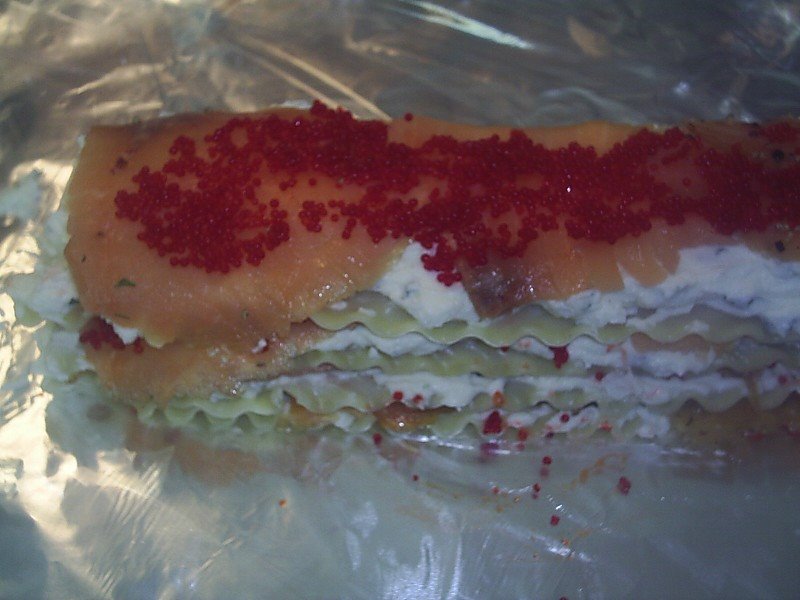
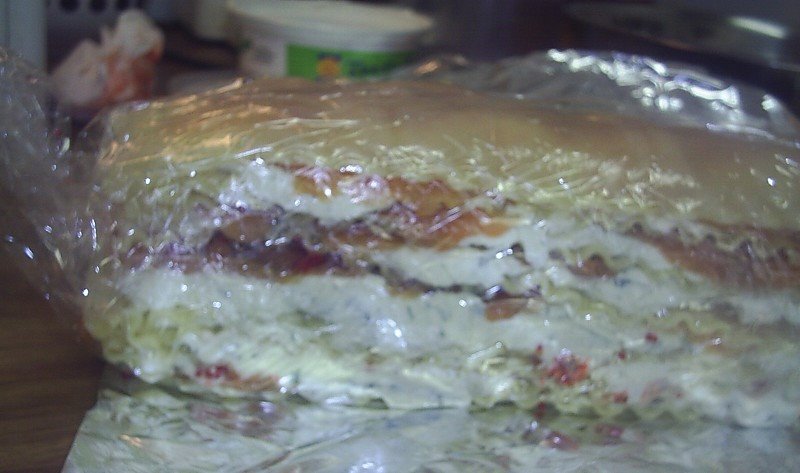
Thursday, August 10, 2006

Cottage Party!

My whole family recently held our annual summer get-together at my parents' cottage, and as it was a potluck type affair, I was expected to bring some nibblies.For a bit of a change, I decided to make some Spicy Potato Samosas. I happen to really like samosas, and spicy ones especially, but they're not the kind of thing that normally makes an appearance at one of our family functions. More about these later.

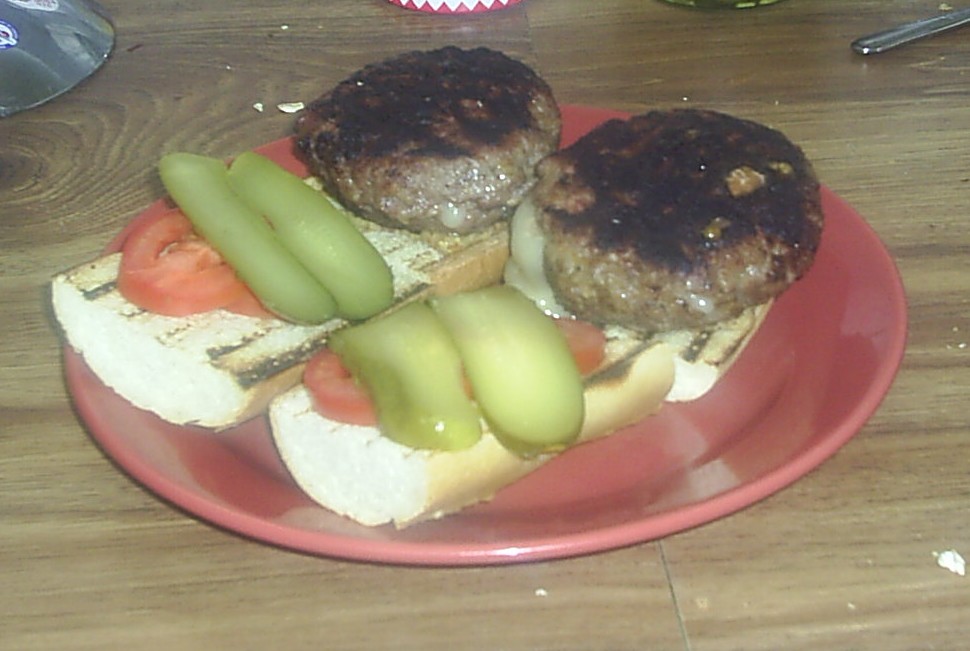
After a swim and the traditional game of softball in the nearby park, the food came out.
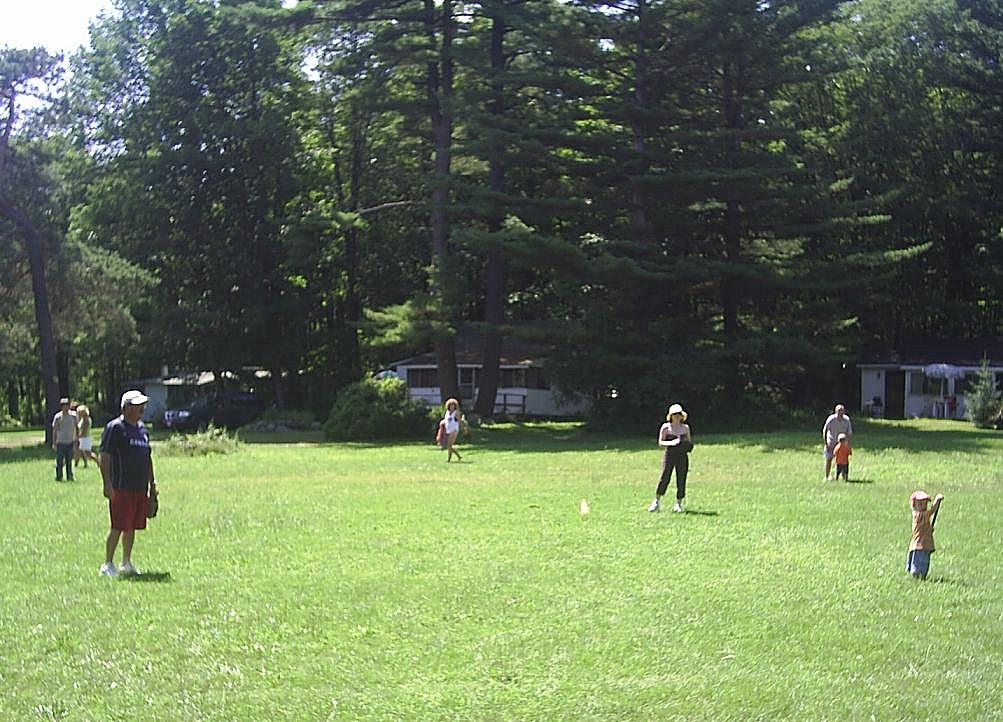
The normal menu for one of our shindigs goes something like this: Burgers and hotdogs cooked on the BBQ (normally by my brother, my dad or myself), with a few veggie patties thrown in for my cousin Kristen who's a vegetarian. (Side note: veggie pattie technology must have made great strides in the last few years, because I tried one at this year's party and it was pretty darn tasty. But you didn't hear that from me.) Then a cornucopia of salads including green salads, potato salads, a few pasta salads, and my personal favourite - the marshmallow Jell-O salad. In addition to these, there are always lots of potato chips, the mandatory spinach dip served in the sourdough bread bowl, my mother's excellent crab dip (which is specifically requested by my cousins), shrimp rings with seafood sauce, and whatever weird concoction I've decided to whip up for the occasion.

Then there was dessert. Trays of brownies, lemon squares, Rice Krispies squares, a raspberry-rhubarb pie (love the rhubarb), slices of watermelon and other stuff which I can't remember.

As I metioned above, this year I made Potato Samosas. I found the recipe in a great cookbook I picked up at a church book sale a few months back, called "Street Food". It features recipes for common street food from around the world.My experience with making these samosas was similar to that of making pierogies for the first time back in February. I made the dough, and while that was resting covered with a damp towel, I made up the filling.Mmmmm. That's some spicy comfort food. There's an entire large jalapeno pepper in there. I was hoping that it wouldn't be too spicy for the gang, but everyone seemed to like them.

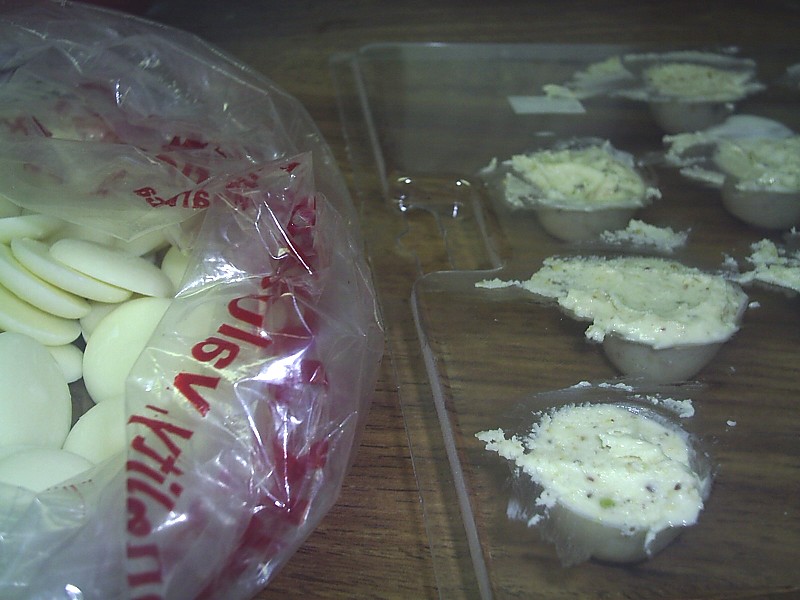
Rolling out the dough and assembling the samosas was a bit of a chore. This was actually my second attempt at making the dough, because the first time I did something wrong, (I'm still not sure what it was) and the dough just would not stay together. It kept crumbling on me, and no matter what I did it would not adhere to itself and allow me to roll it out. I added a bit more water, then it was too wet, so I added a little more flour, etc etc. Anyway, I ended up chucking the whole thing into the bin. This time however, everything went OK and I had some really nice-looking dough to work with. One thing I changed concerned the butter in the dough. The recipe calls for ghee or clarified butter, but ghee is really expensive and clarified butter is a royal pain to make, so I just used regular butter softened in the microwave. It seemed to work just fine, so I'm going to continue doing it that way.

I ran into a bit of a problem when the recipe said "with a large cookie-cutter or glass, cut out about four six-inch circles." Do you know anyone who owns a glass with a six-inch diameter? Seriously, that's a big glass. None of my cookie-cutters were big enough either, but I discovered that the lid of my food processor is exactly six inches across, so I used that.Assembling the samosas took a couple of tries before I got it right. You take a semi-circle of dough, make it into a cone by moistening and joining the edges, spoon a little of the filling in, moisten the top then fold it over and seal to form a tight little triangular package. The diagram in the cookbook makes it look easy, but it took a little stretching and adjusting of the dough to get the look I wanted. Anyway, I managed to get 27 regular sized samosas and four or five large ones.I deep-fried them all in my handy-dandy deep fryer for about 3 minutes apiece, but they weren't really golden brown when they come out. They were nice and crispy, and they tasted great, so I didn't worry about it too much. Of course, then they had to go into the fridge overnight, and survive a trip to the cottage the next day.

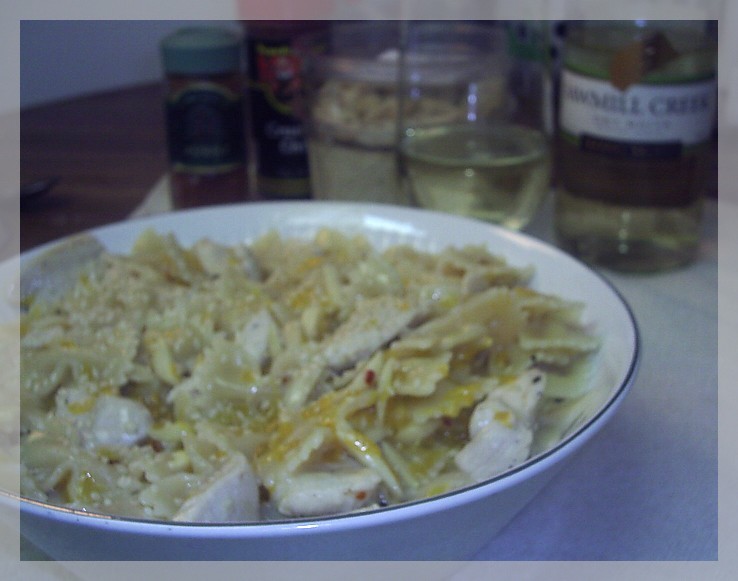
When I got to the cottage, I took them out and had a look. They'd gone a little soft, so before I served them, I put them into a 400F oven for 15 minutes. This worked like a charm and they came out looking like the picture at the top of the post. Fully cooked, nice and crispy and golden brown. Because the family had been nibbling before the rest of the gang arrived, y'know, just to make sure they were OK, I only had about 20 left when the time came to serve them. Everyone got one, and everyone seemed to like them, so mission accomplished.

Like the aforementioned pierogies, due to the messy nature of this recipe, and to the pain-in-the-ass factor of rolling and assembling them, the next time I will double or triple the recipe, make about a hundred of 'em, and just freeze the lot for a rainy day. I think next time also, that I will try the lamb variation in the cookbook.

Spicy Potato Samosas
Makes: 32 Samosas

Pastry
3 C All-Purpose flour
½ tsp salt
3 tbsp ghee or clarified butter
¾ C ice water

Spicy Potato Filling
2 tbsp vegetable oil
1 medium-sized onion, finely chopped
3 C frozen peas, defrosted and drained
1 tbsp finely grated, peeled fresh ginger root
1 fresh hot green chili pepper (I used a jalapeno)
3 tbsp finely chopped cilantro (fresh coriander or Chinese Parsley)
3 tbsp water
1½ lbs new potatoes, boiled in their jackets, peeled and lightly mashed
1½ tsp salt
1 tsp ground coriander
1 tsp garam masala
1 tsp cumin
¼ tsp cayenne pepper
2 tbsp lemon juice
2 C vegetable oil

* Sift the flour with the salt into a deep bowl. Add the butter and combine with your fingertips until the mixture resembles coarse meal. Pour the water over the mixture all at once, knead vigorously,and form the dough into a ball. If it crumbles, add up to 4 more tbsp of water, one at a time until the particles adhere. On a lightly floured surface, knead the dough by folding it and pressing it down and pushing it backward for about 10 minutes, until it is smooth.
* Making the dough can also be done in a food processor. Place the flour and salt in the work bowl. Add the butter, and process with 10 to 12 on/off pulses. Pour in the ice water and process until the mixture becomes a dough. Add a little water, if needed. No vigorous kneading is necessary.
* Form the dough into a ball, brush it lightly with butter or oil, and place it in a bowl. Cover with a damp towel to keep it moist. Let it rest for about 30 minutes. The dough can remain at room temperature for up to 5 hours.
* While the dough rests, prepare the filling. Heat 2 tbsp oil in large skillet. Add the onion, and stir-fry over medium heat for a few minutes, until the onion is lightly brown. Add the peas, ginger, green chili, cilantro, and water. Cover and simmer until the peas are cooked, stirring ocasionally and adding a little more water, if mecessary.
* Add the potatoes, salt, ground coriander, garam masala, cumin, cayenne, and lemon juice. Turn off the heat and allow the mixture to cool. Cover and refrigerate 30 minutes.
* To shape the samosas, divide the dough into fourths. On a lightly floured board, roll out one piece of dough as thinly as possible (very important). Keep the unused dough covered. With a large cookie cutter or a glass, cut out about four six-inch circles. You should be able to get about four circles from each piece of dough. Cut each circle in half.
* Moisten the edges of the dough with your finger dipped in water. Holding the semi-circle of dough in your hand, shape it into a cone. Fill the cone with 1 tbsp of the filling. Moisten and press the top edge over the filling to form a tight triangle. Repeat with the remaining dough and filling. The pastries may be kept on a lightly floured plate, covered, for 2 to 3 hours before they are fried.
* To fry the samosas, heat the 2 cups vegetable oil in a deep heavy skillet, or deep fryer to 375F. Deep-fry the turnovers, a few at a time, for 2 to 3 minutes, turning once, until they turn golden brown. Drain on paper towels. Serve hot. They can be kept warm in a 200F oven in a baking dish lined with paper towels.
* These samosas can be frozen. To reheat, place frozen into a 400F oven for 25 to 30 minutes.

Sunday, July 30, 2006

Canada On Our Plate: Home Is Where The Pot Roast Is

This post is for an event called Canada On Our Plate hosted by Chris and Lea at Canada Eats. The idea is to blog about a recipe that is, in your opinion, typically Canadian. I chose Pot Roast. But this is no ordinary pot roast.An odd choice one would think, and perhaps not specifically Canadian, but this has become a favourite of our family, and it is frequently requested for birthdays and holiday meals. I know I'm at home if this pot roast is on the table.

This recipe is called "Old-Fashioned Pot Roast", and my mother clipped the recipe from the Toronto Star newspaper some years back. The recipe is by Bonnie Stern, who is also Canadian, and who is the founder of the Bonnie Stern School of Cooking here in Toronto. The recipe is at the bottom of this post.

First of all, I would like to say that although I have been at numerous family occasions at which this roast was served, I had never before cooked this myself. So, I found myself on the phone to my mother at several points along the cooking process to make sure that I was doing this the same way as she does. Normally I don't worry about this so much, as I tend to experiment with recipes, but for the purposes of this post, I wanted to duplicate my mother's recipe as closely as possible. Not least because I really REALLY like this particular recipe.

The first thing I had to do for this recipe, aside from buying the ingredients, was to get my hands on a Dutch oven. I found an excellent cast iron model at Zeller's for $11. Can't beat that. After conditioning the pot as per the directions, I had at it.

I rubbed the spice and flour mixture on to the roast, and browned it on all sides in the Dutch oven.After removing the roast from the pot, I added the veggies, gradually adding the wine and the tomatoes. I have to tell you that the smell that was eminating from my kitchen and premeating the house, was just unbelievable. This is the aroma that I smell when I walk in the door of my parents' place when I arrive for a family birthday. Perhaps it's this aroma more than even the roast itself that says "home" to me. Here's a picture of the veggies, then the veggies with the wine added, and then with the tomatoes added to that. Mmmmm....After this, everything was pretty straight-forward. The roast went back into the Dutch oven, the lid went on, and the whole thing went in to the 350F oven for about 3 1/2 hours. I checked the roast periodically to ensure that the liquid wasn't evaporating too fast, but I never had to add any extra water or wine.

The roast came out looking like this:I've got two words for ya: Yeah. Baby. This roast was so tender it was falling apart, and I could cut it with a fork. Instead of slicing it as the recipe suggests, I took two forks and just shredded the roast into pieces. I then scooped all of the lovely vegetables from the pot into the food processor, and pulsed until the mixture was fairly smooth. It's almost worth making this recipe just for this sauce as it is obscenely good, and it goes with anything.
Old-Fashioned Pot Roast

1 beef pot roast (4 lbs), trimmed of excess fat, tied
1 tsp salt
1 tsp pepper
1 tsp cumin
2 tbsp all-purpose flour
2 tbsp olive oil
3 large onions, sliced (about 2 cups)
2 carrot, sliced
1 head garlic, in cloves, peeled
1 tsp dried thyme
1/2 tsp dried oregano
1 bay leaf
2 C dry red wine (or beef or chicken stock) (I used wine)
28oz (796ml) can Plum Tomatoes with juices
2 tbsp coarsely chopped fresh parsley
salt and pepper to taste

* Preheat oven to 350F
* Pat roast dry. In small bowl, combine salt, pepper, cumin and flour. Rub mixture into roast.
* Heat oil in Dutch oven in which roast will fit with about 2 inches to spare around the roast.
* Add roast; cook over medium-high heat, turning until browned on all sides. Remove roast and all but about 1 tbsp of fat from Dutch oven.
* Place onions, carrots and garlic in Dutch oven over medium-high heat and brown slightly, about 5 minutes. Add thyme, oregano and bay leaf. Add wine or stock; bring to a boil and cook uncovered about 5 minutes. Add plum tomatoes, breaking them up with a wooden spoon. Bring to a boil. Add roast. Spoon vegetables and juices over top. Cover tightly and cook 3 to 4 hours in a 350F oven or until very tender.
* Check roast every half hour and add water or stock if liquid is evaporating too fast. There should always be about 2 cups of liquid in the Dutch oven.
* When roast is very tender when pierced with fork or tip of knife, remove from oven. Transfer roast to platter. If there are more than 2 cups of juices, cook over medium-high heat, uncovered, until reduced to about 2 cups. Remove fat from surface, either by skimming with spoon or, after chilling, by lifting off. Discard bay leaf; strain or puree juices.
* Slice roast; place in casserole dish. Taste juices; add salt and pepper to taste. Pour oven roast. Sprinkle with parsley.

Tuesday, July 25, 2006

White Chocolate and Green Fingers

It seems that most of my cooking successes of late have been the results of happy accidents, projects that went awry, or just changed plans.I had originally intended to make some little chocolate cakes with a melty, chocolate centre comprised of a combination of white chocolate and pistachio paste. This of course requires that I make the chocolates first, then embed them into the cake batter. However, after making the little chocolate morsels, I decided that I really didn't feel like making the little cakes, as I now had a nice pile of tasty pistachio chockies.
The first step to making these chocolates was a trip to the local bulk food store (handily located inside the Grocery Palace) for some supplies. I picked up a good-sized bag of white chocolate wafers, one of dark chocolate wafers, a plastic sheet containing fifteen little chocolate rosette molds, and a big bag of pistachios. I then proceeded to shell the nuts, turning my fingers an attractive shade of bright green. What fun.
The next step was to create the Pistachio Paste (recipe below, picture above) that would be mixed with the melted chocolate. I got the recipe for this from a site called The Accidental Hedonist (recipe here). According to the recipe, this concoction is supposed to end up resembling marzipan. Yeah, right. I think it was a combination of not grinding the nuts finely enough, and adding too much water, but my stuff looked more like a mixture of cheap peanut butter and grainy mustard. It tasted fantastic, just looked a little oogly.I then melted some of the chocolate wafers in the microwave. I found that this was the easiest method, rather than messing around with a bain-marie or a double boiler. The instructions that came with the plastic molds say to melt the chocolate for 30 seconds at a time, mixing after each time. It took on average four to five times to get the chocolate smooth enough to work with. The trick with the chocolate was that I had to be quick on the draw after mixing in the pistachio paste, as the mixture cooled rapidly. I spooned a dollop of the mixture into each little mold, attempting to fill in all of the nooks and crannies (a difficult job, let me tell you), and then smoothed off the tops. The sheet went into the fridge for 15-20 minutes to set.
They came out looking like this. I was so pleased with the result, I ate several in celebration. It was at this point that I decided to bag the whole cake plan and make some more chocolates. I repeated the process with the dark chocolate, with equal success. They tasted similar to a crunchy peanut butter cup, although I must say that these were tastier.

Since I already have the plastic mold, and the chocolate wafers are only about $.75/100g (about 1/4 lb), this seems to me to be a cheap way to enjoy one of my favourite things.

Saturday, July 01, 2006

Egg Foo Yum

OK, so maybe it's not strictly Egg Foo Yong, but in my opinion a bean sprout omelette with meat in it is pretty close.Once again, I had a craving but no recipe so I tried to re-create this dish from the memory of my last Chinese food takeaway order. In addition, since I had some nice mozzarella cheese (and for that matter, some tomatoes) left over from the Tomato Mozza salad that I made a few days ago, I incorporated those into my creation as well.

Now normally, Egg Foo Yong contains chicken and shrimp, but I didn't have either of those things on hand so I used a pork cutlet instead. Mmmmmm....pork cutlet....

OK, here's the recipe.

Ian's Egg Foo Yum
Serves 2 people or 1 hungry monkey

1 3oz breaded pork cutlet
2 large mushrooms, thinly sliced
1 large shallot, sliced
1 handful of bean sprouts
4 eggs
2 cloves garlic, minced
½ tsp ground chipotle pepper (optional)
salt & pepper to taste
4 or 5 (or 6 or 7) thinly sliced chunks of fresh mozzarella cheese

* Fry the pork cutlet in a little oil over medium heat until cooked through and the outside is nice and crispy. Slice thinly and set aside.
* Drain some of the pork grease, reserving some for frying the other stuff.
* Increase heat under frying pan to medium-high, and add the sliced mushrooms and shallot. After a few minutes, add the garlic and the pork. Toss to combine evenly.
* Beat the eggs together in a small bowl with the salt and pepper and chipotle.
* Pour the egg mixture over the veggies and pork and stir once or twice to incorporate.
* After the egg starts to solidify, sprinkle the bean sprouts on top, and press down with spatula. Let cook for another few seconds, then flip the whole thing over. Continue cooking for another minute, or until egg looks set.
* Place mozzarella cheese on half of your creation, then fold the other half over, sandwiching the cheese in the middle. Cook for another few seconds until cheese starts to melt. Remove from heat.
* Serve with sliced tomato and some fresh basil.


I really like the combination of fried egg and bean sprouts. This seemed a better way to achieve that, rather than just throwing some egg and some bean sprouts into a pan and making a bean sprout omelette. It turned out really well, and it tastes as good as it looks.

Normally, I have strict rules about combining eggs with cheese; namely, I never do it. It's something about the texture. However, the mozza really worked well with the eggs, and really, who doesn't like ooey-gooey mozzarella cheese?

Friday, June 30, 2006

"C" Is For Cookie

....and that's good enough for me.

I was looking through a food blog called Milk And Cookies, and the latest entry is about a test you can take to determine what kind of cookie you are. Since I am a fan of cookies...um OK, I'm the president of the Cookie Fan Club.... I thought that I would give it a try. Apparently, I am a Chocolate Chip Cookie. See, it says so right there.

You Are a Chocolate Chip Cookie

Traditional and conservative, most people find you comforting.
You're friendly and easy to get to know. This makes you very popular - without even trying!


Nice.

Thursday, June 29, 2006

You Say "Tomato" - I Say, um, "Tomato"

Sometimes, taking a chance can pay off. I'm not normally a big fan of most kinds of cheese, but I've seen this salad on various food shows, and I thought that it looked pretty tasty. The cheese in question is fresh mozzarella cheese, and while I am definitely someone who enjoys a pizza from time to time, I have a hard time simply munching on pieces of cheese. I don't know why this is, but I've been like this for as long as I can remember.
Anyway, this is a Tomato Mozzarella Salad, and after making it a couple of times, I came to realize that, to my complete surprise, the most important ingredient in this recipe is the kosher salt.

"How", you may well ask, "did you come to this conclusion, O wise one?" Well, I'll tell you. But first, the recipe.

Ian's Tomato Mozza Salad
serves 2

2½ C (1 pint) cherry tomatoes, halved
2 large brown mushrooms, thinly sliced
150g (4 or 5 oz) fresh mozzarella cheese, broken into bits
fresh ground black pepper
pinch of kosher salt
olive oil
fresh basil, chopped
fresh flat-leaf parsley, chopped

* Mix the tomatoes, mushrooms, cheese together in a bowl.
* Add the pepper, salt and herbs and mix to combine.
* Drizzle some olive oil over the top.


The measurements are only a guideline, as I really wasn't paying attention to exactly how much of everything I was using. I've made this salad a few times over the past week, and the first time I made it, I didn't add any salt. It was tasty, but there was something missing. When I added the kosher salt to this version, the flavour of the tomato really popped, and it made for a much better salad.

I find this odd that plain old salt was the missing ingedient. The salad didn't taste like salt, it just tasted more like tomato. I know, I know, this is common knowledge, but I've never seen it demonstrated quite as emphatically before.

Thursday, June 15, 2006

Get stuffed!

This is another recipe coming as a result of my trip to New Orleans last month (read the original post here), specifically from the burger I ate at a place called the RiverShack Tavern in Jefferson Parish. They serve a burger called the Shank You Burger, which is a patty of beef and one of hot sausage. It was a good burger, but I thought to myself at the time, "I can do better than this". So, upon my return to the Big Smoke, I endeavoured to put together an exceptional burger.The first stop on this journey, as with most of my culinary exploits, was the Grocery Palace. My intention was to create a burger with a combination of ground beef and pork, so I picked up a pound of lean ground beef, and because the Palace for some reason didn't have any ground pork available, I got four large honey-garlic sausages and just removed the casings later. In addition to the meat, I thought that it would be worth while to have some good bread for the burgers, so I got a nice baguette. Now, here's the fun part. I've noticed lately on various cooking shows, and in some cookbooks, that stuffed burgers are all the rage, so I bought a chunk of smoked mozzarella cheese for the filling. Mmmmmm....smoked mozzarella cheese....The trick with these is to make two thin patties, place the filling in the centre, then mush the two patties together, making sure that the edges are completely sealed so that none of the ooey-gooey goodness escapes prematurely. Here is the recipe I used.

Booya Burgers
Yield: 6 large burgers (and I do mean large)

500g (1 lb) lean ground beef
4 large honey-garlic sausages, casings removed (about 1 lb)
1/2 C oatmeal
1 large egg
1 tsp garlic powder
1 tbsp honey dijon mustard
1/2 tsp cumin
ground black pepper
1 serrano chilli, finely diced (optional)
100g (4 oz) smoked mozzarella cheese, cut into small chunks
** Approximate amount - use enough cheese for the six burgers

* Place all ingredients except the cheese together in a large bowl. Mix gently with your hands (rubber gloves might be an idea), until all ingredients have been incorporated and the mixture looks fairly uniform.
* Place in an airtight re-sealable plastic bag and refrigerate overnight to let the flavours combine.
* Remove from fridge, and form meat mixture into twelve (12) thin patties.
* Place a small mound of the mozzarella cheese on six of the patties, sprinkle with some ground black pepper, and cover each with the remaining patties, forming six large burgers.
* Work each burger with your hands until all of the edges are sealed, and pat down slightly so that the burgers are not too thick.
* Cook on the barbecue until well done. These are pretty big burgers, so they'll take longer than you'd expect.
* Serve on crusty baguettes, with your choice of toppings (I suggest sliced tomatoes, sliced dill pickes and mushrooms)


Now, I had to decide how to cook these wonders of carniverous engineering. Pan-frying them on the stove seemed like a waste of time with burgers like these, so I decided to break out my camp stove, and cook them in the driveway. I love my camp stove. I haven't had a chance to go camping yet this summer, so it was a good opportunity to pull it out of storage and fire it up one or twice. Besides, the smell of the cooking burgers would drive the neighbours up a wall.After cooking the burgers, I dropped the french bread on the grill for a minute to crisp it up a little. There's nothing like fresh bread to go with barbecued burgers. I then garnished my creations with some sliced tomato, dill pickle and some mustard, and had at them. I can honestly say that I have never had a better burger. There was no way I could eat all four of the burgers I cooked, so I wrapped two of them up and put them in the fridge for the next day's lunch and dinner.

Wednesday, June 14, 2006

Food Fit For A King

As an epilogue to my two previous posts (read them here and here) about my trip to New Orleans, I thought that I would say a few words about the trip home. Since we were heading back through Tennessee anyway, and since it only added about an hour or so to the trip, we thought that it would be pretty cool to stop at Graceland on our way through.We didn't actually eat in any of the restaurants at Graceland, but while we were there I had the strangest craving for a deep-fried peanut butter and banana sandwich. I made a mental note to attempt it when I got home.
I was quite impressed by Graceland, not so much for the mansion in and of itself, but for the sense of walking in the footsteps of greatness. In fact, I was a little disappointed by the house, because although it's a very nice house, it's not unusually large or particularly tricked-out. This, I came to realize, is not the point. There's no flash photography allowed inside the mansion, so I don't have any pictures of the Jungle Room or the Media Room, but just the implied activities that probably went on there were enough to make me stand in one spot, looking around with a goofy grin on my face. Elvis was a very cool guy, and it's too bad he's not still around.When I got home, my plan was to improvise some sort of deep-frying apparatus using a large pot and various lifting implements, so it was off to Canadian Tire to purchase a wire mesh lifter and possibly some sort of wire basket for inside the pot. Well, the stars must have been in alignment. When I got to the store, there was a clearance sale happening for a large pile of merch whose packaging had been either slightly or very damaged. What did I spy, but a deep-fryer unit with all of its parts in a really beat-up box, marked down from $129.99 to $60 then to $30! Sold. I drove off with my swag, giggling like an imbecile. The next stop was the Grocery Palace, for the requisite ingedients. I thought that Wonder Bread would be a good choice for the PBB sammies, so I picked up a loaf, along with a couple of bananas, and a jar of Kraft Creamy peanut butter. Booya!

Now, I checked out the 'official' version of Elvis' favourite sandwich, and it requires that you pan-fry the sandwich in a large amount of butter. I thought that I would try a slight variation on this theme, by coating the sandwich in batter, then deep-frying it in my new toy. Here's the recipe I used.

The Gallumphing Gourmand's Deep-Fried PBB Sammies
Yield: 8 little Nuggets of Joy

Sandwich Makin's
4 slices White Wonder bread
1 ripe banana, mashed
Kraft smooth peanut butter


Batter courtesy of CDKitchen (find it here)
½ C corn starch
½ C flour
1½ tsp baking powder
¾ tsp salt
1 dash sugar
½ C milk
1/3 C water


* Fill the deep fryer with oil and preheat.
* Spread some peanut butter on each piece of bread, covering right to the edges.
* Spoon a thick layer of banana on to two of the pieces, and place the other pieces of bread on top, making two sandwiches.
* Cut each Sandwich into quarters.
* Combine together the dry batter ingredients, then add the liquid and mix well.
* Dip each piece of sandwich into the batter and coat well, letting the excess drip off before placing in fry basket. Deep fry two at a time for about 2-3 minutes.
* Remove from deep-fryer to absorbent paper towels, and blot to remove any extra oil.
* Cut each piece in half diagonally, and dust with powdered suger. Devour immediately.
For a 'what-the-hell' kind of recipe, these turned out really well. I was initially concerned that the batter was going to be too heavy, but it was just right, giving the sandwiches a bit of crunch, with the gooey PB and banana centre melting in the mouth. Also, I wasn't sure whether or not they would stay together in the hot oil, but they did, and came out golden brown and very very evil. This is not a sandwich to be eaten every day, but it's definitely worth a try at least once. You'll thank me.

Friday, June 09, 2006

Gallumphing Through The Big Easy - Part II: Laissez Le Bon Temps Rouler!

Let The Good Times Roll!While the remaining four days of our excursion to New Orleans were action-packed, we still managed not to rush around too much. It was simply too hot for that. After the first few days, we got ourselves into a good routine; stay out really late bar-hopping and catching some really excellent jazz and blues at numerous little clubs, then heading for home and sleeping late (the phrase for the week was, "It's 3pm, time for breakfast!"). Then we would take our time getting up in the morning, go to some neat little cafe or restaurant for breakfast, then spend the day touring around the city in the car, either getting a good look at the damage done by Hurricane Katrina in the Lower Ninth Ward and the surrounding areas or simply exploring, and checking out various places of interest.

One of these places was Jean Lafitte's Blacksmith Shop on Bourbon Street.Of course, it's now a bar. According to the plaque inside the place, this is the oldest bar in the United States, dating back to 1772. It looks it. There's not much in the way of electricity in the place, as the back room where we sat was completely in darkness until we lit some candles.
One of my favourite places we went to was a tiny little bar called The Spotted Cat on Frenchmen St. in the Marigny district, which is right beside the French Quarter. This place has a bar, a few chairs and a small stage. But the music that came out of that place was unbe-frickin-lievable. We caught a band called the Washboard Chaz Blues Trio (on Thursday? Friday? I can't remember), which was a harmonica player, a slide guitar player, and Chaz himself playing, you guessed it, a washboard. It was the nicest couple of hours I spent in a bar in recent memory.
Of course, we also sampled the local cuisine in our ramblings, and one of the places we went to was Mona's Middle Eastern Cuisine, also on Frenchmen St. In addition to the traditional Middle Eastern dishes, Mona's also serves local favourites, like po' boy sandwiches and such. I'm a little embarassed, because for the life of me, I can't remember what I had to eat there. I know we started off with hummus and tabouli and pitas as appetizers, but after that all I remember is that I didn't have the catfish, because I'd had it the night before and was looking for something different. Oh well, it must have been good, or I would have definitely remembered what it was. Y'know, they say the memory is the first to go. I think. Anyway, did I mention that beer is available 24 hours a day, from every store? There's got to be a connection there somewhere......
OK, one other place we visited, on the insistence of Paul's friend George, was the RiverShack restaurant in neighbouring Jefferson Parish, which apparently is the "Home of the Tacky Ashtray". We all had what was listed on the menu as a "Shank You Burger", consisting of a patty of beef, and one of hot sausage. Quite tasty. In addition to the burgers, we had Gator Bites (alligator sausage), and Fried Pickles.
After almost a week packed full of shenanigans, we had seen and done a lot, but not nearly as much as we had wanted to. As Paul put it, "That's OK, it just means you'll have to come back." Yes, it does.

I'll leave you all with a picture of the sun setting over Lake Pontchartrain.Ahhhh.

Tuesday, May 30, 2006

Gallumphing Through The Big Easy - Part I: The Descent

You may have noticed that I haven't posted anything for a while. I was on vacation, you see. For this I apologize. Ummm... for the not posting part, not for the being on vacation part. My friend Joe and I hopped in his car and headed wildly off in all directions, or at least in the general direction of New Orleans, Louisiana to visit a buddy of ours. We had been feeling kind of bad, as this buddy had been living in the party captial of the world for the last few years, and we hadn't managed to get our act together sufficiently to go visit. I am happy to report that this grievous oversight has now been remedied.

First of all, I have to say that I LOVE NEW ORLEANS. Whew, that feels better. What a great town. We arrived on the 16th of May after Cannonballing right down the middle of the States - 26 hours in the car including coffee breaks and naps. This was a part of the USA I personally had never visited before. The route went something like this: West from Toronto on the 401 to Detroit, then south through Toledo, (in the pouring rain, no less) dinner at Denny's somewhere in Ohio, on through Cincinnati, Louisville (still raining), Nashville (sun at last), a two hour nap at a service station in northern Alabama (or was it southern Tennessee?), on to Birmingham, then west through the great state of Mississippi including lunch at a Waffle House in Picayune, then finally, New Orleans.

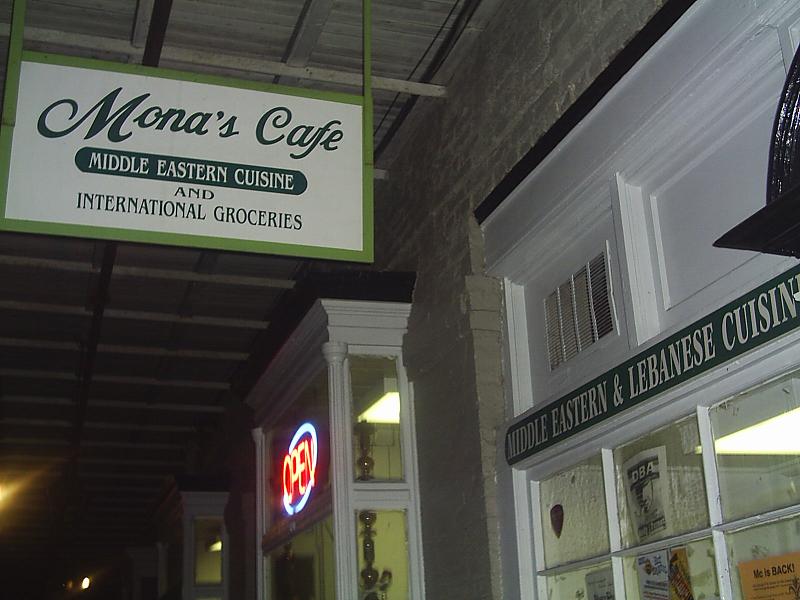
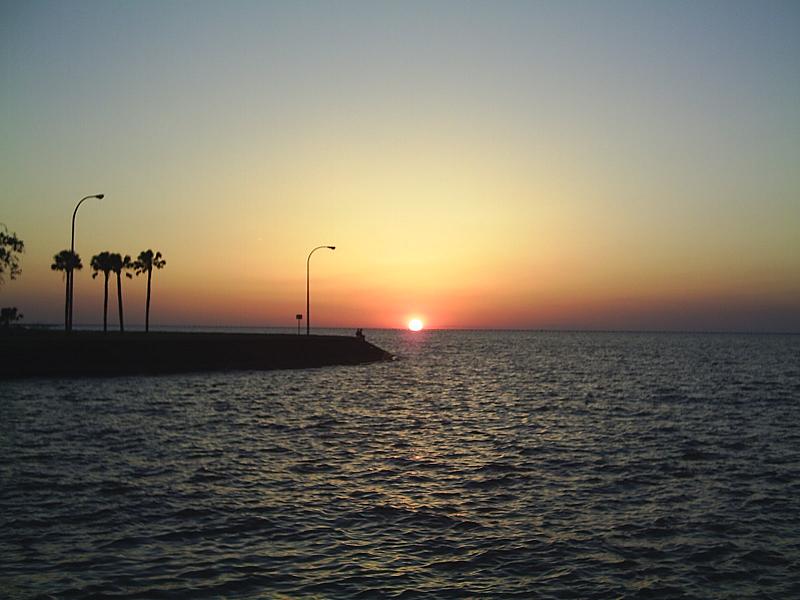
Normally, when on a road trip with friends, we play the LCBO Game to pass the time. For those of you not familiar with this game, I will explain. In Ontario, the only place you can buy liquor is the LCBO store (Liquor Control Board of Ontario). Consequently, there is an LCBO outlet in every single little town in the province. The game is to be the first person to spot the LCBO sign as you pass through each little town, shouting out "LCBO!" and pointing at the sign. Of course, when road tripping through the States, this doesn't really work so well, but after driving through Ohio for a while, we noticed that there seemed to be a place called the Waffle House in pretty much every single little town along the interstate. So, we played the Waffle House Game. I am the king of the Waffle House Game. To be fair, Joe did all the driving, so he couldn't exactly spend all his time searching for the signs, buy hey, a win's a win.

Anyway, after spending all of that time playing the game, by the time we got to Mississippi and we were looking for a place to eat, we thought, "Why not the Waffle House?" Why not, indeed. So, we found one in the lovely little town of Picayune, Mississippi. It's too bad I didn't take a picture of my lunch that day, 'cause it was truly a sight to behold. I had a double order of hashbrowns with pretty much whatever they could throw at it on top. There was chili, tomatoes, mushrooms and ham. I think that was it. The ensuing week has since blurred my memory of exact details from the trip down. Long story short it was everything a growing boy needs. It was REALLY good.

We got into Nawlenz at around 5pm, but it took us a bit of time to find our friend's place, because about 25% of the street signs had been Katrina casualties. Combined with the rush hour traffic (such as it was), and the uneven roads (Katrina again), it took us the better part of an hour to find the house.

We stepped out of the car into what we considered to be beautiful weather. It was about 80 degrees, with a nice breeze and clear skies. Ahhhh yeahhh. Paul was still at work, so we reclined in our camping chairs outside his place under some enormous oak trees. When he finally got home, after saying hello and all that, Paul apologized for the weather. Huhnh? Apparently, New Orleans had been experiencing somewhat of a 'cold snap' for that time of year, and the extremely nice 80 degrees was a record low for May. Must be nice. We had just come from Toronto, where at that point, the weather was still in the high fifties. Of course, now in Toronto it's at least 90 and damn humid, but that's a story for another day.

Paul wasn't exactly expecting us until the next day, because we had originally planned to go camping somewhere on the way down, but we had been making such good time, we really wanted to just get there. Because of this, Paul hadn't booked the next day off either as we were expected the next evening. So Joe and I amused ourselves for the day at the Audubon Zoo, which is right across the street from Paul's place. Nice. I took a pile of pictures while at the zoo, but of course, forgot to get more than one or two with me actually in them.

After baking in the sun all day, we regrouped at Paul's place, hooked up with his friend Frank, then headed into the CBD (Central Business District) for Wednesday At The Square, which turned out to be a big crowd of people having a great time eating and drinking accompanied by some live jazz courtesy of a band called The Iguanas. I had some crawfish etoufee and some beans and rice, and a really good local beer called Abita Amber. I was in heaven. After that, we went to a little Cuban place Paul knew where I had the best catfish po'boy sandwich I had ever eaten. OK, it was the ONLY catfish po'boy sandwich I had ever eaten, but do I ever like catfish. I'd been in the city two days, and already I had decided that I could happily live there.

Stay tuned, the Gallumphing continues...

Wednesday, May 10, 2006

WCC #5: Cinco de Mayo, eh?

When I read that the theme for this month's Weekend Cookbook Challenge was "Cinco de Mayo", I was a little concerned. While I have certainly consumed a fair amount of Mexican cuisine (mostly from Taco Bell), I have never really cooked any. Oh sure, I've fried up some stuff, put it in a flour tortilla and called it a 'soft taco', but nothing that could be identified as definitively Mexican.
Luckily, I recently acquired a cookbook entitled "The Mexican Mama's Kitchen" by Sofia Larrinua-Craxton, which I have really enjoyed reading, as it outlines how to make some basic Mexican staples, such as Pico de Gallo, Refried Beans, and of course, tortillas, along with some very tasty-looking full meals.

For this Weekend Cookbook Challenge, I decided to make Swiss Enchiladas (Enchiladas Suizas). In case you were wondering (and I know you were), in Mexican cooking, ‘Swiss’ refers to any dish that features cream as one of its prominent ingredients. Here, sour cream provides a lower-fat alternative to double cream. In addition to the enchiladas, the cookbook suggests that refried beans make a good accompaniment for this dish, so I made some of that as well.

Now, before I get into the recipes, my ingredient-gathering expidition was just as entertaining as the cooking part. The weekend before, I happened to be walking through Kensington Market, which is possibly the most multi-cultural section of Toronto with people from at least 30 different cultural backgrounds, including Portuguese, Ethiopian, East Indian, Carribean and Mexican. And all packed into about eight square blocks just west of downtown. Needless to say, grocery shopping, and shopping in general in the Market is a real eye-opening experience.

I found a little grocery shop called Perola's on Augusta Ave., which features products and produce from Brazil and Mexico. They have such an unbelievable selection of fresh peppers and dried chilis, that I just had to stock up.
Here are some pictures of some of the stuff I picked up. The enchiladas recipe calls for serrano chilis and tomatillos, neither of which I was familiar with, but Perola's had some. I also got some lovely smoky chipotle peppers (why not?), some dried ancho chilis, some poblanos, some guajillo peppers and some blue corn tortillas. This is also where I got the pinto beans for the Refried Beans recipe.

I made the beans a day ahead of time, because it takes a while for the beans to soak before you can cook them. The recipe is below. Actually, there are two recipes, because you have to cook the beans first, then mash them up and fry them again. These are so tasty and they go with everything. I only ended up using a little bit of the beans with the enchiladas, so I had to find creative ways to use about four cups of refried beans. Ahhh....if only all decisions in life were as easy....

Back Burner Beans (Frijoles de la Olla)

400g (about 1 lb.) pinto, borlotti or black beans (I used pinto beans)
2 litres (1 gallon) water
1 large onion, quartered
3 whole cloves garlic
2 bay leaves
1 small bunch of fresh herbs
salt

Put the beans into a large saucepan and cover with the water. Let soak overnight.
The next day, put the pot on the stove and bring to a boil. Skim off any film that comes to the surface. Add the onions, garlic, bay leaves and herbs. Partially cover and simmer gently for about 1 hour or until the beans are fully cooked and soft. Once cooked, season with salt.

Refried Beans (Frijoles Refritos)

2 C Frijoles de la Olla, with a little cooking water
(or the same quantity of canned pinto, borlotti or black beans, rinsed and drained)
1 medium onion, finely chopped
1 tbsp corn or vegetable oil
salt or vegetable bouillon powder

Lightly mash the beans with a potato masher until they form a soft and lumpy paste.
Saute the onion and oil in a medium-sized frying pan until translucent, add the beans and cook for a further 2 minutes. Add water or bean stock if the mixture is too dry.
Season with salt or vegetable bouillon powder to taste.

The next night, I started in on the enchiladas. The first step, I thought, was to make the tomatillo puree that is required as part of the enchilada sauce. You may notice that in the recipe below, it says to "remove the outer leaves from the tomatillos". Well, this is my own correction and clarification, as the original instructions in the book say to "peel the tomatillos". I took this to mean that the outer skin should be removed, so there I was with a vegetable peeler, trying to peel the tomatillos. Yeesh. This semed a little odd to me, so I checked some other recipes for tomatillo puree online (the next day, of course), and found out that removing the leaves was what was meant by "peeling". Oh well. Live and learn. To make a long story short, I ended up with less tomatillo puree than I expected, but just added some more water to the sauce to compensate.

Tomatillo Puree

½ lb fresh tomatillos
1 tsp baking soda
water

Boil the water with the baking soda. Remove outer leaves from the tomatillos, chop in half and add to water. Cook for 2-3 minutes until they turn yellowish and soft, then puree.

Allrighty then. With all of my ducks now in a row, I started cooking the chicken and making the sauce. The recipe for the sauce calls for the serrano chilis, but I was a little hesitant, as I was unsure of their relative spiciness. I have heard that the rule of thumb for chilis is "the smaller the chili, the hotter the chili". The serranos are pretty darn small, so after chopping one up, and carefully removing the seeds from one little piece, and with a large glass of milk at the ready, I popped it in my mouth. Whew, it wasn't really that hot. I mean, it was a spicy little pepper, but I was expecting to break out into a sweat, and have my sinuses all drain simultaneously. Nope. I would say that the serrano is slightly less spicy than a jalapeno. Excellent. OK, moving on.

After the chicken was finished cooking, I had shredded it and put it aside. The recipe calls for one boneless skinless chicken breast. I didn't think that that sounded like enough, so I used two. Next time I'll use three.

After all of the constituent parts were cooked, the assembly went smoothly. I fried the tortillas in some oil, dipped them in the enchilada sauce, spooned some chicken into each one, folded it in half and placed them into a baking dish. I then covered the tortillas with the sour cream and grated cheese, and, emboldened by my experiment with the serrano, sliced up two more chilis and sprinkled them over the top.Yummy, yummy.

After that, it went into the oven for about 15 minutes, and came out looking like this:
Swiss Enchiladas (Enchiladas Suizas)

The Chicken
2 boneless skinless chicken breasts
750 ml (1½ C) water
2 tbsp onion, chopped
1 tsp salt
1 bay leaf

Enchilada Sauce
3 tbsp corn or vegetable oil
½ medium onion, finely chopped
1 clove garlic, crushed
250ml (1 C) tomatillo puree (see below)
1 tbsp fresh coriander (or ½ tbsp dried coriander)
1 serrano chilli, finely chopped
½ tsp salt
½ tsp sugar
½ tsp baking soda
salt and pepper

Tortillas
250 ml (1 C) vegetable oil
6 soft blue corn tortillas

Topping
300g (1¼ C) sour cream
100g (½ C) grated cheddar cheese
2 serrano chillis, sliced thin

1. Preheat the oven to 350ºF/180ºC/Gas Mark 4.
2. Put the chicken breasts in a saucepan and cover with the water. Add the 2 tbsp chopped onion, salt and bay leaf. Bring to the boil and skim anything that comes to the surface. Boil gently for 20 minutes, until the chicken is cooked. Leave to cool and shred lightly with your fingers. Reserve.
3. While the chicken is cooking, make the sauce for the enchiladas. In a medium saucepan, heat the oil and add the onion. Sauté for 5 minutes, until soft. Add the garlic and sauté for a little longer, making sure that the garlic does not burn. Add ¾ of the tomatillo puree, most of the coriander, the chilli, salt, sugar and baking soda. Cook for 10 minutes, until the sauce no longer tastes too acidic. Add some of the chicken stock to obtain a fairly liquid sauce. Season to taste with salt and pepper.
4. Heat the 1 C of vegetable oil in a frying pan and put the tortillas in one at a time. Try each tortilla for 15 seconds and place on a plate lined with kitchen paper. The tortillas should remain soft.
5. Dip each tortilla in the sauce and place on a medium-sized baking dish. Put a little of the shredded chicken on each tortilla and fold in half. Repeat the process with each tortilla. Top with the rest of the tomatillo sauce, the sour cream, the cheese and the sliced chillis. Bake in the oven for 10 minutes, until the cheese turns golden brown.
6. Garnish with the remaining coriander and serve warm. They taste delicious when served with refried beans (see recipe above).

Friday, May 05, 2006

Let's Try That Again, Shall We?

After making the batch of muffins last week (see post here), I was a little disappointed that they didn't turn out as well as I had hoped. They tasted and looked OK, but they didn't rise very much, because I had added an extra ¼ cup of milk to the batter in an effort to make it less 'gloopy'. So I decided that since I like the recipe, and they tasted pretty darn good, that it was worth another attempt.

The first time, I thought that it was the proportions that were the problem, as the batter came out really thick and sticky. Well, I think that's pretty much how it's supposed to be.

This time, I went exactly by the recipe plus added a handful of raisins, but this time greased up those muffin cups really good, and only baked the muffins for 19 minutes (yes, 19 - it seemed like a good number) instead of the 25 minutes I cooked them last time. Success! Not only were they not black and charred, but they rose nicely in the pan and popped right out with only a little coercing.

And the aroma! I baked these this morning, so when I come home from work this evening, the first thing I'll smell when I walk through the front door will be the lingering smell of fresh cinnamon-raisin muffins.

Tuesday, May 02, 2006

Another Very Civilized Evening

Last night I spent some quality time at my local pub, The Feathers, tasting some very nice single malt whiskies. This was the final of their Whisky Challenge series until the fall.

At the last Whisky Challenge, which was back in February (see post here), I didn't fare so well, so I was determined to put forth a better showing this time.

The theme for last night's event was "Mostly Peatless", which meant that very few of the selections would be from the Island (or Islay) region, which is largely responsible for the production of 'smoky' or 'peaty' whiskies. I didn't particularly mind this, for while I certainly enjoy a nice smoky malt from time to time, I really prefer a nice full-bodied Highland malt.

Ian (the Publican, not me) certainly uncorked the good stuff last night, as six of the eight malts served were Cask Strength, and all of the malts were at least 18 years old.

Here are explainations for some of the abbreviations used in this post.

C.S. (Cask Strength) - Meaning bottled straight from the maturing cask without chill filtering or the addition of water. Generally a fuller tasting, stronger dram.
D.B. (Distillery Bottling) - Single malt whisky bottled by the distillery is known as a distillery bottling or an official bottling and is usually bottled with an age statement (The Macallan 12 Years Old) or a vintage year (Glen Rothes 1989).
R.M. (Rare Malt Series) - Pretty much self-explanatory.
Sig. (Signatory Vintage) - Check out the link here

Here are the malts that we tasted in the order they were served. The first comment for each malt is the description provided by the distillery. The second comment is my own impressions.

1) Auchentoshan 25yr. C.S. (D.B.) - A triple distilled single-cask bottling from the Bowmore Group. Light mahogany in colour with soft lemon and vanilla undertones. A palate of toffee and butter, some fruit and a delicate, sweet finish.

I liked this one a lot. Full-flavoured, with a hint of banana. Seriously. 7

2) Macallan 1985 18yr. (D.B.) – This Speysider is just a lovely dram and should dispensed with a heavy hand. Deep chestnut in colour with a glorious honey and sherry nose, a big bouquet with nuts and floral notes and a superb dry, warming finish.

I just love Macallan of any vintage, but this one was truly excellent. I actually guessed this one correctly. 8.5

3) Benrinnes 1974 21yr. C.S. (R.M.) – This big beauty has only been bottled as a single malt by the distillery since 1991. Bright gold in colour with almond – vanilla flavours, some nuts and oil, quite creamy and a spicy, sweet lingering finish.

This one completely bamboozled me. This is a nice, light-tasting dram with a bit of spice on the end of the tongue. Really quite pleasant. I guessed this as the Bladnoch, below. rrrr. 8

4) Bladnoch 1977 23yr. C.S. (R.M.) – The southern distillery is close enough to England to affect its quality. Gold in colour with a sweetly perfumed nose. Light and smooth with honey and citrus, somewhat gentle yet crisp – a good aperitif.

Another spicy one. I've never tasted a malt quite like this one. Very complex full palate with hints of lemon. Nice nice nice. 9

5) Glenmorangie Sauterne 1981 (D.B.) - From Tain in the Northern Highlands. Chestnut in colour with a rich toffee and ripe fruit nose and a body suggesting hazelnuts, honeycomb, even vanilla ice cream. The finish is exquisite, gentle and sweet.

An OK malt. Very subtle, with a taste of vanilla, and just slightly nutty. 7

6) Royal Brackla 1975 C.S. (Sig.) – Founded in 1812, the year as Napoleon invaded Russia. Fresh grains on the nose, then fruit and spiciness becoming hot and peppery. Quite robust with a restrained, malty finish.

That's a SPICY meatball. I am really starting to like the peppery malts. A lovely dram - too bad a bottle costs several hundred dollars. 8.5

7) Royal Lochnagar 1973 23yr C.S. (R.M.) – From the Eastern Highlands and a favourite of Queen Victoria. Quiet on the nose, soft-textured and appetizing, some dry nuttiness and just a hint of marzipan. An elegant, subdued finish.

A hint of peaty goodness, with a slight taste of toffee. A little smoky, yet still a Highland malt. Yummy. 8

8) Talisker 1982 20yr. C.S. (D.B.) – From Skye’s only distillery and rated highly by Robert Louis Stevenson. Gold in colour with a distinct coastal nose, peppery and slightly sour with a heat that slowly gains in intensity. A more refined finish than younger versions.

What can I say about Talisker? I love this malt. Heavy-duty smoke and peat, so good it was almost crunchy. Booya. 9

The list that was provided to each of the participants actually contained 10 malts, of which we were served eight. Here are the other two from the list that were not served.

Auchroisk 1974 28yr. (R.M.) – Gentle liquorice and toffee aromas introduce a smooth, soft-bodied dram with sweet malty shortbread and cinnamon flavours. A warming, long finish.

Bruichladdich 20yr. (D.B.) – An abandoned ruin of a distillery miraculously brought back to life. Complex nose of melon balls in honey, lemon meringue and kiwi and sweet oak and barley sugar. A finish both graceful and smooth.

Normally, there is at least one malt served that I just don't care for. It's not that it's a bad whisky necessarily, it's just not to my taste. This wasn't the case last night. Everything that was served was absolutely top-notch.

OK, the scoring system is simple. If you guess the malt exactly correct, you get 3 points. If guess the malt incorrectly, but get the region (Highland, Lowland, Island) correct, you get 1 point. If you're completely wrong, you get bupkus.

The rating system for scores, as provided by The Feathers, is as follows:
18-24 Points - Nae chance!
13-17 Points - Splendid!
9-12 Points - Very respectable.
5-8 Points - Not too bad.
1-4 Points - Tonight's Pudding!

Out of a possible 24 points, I scored a 12. I guessed malts 2, 5, 6 and 8 correctly, and got the rest completely wrong. It's not great, but it's an improvement on the 9 points I scored at the last one. I don't mind getting a bad score, but I always strive to avoid being the Pudding. So far, it hasn't happened. Yet.

The other two in my party fared slightly better than I did. Pat scored a 15, and Mike (our resident expert) scored a 16. The evening's winner scored 21 points - 7 out of 8 guessed correctly. For his efforts, he won a bottle of Dalmore 12yr. Nice.

Boy, with six of the malts being cask strength (meaning higher alcohol content - probably in the 50-60% ABV range), I was feeling very OK by the end of the night. In addition, we had someone guarding the chandeliers, because it was looking like our friend Pat might be doing some dancing on the tables. Woo-hoo!

Friday, April 28, 2006

Baking Is Hazardous To Your Muffins

Last night, I made muffins for the first time in a very long time. I don't do much baking, really, but the other night I was flipping through one of my cookbooks featuring recipes for muffins, cakes, quickbreads, etc. and I found a recipe for Coffee Cake Muffins that looked pretty easy. Best of all, I already had most of the ingredients on hand. On the way home from work yesterday I picked up some milk (the only thing I was missing), and I was away to the races. Sort of.
The first batch I made did not exactly come out as planned. There are no pictures, as it was just too horrible. I put the muffin pan into the oven picturing fluffy, golden coffee cake, but what I got was cinnamon-flavoured charcoal. Harrumph.

So. I decided to modify my approach somewhat. The directions say to bake the muffins for between 20 and 25 minutes. Just a tip - 25 minutes is TOO LONG. For my oven, anyway. Plus, the batter seemed really gloopy and sticky. I had a hard time getting the stuff from the supposedly non-stick silicon spatula into the muffin cups. In addition to that, the directions say to 'lightly grease' the muffin pan. Well, OK, I admit it, I have a crappy muffin pan. But, I faithfully 'lightly' greased the cups, and then needed a cold chisel to get the little suckers out.

My second attempt was this morning. Armed with the knowledge gained from the miserable failure of the previous evening, I set out to make some edible muffin-like cakey things. Now, they weren't what I would call perfect, but as I generally prefer NON-crunchy coffee cake, I declared them a success.

First of all, I smeared those muffin cups with a generous amount of butter. Not an outlandish amount, but they knew they'd been smeared. Then, I decided to add a bit more milk than the recipe calls for in an effort to make the batter a little less gloopy and thus easier to work with. This did work, but the muffins didn't end up rising quite as much as the first batch. I'm still tinkering with the formula. This will require additional experimentation, but I'm sure my co-workers (on whom I've been recently foisting my baked goods) will not mind.

The additional lubrication on the muffin cups worked a charm. And, I suppose, only baking the muffins for exactly 20 minutes helped as well. They came out golden instead of black, and were easily extracted from the pan. Now I just have to get them to rise a bit more.

Oh yeah, you guys probably want to know the recipe, don't you? OK, OK, keep it down, here it is.

Coffee Cake Muffins
from Company's Coming - Muffins & More by Jean Paré
Makes 12 Muffins

Muffin Batter
1½ C All-purpose Flour
2 tsp Baking Powder
½ tsp Salt
¼ C Butter, softened
½ C Granulated Sugar
1 egg
¾ C Milk (2nd attempt I used 1 C milk)
½ tsp Vanilla

Preheat oven to 400ºF. (200ºC)

Combine flour, baking powder and salt in a large bowl. Stir. Make a well in the center. In another bowl combine butter, sugar and egg. Beat well. Mix in milk and vanilla. Pour into the well in the flour mixture, and stir just to moisten. Spoon part of batter into lightly (heh) greased muffin cups 1/3 full. Sprinkle Spice Mix over top. Spoon rest of batter over top filling to 2/3 full. Bake for 20 to 25 minutes.

Spice Mix
½ C Brown Sugar, packed
2 tbsp All-Purpose Flour
1 tsp Cinnamon

In small bowl combine all ingredients. Stir well. Sprinkle over batter as directed above.

Tuesday, April 25, 2006

Food From The Ether Part 1: Orange You Glad I Didn't Say Banana?

I recently participated in a weekly blog event hosted by Anne of Cooking With Anne called "Ready, Set, Cook!" Every Tuesday morning Anne provides a list of three special ingredients, and the idea is to create a recipe off the top of your head using those three ingredients. You can use anything else you want, but you must use those three ingredients.
The three ingredients for last week's event were: farfalle (bowtie pasta), chicken and mandarin oranges. Now, it's not a requirement of this event that you actually cook your creation. However, the recipe I came up with sounded pretty tasty, so I thought that I would attempt it.

When it came to actually preparing the recipe I did end up changing a few things because reality, unfortunately, does tend to intrude into the creative process. My original recipe can be found here, with the other submissions. The recipe I prepared last night is below.

Chicken Farfalle with Spicy Orange Sauce
Yield: 2 entrees, 4 appetizers, or 1 Big Honkin' Bowl

½ lb. boneless chicken breast, cut into chunks
1 can (10 oz) mandarin orange segments, with juice
1 C white wine
pinch of paprika
1 tsp crushed chili pepper flakes
salt & pepper to taste
2 tbsp + 2 tbsp butter

2 tbsp flour
¼ C slivered almonds
small handful of sesame seeds
2 C farfalle (bowtie pasta)


Brown chicken in butter, remove from pan and set aside.
Add some more butter to the pan, and mix in the flour. Add the can of orange segments, the wine, the paprika and the chili flakes and mix to combine. Bring to a boil, then reduce heat to medium low.
Meanwhile, put a large pot of salted water on to boil for the pasta.
Place the chicken back into the pan and simmer uncovered, stirring occasionally, until the sauce reduces by about 25%, about 10-15 minutes.
When the water boils, cook the pasta until just al dente. Place the pasta on a plate or bowl and add the chicken and sauce. Sprinkle with the almonds and the sesame seeds, and toss to combine. Serve immediately.


I really didn't know what to expect with this dish, but it turned out really well and tasted amazing. The wine and the oranges worked really well together and produced a nice light-tasting sauce combined with a spicy hit from the chili flakes and paprika. The almonds and sesame seeds added some more flavour and provided a bit of crunch.

All in all, I was very happy with this and will be adding this to my regular repertoire of dinners.

Monday, April 17, 2006

The Voices In My Head Win Again

Harry: Repeat after me. Pepper.
Sally: Pepper.
Harry: Pepper.
Sally: Pepper.
Harry: Waiter, there is too much pepper on my paprikash.
Sally: Waiter, there is too much pepper on my paprikash.
Harry: But I would be proud to partake of your pecan pie.

I've had this snippet of dialogue from "When Harry Met Sally" rolling around in my head for about a week now (pee-can pieeeee), and it has reminded me how much I like chicken paprikash. (How's that for a segue?) I tried paprikash for the first time about nine years ago at a Hungarian restaurant here in Toronto, and it has remained one of my favourite comfort foods. Don't ask me which restaurant it was, I can't remember. This was during my "Find-a-new-restaurant-featuring-foreign-cuisine-I've-never-tried-before" phase. Hmmm. I guess I could have called it my "Exotic Foreign Cuisine" phase, but that would have been too easy. Come to think of it, I'm still in this phase.

But I digress. In addition to making the paprikash, I had been wanting to try to make gnocchi. Gnocchi tastes best with sauce I'm told, and paprikash goes well with noodles or dumplings, so I thought that the two things would work well together.

I downloaded a recipe for chicken paprikash from Cooks.com. Find the recipe here. The recipe I used for the gnocchi is adapted from a recipe scrounged from Rob & Rachel at Hungry In Hogtown. I say adapted, because instead of the russet potatoes called for in their recipe, I used sweet potatoes. Have I mentioned that I really like sweet potatoes? But, aside from scaling back the quantities a bit, that was the only substitution I made.

The paprikash itself went pretty much according to plan. The recipe requires that the chicken be browned in quite a lot of butter (¼ C) . Now, I like butter, but I thought that ¼ C was a bit excessive. So, I cut back a bit and only used about 2 tbsp to cook the chicken, and added a bit more for the onions. While the chicken was simmering, I started on the gnocchi. I had already cooked the sweet potatoes, and pureed them in the food processor. Rob and Rachel mention in their post that they prefer to bake the potatoes rather than boil them, as this reduces the amount of moisture in the potatoes. I decided to boil them anyway, but after I drained them I returned them to the empty pot on the stove over reduced heat to attempt to cook out some of the excess moisture before putting them in the discombobulator. Never having actually tasted gnocchi before, I really don't know whether this made any difference.

After the potatoes were ready, I added the nutmeg, flour and egg and mixed up the dough. I'm not sure how much flour I ended up using, but the dough didn't stick to the sides of the bowl, and after kneading it a bit, it became nice and pliable and easy to work with. I split the dough up into about four pieces, and started to roll out each piece between my hands. Despite having the directions in front of me, I was unsure as to how big to make each nugget o' gnocchi, so I settled on the size of my thumb. Upon talking to some people at work this morning, I found out that I should probably have made them about half that size, but oh well, live and learn.

At this point the water for the gnocchi was boiling, so I dropped in a bunch of the little suckers, swished them around with a big spoon to make sure that they weren't sticking to the bottom of the pot, and shifted my attention to the paprikash.

It had been simmering for about twenty minutes, so that meant only one thing - time to add the flour/water mixture to thicken the sauce, and the sour cream to give it some body. Having done that, I mixed everything around a bit, then covered the pan and removed it from the heat. I had read over several recipes for paprikash before settling on this one, and although this particular recipe didn't specify, I removed the pan from the heat at this point because one of the other recipes had said that if the sour cream is allowed to boil, then it will curdle in the pan. Eeeeuwww. So, off the heat it came. The gnocchi was also finished cooking at this point, so I drained them, put some on the plate and poured the lovely paprikash over the top.

The whole thing turned out very well, and it was certainly tasty, but the jury is still out as to whether or not I actually like gnocchi well enough to make them again. I don't know whether it's because I made them wrong, or whether I simply prefer mashed potatoes, but the meal seemed awfully heavy. I think my next assignment is to find an Italian restaurant and try some real gnocchi. Life is rough.

I'm also planning to make some pee-can pieeee. Stay tuned.

Wednesday, April 12, 2006

Weekend Cookbook Challenge #4: Easter Brunch

This recipe was a colossal pain to make, but as with most recipes like this, the result was worth the effort.


This is Chilled Seafood Lasagna with Herbed Cheese. I found it in a cookbook I've had for a very long time, yet this is the first recipe from it that I have attempted. The cookbook is The Treasury of Creative Cooking, and it features recipes that have won various invitational cooking competitions around the United States. This recipe, apparently, was a prize winner in the "Wisconsin Milk Marketing Board Supermarket Chef Showcase". Whew. Say THAT five times fast.

I've been meaning to submit something to the The Weekend Cookbook Challenge for a while, and this is the culmination of my effort. When I first found this recipe, there was no doubt in my mind that I was going to attempt it, I just needed an excuse because, well, smoked salmon and caviar are not items I normally stock in my kitchen.

First of all, here's the recipe.

Chilled Seafood Lasagna with Herbed Cheese
Makes 24 First Course or 8 Entrée servings

2 C ricotta cheese
1½ C mascarpone cheese
2 tbsp lemon juice
1 tbsp fresh basil, minced
1 tbsp fresh dill, minced
1 tbsp fresh tarragon, minced
¼ tbsp white pepper
8 lasagna noodles (2 inches wide), cooked and drained
1 lb. smoked salmon
¼ lb. whitefish caviar, gently rinsed

1) Place ricotta cheese, mascarpone cheese, lemon juice, herbs and pepper in a food processor, and process until well combined.
2) Line terrine mold with plastic wrap, allowing wrap to come over the sides.
3) Layer 1 noodle, ½ C of cheese mix, 2 oz. of lox, 2 rounded tsp of caviar, and repeat, ending with a noodle on top.
4) Refrigerate several hours until firm.
5) Carefully remove from mold, and remove plastic wrap.
6) Slice with warm knife.
7) Garnish with strips of lox rolled to look like roses.

Okay, back to my original comment. This was a pain simply because I don't currently own a terrine mold, so I had to freehand the Leaning Tower Of Pasta, as I came to call it.

My first obstacle, however, was cooking the lasagna noodles without breaking them.None of my large pots were quite large enough to handle the noodles, so I used a roasting pan on top of the stove burner. That actually worked pretty well. I then drained them and put them aside.

Next came the cheese mixture. This was pretty staightforward, I just dumped the cheeses and the herbs into the trusty food processor, and blended. Just a side note here - I've haven't had much experience working with fresh herbs before, and it was just incredible to me how much of a difference in aroma there was between the fresh basil and the dried basil I normally use. Also, I really liked the pungent liqourice-like smell from the tarragon.

Now came the tricky part. The assembly. Everything started out well; I had all the respective parts measured out and prepared. How could everything have gone south so quickly?
I started out by placing a piece of aluminum foil down, and on top of that, a piece of plastic wrap. The trick was to remember not to place anything like spoons or spatulas on the plastic wrap while the assembly was in progress, as they would stick, and thus disturb the increasingly precarious Leaning Tower when I picked them up again. And so it began. The first layer went OK, but it was when I placed the second noodle that I realized what the challenge was going to be.You see, the cheese was holding the lower noodle in place, but all that was touching the upper noodle was smoked salmon and the spoonful of caviar. Not exactly a sturdy arrangement. Of course with a terrine this would be a moot issue, but as the layers increased, I kept having to adjust the stack to keep it from falling over.

Another side note - my local Grocery Palace actually stocks caviar. I was thinking I would have to make a pilgrimage to the St. Lawrence Market to find some, but happily, they stocked both red and black lumpfish caviar. I chose the red stuff. The recipe calls for whitefish caviar, but since that's what they had at the store, that's what I used. Besides, I thought it would go well with the orange of the smoked salmon and the white of the cheese.

When I finally placed the final noodle on the top, I breathed a sigh of relief. But then it struck me. The piece of plastic wrap that the lasagna was sitting on was now not wide enough to wrap around it completely. I panicked for a second, then realized I could just add another piece.I then wrapped the aluminum foil around the package, and gingerly transported it to the fridge on a piece of cardboard cut to fit the lasagna. Then I had a scotch. Wow. Through this whole ordeal, the thought that was running through my mind was, "This had better taste good."

I left it to chill overnight in the fridge. In the morning I took it out, carefully removed the wrapping, heated my chef knife under some hot running water and cut a slice. Very very tasty.In addition, I had some of the smoked salmon and some of the cheese mixture left over, so I made some toast, and had a quite enjoyable breakfast, all things considered.

The next time I make this, and I likely will, I'm not doing it without a terrine mold. That's all there is to it. And despite my bitching and moaning, this was fun to make, and I'm really happy with how it turned out.