Monday, September 10, 2007

Mmmmm... Brownies

OK, so I've been away for a while. Partly due to a crazy summer schedule, and of course, partly due to apathy, but I'm back now. No, really.
Although I didn't get too ambitious in the kitchen over the summer, one of my few culinary exploits concerned chocolate. And cheesecake. And more chocolate.

The recipe is a result of the World Nutella Day event I participated in back in February, and is courtesy of Mary at AlpineBerry. It can be found here.

The family summer party/picnic/softball game was once again held at my parents cottage, and of course, I was expected to contribute something tasty to dinner. It's always a challenge for me to come up with something interesting (and different from past years' contributions), and that will survive the hour-and-a-half drive north.

In the past, I have made some spicy samosas or other similar appetizers, but this year I thought that I would make a dessert. Enter the brownies.

These are not only brownies, they are CHEESECAKE brownies. And they're not only cheesecake brownies, they're NUTELLA cheesecake brownies. The bottom half is a nice chocolatey brownie mixture, which includes a few healthy dollops of Nutella. Mmmmm... Nutella... The top layer is a chocolate cheesecake concoction, which also contains - you guessed it - a few healthy dollops of Nutella. Then, as if that wasn't enough, I topped the incredibly decadent, and really quite evil, brownies with some shaved white chocolate.

The only problem with making two pans of evil cheesecake brownies, is that after bringing one of the pans to the cottage party, I was still left with a whole pan for myself.

Now, I can hear you saying, "but Ian, how can that possibly be a problem?" While I realize that most of you would welcome this kind of 'problem', I've been on kind of a weight-loss kick just lately. I've found that eating a whole pan of brownies by oneself (while immensely satisfying), is really not conducive to actually LOSING weight. Lots of extra sit-ups were required. Now... I say 'required', but not really 'performed'. There's a hitch in that plan somewhere... hmmmm...

So, as I mentioned before, the summer was a bit slow for me cooking-wise, but I'm back at it and will try to post more often than once a month. Cheers!

Tuesday, June 19, 2007

A Walk In The Woods

Once again, it all came down to momentum. Most of my really good walks take place after I get off the streetcar on my way home from work, and this time was no different.I just felt like walking. I had no plan, no destination picked out, so because I was facing east when I got off the streetcar, that was the way I went. I walked along Queen St. until I got to Glen Manor Drive. One of the best things about Glen Manor, besides being in a fairly swanky neighbourhood, is that there is a series of parks and nature trails leading from Queen St. all the way north to Kingston Rd. This is where I headed.As I walked up the path, I was struck by how quiet is was. Here I was, not a hundred feet from the bustle of Queen St., and all I could hear were birds and the barking of a few dogs.Having passed through the first little park, I crossed Glen Manor Drive, and walked up into the second park, which among other things is apparently a very popular dog park, as there were several people out with their canine companions running around (the dogs that is) and enjoying the late afternoon sun. Halfway up is my favourite feature of this particular park - the wooden foot bridge. There is really nothing special about this bridge, but as a child I remember thinking that it was so cool to see something like this smack in the middle of an otherwise bustling urban neighbourhood. Of course, I didn't phrase it in my mind quite like that at the time. It was more like, "Cool... a wooden bridge...".On through park number two, and I arrived at the most interesting part of this trek; the nature trail. This is less of a park, and more of a path through a wooded ravine. When I was in high school, this was a popular spot to come to hang out, or have a smoke, or whatever, with a fair expectation of privacy. I was happy to see that there was a small brook running beside the path, and it actually looked clean and didn't have any crap floating in it. Always a bonus.It had been years since I'd walked through here, and once again I was struck by the sense of stillness and apart-ness from the surrounding city. I could just see the tops of the houses through the trees at the top of each side of the ravine, yet could not hear any street noise.Occasionally, I would pass someone walking their dog, or who was just out for a walk, and we'd nod or say "hi" as we passed, but for the most part, I was alone in the woods. That sounds a lot scarier than I meant it, considering that it was 6:30pm, and still essentially broad daylight. As I crossed the foot bridge, I saw what I can only describe as a gnarly tree. "That tree is totally gnarly" I thought, and so I had to get a picture of it.On my way up and out of the ravine, I stopped to turn around and look back at the path. I stood there at the top of the stairs, and just enjoyed the view. I find it amazing that there are still places like this in the city, when sometimes it seems that undeveloped natural land in the city of Toronto is becoming a thing of the past.

Sunday, May 20, 2007

Aaarghhh - And I Mean That.

It's now 9:45pm on Sunday of a long weekend, and I'm in the office. I've been here since 9:00am, and I'm starting to feel a little crispy around the edges. My department has been working on a hyper-important yet still very silly project all weekend, and now I've had enough.

I'm tired, I ate WAY too much catered food, and I'm tempted to find a quiet corner in the nice air-conditioned computer room and catch a few ZZZZs.

They tell us that we'll out of here before midnight, but I really don't think THAT's gonna happen...

Despite the witty name of this Blogsite, I'm trying my best NOT to gallumph around the office like a grumpy grizzly bear that's been woken up from hibernation two months early. Ahhh... hibernation...

Speaking of the catered food, we got a bunch of potstickers and salad and submarine sandwiches and stuff for lunch. All very tasty, but the problem was that we didn't get lunch until about 1:30pm, and then dinner arrived (lots and lots and lots and lots of pizza) at about 5:30pm. It felt like I was eating solidly for about five hours straight. Did you know that you can get broccoli on a pizza? I mean, I knew that, but had never actually seen it. It just looks wrong somehow.

Oh, great. Now I'm babbling.

I don't think I'll have to come in tomorrow (holiday Monday), but again, at this point in the evening all bets are off. Thank god for taxi chits - at least my ride home is taken care of.

Whenever that may be.

Wednesday, May 09, 2007

Gadgets & Toys Part I - Salad Dressing Cruet


At a miniscule 25¢, this is definitely one of the better bargains I have ever got from a yard sale.

Over the last year, I have been making a concerted effort to both drop some weight and to cut down on my spending. One of the easiest ways I found to do both of these things was to stop buying commercially produced salad dressing. Even the ones that claim to be 'Low Fat' or 'Calorie-Wise', still seemed to have quite a lot of fat and calories. I think I've said this before, but it's worth repeating - nothing ruins the good intentions of a nice green salad like a splat of creamy high-cal dressing.

Since I got the sweet baby pictured above, I have been making my own balsamic dressing. It's really easy. I know, I know, it's possible to make dressing without a Good Seasons salad dressing beaker, but I know I never did. It's foolproof. Well, as much as anything's foolproof. The lines on the side indicate where to fill each ingredient to, then you shake to mix it up. Um, after firmly snapping the lid on. Don't ask.

My favourite combination so far has been extra virgin olive oil, balsamic vinegar, water, a splootch of honey-dijon mustard and some fresh-ground pepper.

Monday, May 07, 2007

Ready, Set, Cook! #34: Feeling A Little Chicken


...or maybe I was just feeling a little flaky.

The feature ingredients in this month's edition of Ready, Set, Cook! hosted by Anne at Cooking With Anne are:

* Chicken Breasts
* Onions
* Sour Cream

The rules for the event can be found here.

I approached this challenge a little diiferently from past editions, in that I didn't create the recipe before going to the grocery store for the ingredients. I decided to go to the grocery store, and just wait for something to catch my attention.

I was actually out for a walk after getting off the streetcar on my way home from work, and as I passed the ValuMart on Queen St. East, I remembered about the event, and that posts were due by Tuesday (which is tomorrow, as I write this).

As I wandered through the produce department, I decided that I wanted to incorporate puff pastry or something similar into the recipe. So after grabbing some nice-looking produce (mushrooms, onions, new potatoes), I was heading towards the meat department to find some chicken, when I noticed that they had Montreal Smoked Meat on special in the deli department. Smoked Meat is one of my favourite foods, though I don't eat it that much. It's the moderately fatty meat in addition to the spices that makes it good, you see. I made an exception this time, as it is second only to bacon on my Favourite Foods list. It's a large list, and the thing is that because of this blog it just keeps getting larger. The challenge is making sure my waistline doesn't.

So, the Smoked Meat was in, and I found some nice chicken breasts to go with it. Along with the onions and the sour cream that are the other theme ingredients, I decided to add mushrooms and some chopped cubanelle pepper. Not to mention the chili sauce that I seem to be using in everything I cook lately.

Despite making an entire chicken casserole, I decided not to bake all six shells as I would just have to eat them, and it's easier to store leftover casserole than it is to store leftover pastry.

These are some tasty sandwiches, or pastries, or whatever, but my point is THEY TASTE GOOD. I highly recommend them. Here's the recipe that I used:

Flaky-Bakey Chicken Sammies
Makes lots

2 boneless skinless chicken breasts, cut up into bite-sized pieces
100g (4oz) Montreal Smoked Meat, chopped up
2 medium onions, chopped
3 large white mushrooms, sliced
3 tbsp light sour cream
juice & zest of one lime
2 tbsp honey mustard
1 good-sized splootch sriracha chili sauce (or any hot chili sauce)
salt & pepper
1/4 C water
3 frozen patty shells

450g (1 lb) small whole new potatoes - I had about eight of them
2 green onions, chopped
light sour cream
salt & pepper

Preheat the oven to 400F.
Place the frozen patty shells on a baking tray, and bake for 18-20 minutes.
Remove from oven. With a fork, cut out removable tops and save to use as lids, and let cool on a rack.

Reduce oven heat to 375F.
Place the rest of the first group of ingredients into a medium-sized casserole dish, and gently mix to combine.
Bake at 375F for about 60 minutes.

While the chicken is cooking, place the potatoes into a medium-sized saucepan and just cover the potatoes with water. Cover and bring to a boil, then reduce heat and tip the lid. Cook over medium heat for about 15 minutes or until potatoes are cooked through and soft.

When chicken casserole is ready, spoon a healthy amount into each shell, and place lid on top. Cut an 'X' into the top of each potato and pinch the sides slightly. Top potatoes with a small dollop of sour cream and chopped green onions.

Wednesday, April 18, 2007

Blog Party #21: Currying Favour - or - Hold On, I'm Cumin

Bite-sized beauties and Turtle Punch, too!
When I saw the post announcing this Blog Party event, I was excited because this gave me a chance to try out a couple of things I'd been considering lately. Namely, Chicken Wings and specifically, some spicy spicy sauce I've been working on. Plus, it gave me an excuse to mess around with my standard potato salad recipe that was becoming a bit tired. The theme of this month's event is: Picnic Food!

I was originally planning to make a bunch of different stuff for this event, but due to time and budget constraints, I settled on two dishes and one cocktail. Nothing says 'Picnic Food' to me like potato salad and cold chicken, so I made Spicy Chicken Drumettes and Devilled Potato Salad with Turtle Punch (it's much like Rabbit Punch, but not quite as fast :-{>).

You would think that it would be easy to find raw chicken wings at any grocery store, but NOOOOOO.... I had to go to three different places before I found a single tray of about a dozen chicken drumettes. Of course, it was the Grocery Palace, where I should have gone in the first place. Oh, well. Maybe it was the fact that it was a Sunday night and the meat counters were all half-empty. Or maybe.... maybe it was an evil conspiracy to prevent me from cooking tasty food for this event. Or maybe I've just been drinking too much Turtle Punch.

Over the last little while I have developed a taste for cumin, and have been putting it in pretty much everything I cook. For the wings, I wanted to make a really good coating, so I decided to make a masala from cumin seeds, coriander seeds, black peppercorns, asafoetida and kosher salt. Here's how I did it:

Killer Curry Masala

1 tbsp cumin seeds
1 tbsp coriander seeds
1 tsp asafoetida powder
1/2 tsp black peppercorns
1/4 tsp kosher salt

In a dry skillet, over high heat, dry-roast all ingredients for 30 seconds to a minute until the coriander seeds start to darken, and the cumin seeds start to pop. You will really be able to smell the fantastic aroma.
Remove from skillet and whiz to a powder in a spice grinder.

*NOTE: Dry-roasting the spices is very important. You COULD just mix everything together and grind them up, but you wouldn't get the same depth of flavour, or great aroma.

~~~~~~~~~~~~~~~~~~~~~~~~~~~~~~~~~~

OK, back to the chicken.

To make these drumettes easier to handle, I cut off the knobby end of the bone and pressed the rest of the meat down, leaving a ball of chicken meat with the bone sticking out. Then, flour, egg wash, then tossed in the masala and breadcrumbs and baked in the oven at 400F for about 45 minutes. They may look blackened, but the meat was still moist, and the coating was nice and crispy (and darn tasty).

Ah, potatoes. I love potatoes. I could eat potatoes at every meal. For this meal, I wanted to combine two of my favourite party/picnic foods: potato salad and devilled eggs. I started off by hard-boiling some eggs, and boiling and mashing a medium-sized Yukon Gold potato. While the eggs were cooling, I fried up a couple of pieces of crispy peppered bacon, cut them into square pieces and set them aside. To the potatoes, I added some fearsome sriracha chili sauce (ah yeah, that's good lovin'), then some of the masala, a chopped green onion, some grainy mustard, a little mayo, a little butter, some crushed garlic, and a splash of Worchestershire Sauce. Mix until smoooooth. I peeled the hard-boiled eggs, and cut them in half. I removed the yolks and added them to the potato mixture, and roughly mixed them in.

So. The egg halves made a perfect little serving vessel for the mashed potato salad, and with a piece of bacon added in, and a slice of cocktail olive to top it all off, there you have Devilled Potato Salad.

What's that? The punch? I haven't explained the punch, you say? Alright, alright, I'm getting to it.

I find it more difficult to invent cocktails than food recipes. I don't know why. Maybe it's the fact that while I was in university, I would concoct various libations that only I seemed to find tasty. I mean, really. Homemade red wine mixed with Diet Pepsi should work, shouldn't it? It certainly worked for me at New Year's Eve 1989.... people tell me. But I digress. Here's the formula.
Turtle Punch
Makes one pitcher of punch

1 pot of tea, cooled (I think it's Orange Pekoe)
2 C citrus drink
2 C peach drink
2 C rye whiskey
1 C sherry (I ran out of rye)
1/2 C sugar (trust me on this one)

Stir to combine, and chill in fridge.
Serve in frosty glass, and top with chunks of Turtles ice cream bar on a toothpick.
~~~~~~~~~~~~~~~~~~~~~~~~~~~~~~~~~~

A big thank you to Stephanie at Dispensing Happiness for doing such a great job organizing this event.

Friday, March 30, 2007

Best Of Blogs 2006 - I'm a finalist!

Hey Kids!

Just found out that The Gallumphing Gourmand is one of eight finalists at the 2006 Best of Blogs Awards in the Best Food, Wine and Cooking Blog category. How cool is that? Click the link above to place your vote (it would be cool if you would vote for me, hint hint) until midnight Friday April 13, 2007.

Thank you to everyone who enjoys my blog, it's been fun to do.

Here are links to some of the posts I had the most fun with from the past year:

Large Chef At Home - March 14, 2006

Weekend Cookbook Challenge #4: Easter Brunch - April 12, 2006

Food Fit For A King - June 14, 2006

Ready, Set, Cook #20: Bite-Sized Bacon Bundles - Booya! - October 30, 2006

World Nutella Day 2007 - Nutella Sugar Stars - January 31, 2007

Tuesday, March 20, 2007

Large Salads and Small Pork Chops

In an effort to both eat healthier and to save some cash, I have been making a concerted effort lately to bring my lunch to work with me every day.Also, because I have better things to think about in the morning, and because my brain is still in low gear until my first coffee of the day, I tend to make the same thing pretty much every morning - a big salad and a little pork chop.

I decided recently that I should really get on this whole 'losing weight' thing, and a friend suggested that a good way to do that would be to go vegetarian. Now, I don't have anything against vegetarians or vegetarianism, it's just not a choice that I would make for myself. To be honest, I like meat way too much to do that. To even consider living without steaks or chops or burgers, the mind boggles. Not to mention bacon. Ahhh, bacon. But I'm getting a little off-track here.

As a child of the '70s and '80s, the phrase "You may not" is not one of my favourites. My instinctive response is "Don't tell me what to do", and then nothing gets done. However, I've had to rethink my whole decision-making process as it applies to menu creation, and cooking healthy meals. I've found that if I take "You may not" and change it to "I don't want to", things tend to work a bit better. I could spout some inspirational rhetoric right now, but I just find that if I truly want to do something (or not do something), then I can make it happen.

So, although the veggie route is not one I will be taking, I have been making a concerted effort to increase my vegetable intake at every meal, to make sure that I eat my leafy greens, and also to reduce the amount of meat eaten in a day. All it takes to do this, is a little preparation when I get home from the grocery store.

If I buy a large package of ground beef, then before it goes into the freezer I divide the meat up into three- or four-ounce portions. With chicken legs and pork chops, I wrap them all individually. My old system, which was to cook a bunch of food and then "save some for later", never really worked that well. It used to be "OK, I guess I'll thaw the entire pound of ground beef, because I don't feel like trying to saw through it when it's frozen." Then of course, I would just end up eating the whole thing. Not good.

Since I started this blog over a year ago now, and since I've taken a more active interest in cooking, I've found that several things I used to buy pre-made are really easy (and cheaper) to make myself. Take salad dressing. Nothing ruins the good intentions of a nice green leafy salad like some creamy, high-cal dressing. All you need is oil, balsamic vinegar and water, and you've got salad dressing. Oh yes, and a funky vintage Good Seasons salad dressing cruet with measuring lines on the side. Heh. Found it at a yard sale for a quarter. I use it all the time, it's one of my favourite kitchen gadgets. I just add the vinegar to the line, add the water to the next line, then fill with oil. Add a little fresh ground pepper, and a small splootch of honey-dijon mustard, et viola! A tasty balsamic vinaigrette.

The salad is assembled as follows:

Gallumphing Gourmand's Tasty Lunchbox Salad
serves 1

* Red leaf lettuce
* one plum tomato, chopped
* two green onions, chopped
* two radishes, chopped
* 1/4 green pepper, chopped
* three or four medium mushrooms, chopped
* small squirt of balsamic vinaigrette
* one small grilled pork chop, sliced


It's taken some adjustment to go from standard food court grub like rice-and-two-items combos or large pastrami sandwiches to eating the salad every day. But I find that after a few weeks of doing this, I've gotten used to it. And now that I've started to incorporate actual exercise into my daily routine, I'm starting to feel the results, if not actually see them yet. I look forward to the salad, because it makes me feel good.

Monday, March 05, 2007

WCC #14: A Salad By Any Other Name...

...would still taste like salad. Unless, of course, you use gelatin to make that particular salad. For this edition of Weekend Cookbook Challenge, I decided to take a bit of a retro approach to the Salad theme.

I dug out my vintage Better Homes & Gardens cookbooks (Copyright 1963), and selected the volume entitled Lunches and Brunches. The clever subtitle is "Luscious lunches, best brunches". Whoever thought that one up MUST have been getting paid the big bucks.

This entry is based on the 'Make-ahead Luncheon' found on Page 13 of Lunches and Brunches. I say 'based on', because I didn't make the entire menu suggested for this luncheon. What I did make was:

Chilled Tomato Juice
Ham & Swiss Roll-ups
Devilled Eggs

and the pièce de résistance:
Confetti Relish Mold


Sounds so good, you can almost taste it, hmmmmm?

The devilled eggs are pretty self-explanatory, and the ham & swiss roll-ups are just that - a piece of cooked ham, a piece of swiss cheese, some grainy mustard, a little wasabi, and ROLL UP. The recipe calls for horseradish, but I don't have any, and wasabi is basically horseradish on crack anyway, so I used (a tiny bit of) the wasabi.

The Confetti Relish Mold was the fun part. For all you fine people who are just dying to make a gelatin-mold salad, here's the recipe as printed in the book:

Confetti Relish Mold
serves 6

2 beef bouillon cubes
1 3-oz package of lemon-flavoured gelatin
1 C boiling water
2 tbsp tarragon vinegar
1/2 tsp salt
1 C dairy sour cream
(as opposed to library sour cream, maybe?)
1/2 C chopped unpared cucumber
(I peeled it anyway)
1/2 C finely chopped green pepper
1/4 C sliced radishes
2 tbsp sliced green onions

Dissolve bouillon cubes and gelatin in boiling water. Add vinegar and salt. Chill until mixture is partially set.
Add sour cream, beat smooth. Add remaining ingredients. Pour into a 3-cup mold. Chill until mixture is firm.


OK, that was what the book said. This is what I actually did. I made a few common-sense (to my mind, anyway) substitutions. Instead of boiling water and bouillon cubes, I just used Campbell's Beef Broth, and instead of tarragon vinegar, I used white wine vinegar with 1/2 tsp of tarragon leaves. Oh yes, instead of the dairy (!) sour cream, I used plain yogurt.After boiling the broth, dissolving the gelatin (lemon-flavoured Jell-O), and adding the vinegar and salt, I put the saucepan into the fridge for about an hour. I then added the yogurt, and used electric beaters to 'beat until smooth'. I then added the rest of the stuff, stirred to combine everything, then poured the mixture into five individual little glass bowls. I don't have a jelly mold, and since I don't plan to ever make this again, I didn't think that there was any point to buying one. Since I had several of the little suckers, I decided to experiment a little bit. I put two of them into the freezer, and the other three went into the fridge.

I really wasn't sure how long they would take to set properly, but after three hours, they seemed fine. The book provides helpful tips for turning out a jelly mold:

Loosen edges with top of knife. Place platter over mold; invert. Wring towel out of hot water; lay over mold. Lift off mold.

Whaddaya know, it worked. I don't know why the beef flavour was included, because the lemon completely overpowered it. The jelly tasted about how you'd expect: creamy lemon jello with crunchy bits in it. Surprisingly, it wasn't too bad.

A big thank you to Tami at Running With Tweezers for running this event, it's always fun to look through the old cookbooks.

Success Is A Dish Best Served With Relish

Or mustard.

As a follow-up to my last post, and the deep-fryer meltdown incident, here is my second attempt at Mashed Potato Poppers.Thanks to a comment from Vicki, this time I didn't add any butter or cream to the potatoes before I deep-fried them. They turned out perfectly. Well, they turned out how I expected them to turn out, which I guess is pretty much the same thing.

The recipe is pretty simple. I'll run it down for you.

Mashed Potato Poppers

4 medium potatoes, boiled and mashed
1 tbsp red pepper flakes
1 tbsp garlic powder
(I didn't have any fresh garlic on hand or I would've use that instead)
salt and pepper
1 good-sized gloop of Worchestershire Sauce
(pardon the technical jargon)
1 small gloop of Tabasco (to taste)

Mix all ingredients in a large bowl. Form into 1-inch balls and deep-fry 6-8 at a time (depending on the size of the deep-fry unit) for about 4 minutes.
Remove from oil and place on paper towels to blot some of the oil.
Serve with mustard or whatever tickles your fancy.

I don't know about you, but my fancy is fairly ticklish, so in addition to the mustard, I tried mayo, wasabi, hot sauce, Nutella (why not), and peanut butter. All turned out to be acceptable choices, but I guess the mustard is my favourite.

Friday, February 16, 2007

Blog Party #19: Take Comfort

Ahhh... Comfort Food. It's always fun to cook comfort food. It's not about nutrition (necessarily) or presentation or culinary genius, it's about making a big pile of stuff that tastes great and make you feel good. A big thank you to Stephanie at Dispensing Happiness for organizing this cool event.

The outline for this event can be found here, but the basic idea is to take your favourite comfort foods, and turn them into appetizers. This includes at least one appetizer and one cocktail.

For the purposes of this event, my favourite comfort foods are: Rice-A-Roni, mashed potatoes and hot dogs. In addition, I thought that I would whip up a cocktail that I invented (I'm pretty sure) called a Flux Capacitor. Mmmm... tasty...

Of course, the challenge was to figure out how to convert what I would normally eat out of a really big bowl into bite-sized appetizer-type finger foods. I have to admit that I agonized over this for a while before settling on a couple of ideas.
First of all, for the Rice-A-Roni, I normally add a couple of eggs to the pan when I add the water and the oh-so-tasty flavour packet, and it ends up looking like a rice frittata. So, I thought that I would just cut up the frittata and serve it on small pieces of toast with a piece of smoky bacon, and a little bit of grainy mustard. And thus, the Bacon 'n Egg Rice-A-Roni Canapé was born.

Secondly, I love hot dogs. I especially love to pack everything I can possibly think of on the top. So, I got out my package of handy-dandy bamboo skewers, and proceeded to de-construct the hotdog by skewering a combination of: green bell pepper, wiener pieces, cubes of mozzerella, sliced mushrooms, black olives and red bell peppers. Served with a dip made from grainy mustard, a little mayo, Worcestershire sauce, Louisiana Hot Sauce, some lemon juice and some freshly ground pepper. Voilà, a Weenie-Kabob!

For the third apetizer, I ran into some problems with the execution of my idea. My original thought was to make up some nice, creamy, garlicky mashed potatoes, roll them into balls, coat with breadcrumbs, and deep-fry them for a couple of minutes. This would theoretically produce crispy golden balls of tasty potato. Hmmmm.... It should have worked... but it didn't. I made up the potato balls and rolled them in breadcrumbs, but when I submerged them into the hot oil, all they did was disintegrate into a sloppy mess. Crap. So, I decided that since the potato was already fully cooked, that I would simply roll the balls in the breadcrumbs and call them done. And call them Potato Poppers. Not bad at all, especially with the (yes, you guessed it) mustard dip.
Now for the beverage portion of evening. As I mentioned before, I made a Flux Capacitor. "But Ian," I hear you say, "what is a Flux Capacitor?"

I'm glad you asked.

The name comes from one of my all-time favourite movies - Back To The Future. The drink is made with one part Ouzo to two parts Sprite. Garnish with a maraschino cherry and some lime peel, and you've got one tasty cocktail. Plus, as an added bonus, when you drop the toothpick with the cherry and lime peel into the drink, it starts to fizz up quite a bit, and the cherry bounces up and down in the glass. Very cool effect. I have two reasons why I call this drink a Flux Capacitor. First, if you drink several of them, it will really Flux you up. Plus, again directly quoting the movie, "the Flux Capacitor... which is what makes time travel possible..." By this I mean, Time Flies When You're Semi-Concious. And it even tastes good. The Ouzo tastes like licorice, and has a pretty intense flavour. But, when mixed with the Sprite, which tastes like lemon-lime, the licorice flavour still comes through, but the intensity is muted somewhat. Now, this can be viewed as either a good or a bad thing. Both for the same reason - because the cocktail goes down real easy.

I will add a link to the event round-up when it's posted on Saturday.....

~~~~~~~~~~~~~~~~~~~~~~~~~~~~~~~~~~~~~~~~~~~~~~~

....and here it is!

After some technical difficulties, the round-up for this event can be found here. Check it out!

Wednesday, January 31, 2007

World Nutella Day 2007 - Nutella Sugar Stars

If at first you don't succeed... try changing the recipe.My participation in this event can be chalked up to coincidence and good timing. Nutella is one of my favourite things in the world, and I have been looking for a tasty way of incorporating it into a recipe, and I finally found one.

After my first unsatisfying experience making sugar cookies back before Christmas, I wanted another crack at them, so I adjusted the recipe slightly by adding a bit more flour and reducing the cooking time from 10 minutes to 6 minutes (and didn't roll the dough quite so thin), and they turned out beautifully. Buoyed by this success, I decided to tweak the recipe further by replacing the almond extract with orange extract, and adding chocolate. Ahhh chocolate. For my first attempt I used cocoa powder, which was good, but I thought that Nutella would be an ideal addition and would add another dimension of flavour to the cookies. So I did. Unfortunately, the cocoa and Nutella completely clobbered the orange flavouring, so I left it out the next time.Not only did I add Nutella into the cookie dough, but sandwiched two cookies together using more Nutella as the filling.

And it was good. Oh my, was it good.

All of this brings me back to the fact that at that point I still didn't know about this event, and just happened to be talking to my friend Rob from Hungry in Hogtown. When I mentioned that I had just made some Nutella cookies, he said, "Oh, are they for the World Nutella Day event?" I promptly replied, "They are now!" Click the picture on the right to view the World Nutella Day website, and the event wrap-up on February 7.

What a great idea for an event. Despite knowing a few lost souls who actually dislike Nutella, and for whom I have nothing but pity, everyone I know who likes Nutella, LOVES Nutella. In my opinion it has supplanted ambrosia as the Food of The Gods. One of my favourite things in the world is a thick layer of Nutella and raspberry jam on warm whole wheat toast. Pure joy.


Chocolate Sugar Stars
makes about 8 dozen

1 C granulated sugar
1 C softened butter
1/3 C cream cheese, softened
½ tsp salt
1 tsp orange extract
½ tsp vanilla
1 egg yolk (reserve white)
2¼ C all-purpose flour
¼ C cocoa powder
1 big (OK, huge) spoonful of Nutella (about 2 tbsp)
colored decorative sugar (I used white for these ones)
more Nutella for spreading

In large bowl cream together the sugar, butter and cream cheese.
Add the salt, extracts, egg yolk, cocoa powder and Nutella; blend well.
Stir in flour until well blended. Chill dough for 2 hours.
Pre-heat oven to 350F/180C.
On lightly floured surface, roll out dough one-third at a time to 1/8-inch thickness. Cut into desired shapes with lightly floured cookie cutter (I used a star-shaped one). Place 1 inch apart on cookie sheet covered with parchment paper. Leave cookie plain, or brush with lightly beaten egg white and sprinkle with colored sugar. Bake for about 6-7 minutes or until light golden brown. Cool completely on wire racks.
After the cookies have cooled completely, thinly (or thickly) spread some Nutella on one cookie, then cover with another, sugar sides out. Press together lightly so that the cookies adhere. Chill in the fridge in a sealed container until ready to serve.

Friday, January 26, 2007

RSC#23: Maple Pork Roast with Raisins and Dark Chocolate

Pork and chocolate. Two of my favourite things, yet they are not normally used in the same recipes. For last week's Ready, Set, Cook! event, instead of the normal three feature ingredients, Anne provided a selection of five ingredients, from which the participants could choose two or three for their recipe. The five ingredients were: salmon, maple, pork, tomatoes and chocolate. As soon as I saw that, I knew that I had to try making something with both pork AND chocolate, because no-one else likely would and because I love a challenge. Now, I did a bit of searching on the internet for any recipes that used these two ingredients because I didn't want to blindly throw something together if it was just going to taste like crap. You see, from past experience, I have come to realize that there are some combinations of ingredients that just don't work. At this point I will reference my teenaged experiments with omelettes, and just what was possible to mix with eggs in a fry pan. Keep in mind here that I was around fourteen and had no finesse in the kitchen, and when I say "omelette", I mean I cracked a couple of eggs into a pan and threw some other stuff in with them. There was no whisking, or blending or even measuring (although that's not necessarily a bad thing), but I found that the combination that I hated most was eggs and chocolate. Looking back, I'm still not sure why this didn't work, but it sucked sure enough.

I wanted to avoid that this time.

I found a neat recipe for a sauce that involved red wine vinegar, sugar, raisins and dark chocolate. The best part was that this sauce was meant to be used with meat, and in this case, pork. I think that the secret to this sauce was that there really wasn't that much chocolate in it, that it wasn't a 'chocolate sauce'. It was a very nice reduction using chocolate for a flavouring rather than a base. It worked really well with the roast I cooked, and I will definitely be keeping this recipe on file.

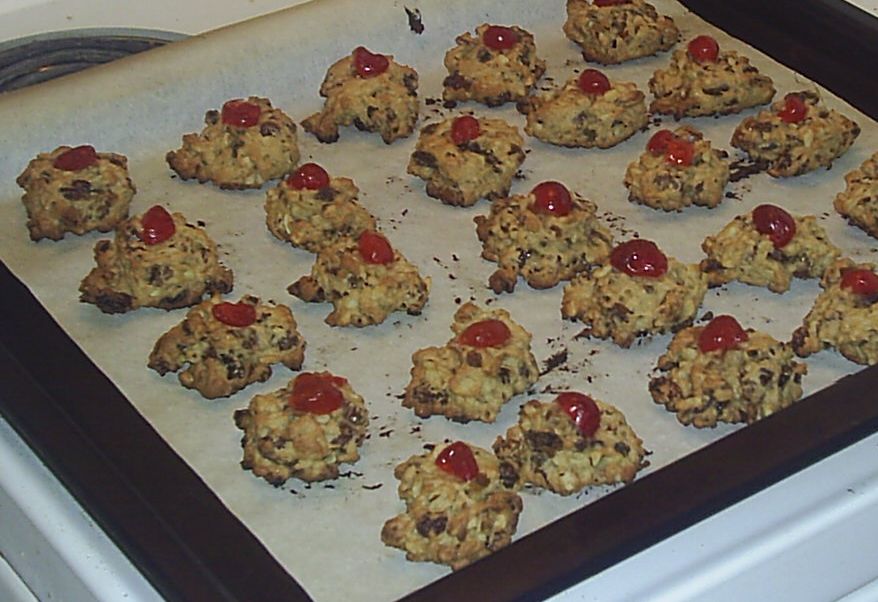
The recipe I originally created can be found here in the wrap-up for Ready, Set, Cook #23. As normally happens, it got modified slightly when I actually attempted it. The recipe I actually used can be found below.First of all, I bought a cheap pork shoulder roast for about six bucks from the grocery store a few blocks from my house, along with some red wine vinegar and some maple syrup. I already had the raisins and the chocolate from my recent cookie-baking explosion from before Christmas. The original recipe also called for roasted pine nuts, and I went to the trouble of buying some, but when I cooked the roast, I completely forgot about them and left them out. Didn't really make much of a difference, as the pork was unbelievably tasty even so, but it irked me to have forgotten.

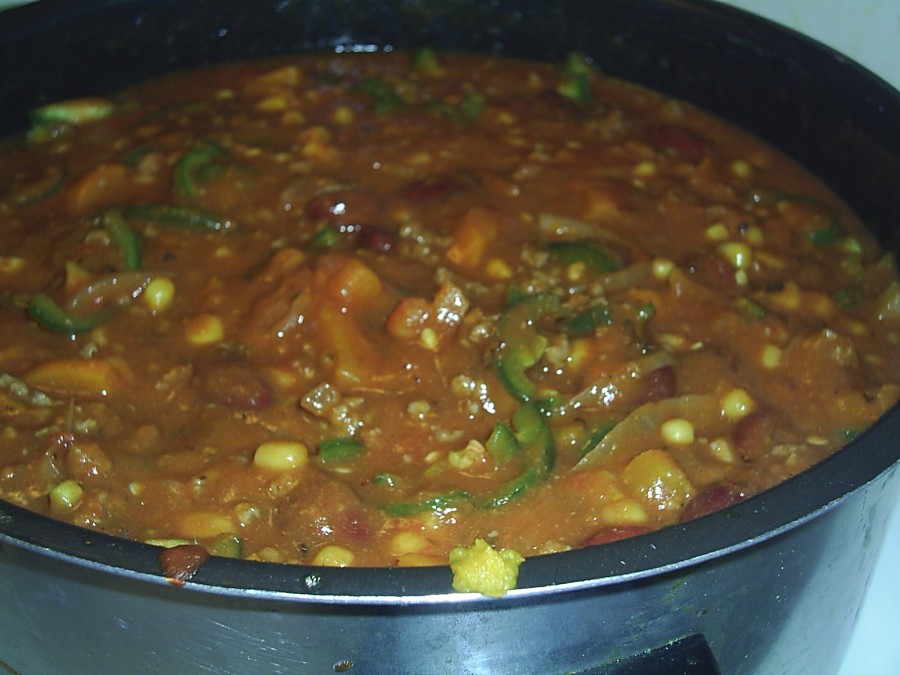
I cooked the meat in my handy-dandy cast-iron dutch oven (I love my dutch oven), with the veggies, the chicken broth, the wine and the maple syrup. I was expecting more of a maple-y taste from the roast, but I guess it got overpowered by the wine. As you can see from the picture above, the meat came out beautifully. It was falling off the bone, and was easily shredded with two forks. While the meat was resting (before I shredded it), I made the sauce.

I have to mention here that boiling vinegar is not one of my favourite smells. In fact, it is probably one of my least favourite food-related smells, along with boiling beer (that's a story for another day), and frying liver. My mother would always try to fool my brother and I by cooking bacon with it, but we knew, oh we knew... waitaminnit... where was I?... oh yes, the boiling vinegar. I DON'T LIKE THE SMELL.

The dark chocolate (I used chopped-up dark chocolate chips) melted nicely into the sugar-vinegar mixture, and gave it a rich taste that I really liked. The raisins also added some more depth of flavour, and a bit of texture, and of course raisins always go well with pork.

This is a good recipe, and one that I will actually consider cooking for other people. I have somewhat of an eclectic palate, and as some of my friends are not as culinarily adventurous as I am, I have to take this into consideration when I say "Try this!".

Maple Pork Roast with raisins and dark chocolate
Preparation time less than 30 mins
Cooking time over 2 hours
Serves 6

2 tbsp olive oil
1½ kg (3 lbs) pork shoulder roast
2 medium onions, sliced
3 carrots, peeled and sliced
1 C red wine
1 C chicken stock
½ C maple syrup
salt and freshly ground black pepper

¾ C red wine vinegar
¼ C sugar
2 tbsp dark chocolate, chopped
½ C raisins
enough rice for 6 people

Pre-heat oven to 180C/350F/Gas 4.
Place a large saucepan, or dutch oven on high heat.
When very hot add the olive oil and brown the roast on all sides. Remove the roast from the pot and set aside.
Add the onion and stir on heat for a minute until the onion is slightly golden.
Add the roast back into the pot, then add the sliced carrot, red wine, chicken stock and maple syrup, and bring to the boil.
Season with salt and pepper, cover, and place in the pre-heated oven.
Cook for 2 – 2.5 hours, until the meat is tender and falling apart, basting every 20-30 minutes. Make sure the liquid does not completely boil away, adding some more chicken stock or wine if necessary.
While the meat is cooking, place the red wine vinegar and the sugar in a small saucepan, stir till the sugar dissolves and then boil for two minutes.
Add the chopped chocolate, stir it, add the raisins and then set aside to allow the raisins to plump up in the liquid.
When the meat is cooked, shred with two forks and add the chocolate/raisin/vinegar mixture.
Serve with rice.

Thursday, January 25, 2007

WCC #13: Coconut Chicken Curry

When I decided to participate in this month's Weekend Cookbook Challenge, I felt a bit daunted. The theme this time around is to cook a recipe from a recently acquired cookbook, and the one I acquired most recently is The Joy of Cooking - the 75th Anniversary Edition. Which has 4500 recipes in it. This thing is huge, and to work my way through it will take quite a while. Not that I'm complaining.I got it for Christmas from my parents, and I had been meaning to leaf through it anyway, but to choose just one recipe out of so many would take forever, so I took a shortcut. The old 'recipe lottery' approach. I closed my eyes, flipped open the book at random, and dropped a finger to the open page. Why not? My finger dropped on the recipe for "Coconut Chicken Curry" on page 431. Yum. I am a big fan of curry, but have not actually cooked many curry dishes, so this seemed an ideal choice.

This is really a pretty straightforward recipe, but of course it required a trip to the Grocery Palace for supplies, and to the Bulk Barn for a can of coconut milk, which I don't normally stock in my pantry.

One change I made to the recipe was to make my own curry powder. The recipe calls for a tablespoon of 'curry powder' but I thought instead that I would try out another new kitchen gadget acquired at Christmas (also from my parents); a really cool stone mortar and pestle. I took a tablespoon of cumin seeds and a tablespoon of coriander seeds, placed them on a baking sheet and cooked them for a few minutes at 400F until they darkened a couple of shades. Then, I removed the tray from the oven, placed the seeds into the mortar along with a teaspoon of asafoetida, and bashed it good. So aromatic, especially with the asafoetida, which smells like a combination of garlic and onion, although a bit more pungent.

Everything else was a breeze. Some of you may be thinking that this was perhaps not much of a 'challenge' for the Weekend Cookbook Challenge, but it was nice to cook something that didn't have me tearing my hair out for a change. And the payoff was that I ended up with enough tasty chicken for two more meals.

Coconut Chicken Curry
from The Joy of Cooking – 75th Anniversary Edition

2 lbs chicken thighs or breasts
salt & pepper
2 tbsp oil
1 C chopped onions
1 large carrot, peeled and sliced
½ C peas, thawed (if frozen)
2 green onions, chopped
1 jalapeno pepper, seeded & chopped
1 tbsp fresh ginger, peeled and finely chopped
2-3 garlic cloves, crushed and minced (I used 4)
1½ C (or 1 can) unsweetened coconut milk
½ C golden raisins
1 tbsp curry powder
1 tsp salt

Heat oil in large skillet. Add chicken and brown on both sides. Remove from pan.
Add onions, carrot, peas, green onions, jalapeno, ginger and garlic. Cook until the vegetables are soft, about 5 minutes.
Add the coconut milk, raisins, curry powder and salt, and bring to a boil.
Add the chicken, reduce the heat, and simmer for 20 minutes for breasts, or 25 minutes for thighs, or until the sauce is thickened and the chicken is cooked.
Serve with rice.

Friday, December 29, 2006

Again With The Cookies...

Christmas is over for another year. I tell you, coming back to work feels like a rest. It's not easy entertaining two nephews and niece who are all under the age of five. I love them all dearly, and love spending time with them (and my parents and my brother and sister-in-law, of course), but HOLY COW, those kids do not tire easily.

At one point on Boxing Day I was trying to sit quietly for a few minutes, and young James (who is two-and-a-half) found me, grabbed my finger and kept repeating "play Uncle Ian, play". For some strange reason, when I tried to explain to the boy that Uncle Ian was tired, and maybe he should jump on Uncle Monkey Face (don't ask, it's a long story), he just kept saying "play Uncle Ian, play". So of course, I smiled and said, "OK, let's play".So, with a full house of sixteen people, including five children under ten, we had a very nice buffet-style turkey dinner. My brother has a big dining room table, but not big enough to sit sixteen. As my contribution to the meal, I had prepared gift boxes of cookies for everyone. Tell me you're surprised.

Each box contained some Cinnamon Snickerdoodles, some Chocolate Toffee Holiday Cookies, and some Cream Cheese Sugar Cookies. This was the first time I had attempted the sugar cookies, and I vowed at the time that I would never make them again.Let me tell you why.

When it comes baking cookies, flour and I have an amiable relationship most of the time. However, when a certain Ms. Rolling Pin gets involved, things tend to get messy.

As you may have noticed, all of the cookies I have baked lately have been drop cookies, as in "drop the batter by spoonful on to the cookie sheet". I have taken some liberties with this, but that's basically what they are. These sugar cookies were my first foray into the murky world of rolling pins and cookie cutters. It wasn't really an auspicious start, let me tell you.

I really wanted these to work out. I went out and bought some funky new cookie cutters and some red- and green-coloured sugar and was all set. When I made up the cookie dough, it seemed to me that it was a little sticky and loose, but I thought that a couple of hours in the fridge would fix that. That was wishful thinking, apparently.

For this last explosion of cookie-baking, I have been using parchment paper instead of greasing the cookie sheet, and without exception it has been a huge improvement. It's essentially a non-stick surface, and means that I don't have to do anything more than wipe off the pan with a paper towel afterwards, if that.

This dough had other ideas.

I guess the dough didn't have enough flour in it, because it stuck to everything. EVERYTHING. The rolling pin, the kitchen table, the bowl, the parchment paper... AAAAGGGHHHHH! I managed to get about six snowmen cut out and on the cookie sheet before I gave up with the rolling pin. I ended up simply taking a small spoonful of dough, rolling it into a ball, wetting my finger slightly, and patting it down until it was about an 1/8 of an inch thick. Sixty times.The pictures at the top of this post show the sugar cookies that came out of later batches. You'll notice that they're fairly light in colour, and don't have too much coloured sugar on them. The cookies in the picture above were one of the first pans out of the oven. I oversugared them somewhat, and to me, it looked like the cookies had been in a horrible horrible accident, and the lines of melted sugar looked like blood-spatter. I call them "Drive-By Cookies". Look for them soon in a supermarket near you.

The one thing that saved these cookies was that despite their appearance, they tasted wonderful. Made me re-evaluate my "never again" stance, so I will likely have another go at some point.

Here is the recipe for these cookies. May you have better luck with them than I did.

Cream Cheese Sugar Cookies

1 C granulated sugar
1 C softened butter
1/3 C cream cheese, softened
1/2 tsp salt
1/2 tsp almond extract
1/2 tsp vanilla
1 egg yolk (reserve white)
2 C all-purpose flour

In large bowl combine sugar, butter, cream cheese, salt, extracts and egg yolk; blend well. Stir in flour until well blended. Chill dough for 2 hours. Pre-heat oven to 375F. On lightly floured surface, roll out dough one-third at a time to 1/8-inch thickness. Cut into desired shaped with lightly floured cookie cutter.
Place 1 inch apart on ungreased cookie sheet. Leave cookie plain, or brush with lightly beaten egg white and sprinkle with colored sugar. Bake for 7-10 minutes or until light golden brown. Cool completely on wire racks.

Friday, December 22, 2006

Craziness. Absolute craziness.

'Tis the season to be REALLY REALLY busy.

During the rest of the year, I find myself sitting at home evenings thinking, "I know I could be doing something constructive right now, but Trailer Park Boys is on in ten minutes...."Well, careful what you wish for. Over the last two weeks, I have conducted and performed with a small brass ensemble for a Carol Service at a local church (incidentally, the same church at whose book sale I scored a whole pile of cookbooks), organized the annual holiday potluck lunch at my office, baked about fifteen dozen cookies and a four-pound lasagna, and still managed to (almost) finish my Christmas shopping. Oh yeah, and my full-time job.In addition to all of this, the friend of mine who I visited in New Orleans back in May flew into town for the holidays (and boy are his arms tired), so copious partying was required.

The cookies pictured above are an adaptation of the Minnesota Munchers I mentioned in my last post. However, after some more modifications and alterations I have made these my own now, and they will now forever be known as (drumroll) "The Gallumphing Gourmand's Chocolate Toffee Holiday Cookies". Kinda trips off of the tongue, doesn't it? The reason I don't have more pictures of these, is that the little suckers tend to disappear quickly when I bring them to work with me.I have to tell you about the lasagna, though.

I got the idea (and the basic recipe) from my friends Rob & Rachel at the incomparable Hungry In Hogtown, but as a good meat sauce is different for everyone, I consulted several recipes before settling with the one below. Plus, instead of the standard ricotta cheese, I made a nice Béchamel sauce, and bought a big chunk of fresh parmigiano reggiano cheese. The bonus in this whole thing, however, was the fact that the mother of one of my co-workers offered to make me some fresh pasta (thank you, Mrs. Ignagni).She made me sixteen noodles that were about six inches wide and between ten and twelve inches long, and they were all individually wrapped in plastic wrap. This was the most beautiful pasta that I have ever worked with, and definitely improved the taste of the lasagna.

Now, to the nuts & bolts:

Lasagna Bolognese

First, I made the meat sauce and let it rest in the fridge in a sealed container for a few days.
Ragu Bolognese (the meat sauce):
500g (1 lb) extra lean ground beef
500g (1 lb) ground veal
500g (1 lb) mild italian sausage
125g (¼ lb) pancetta, diced
5 tablespoons canola oil
3 tablespoons butter
1 carrot, finely, diced
1 medium onion, diced
1 rib celery, finely diced
4 cloves garlic, crushed and diced
1 can whole roma tomatoes, with liquid
1 C milk
1 C chicken broth
¼ C sherry
Kosher salt and freshly ground black pepper
Parmigiano-Reggiano, for grating

* In a 6 to 8-quart, heavy-bottomed saucepan, heat the olive oil and butter over medium heat.
* Add the onions, celery, and garlic and sweat over medium heat until the vegetables are translucent and soft but not browned, about 10 to 15 minutes.
* Add the ground beef, veal, sausage, and pancetta and stir into the vegetables.
* Turn the heat up to high, stirring to keep the meat from sticking together until it's all browned.
* Add the tomatoes, milk, wine and sherry and stir to combine. Snip the tomatoes into smaller pieces with kitchen scissors. Simmer over medium-low heat for at least 3 hours. You could even turn the heat right down to low, and let that bad boy go the whole day. I simmered my sauce for only three hours due to time constraints. Season with salt and pepper, to taste, and remove from the heat.
* If not using it right away, place in sealed container and store in the fridge. This can also be frozen for up to a couple of months.

On the night before the potluck lunch, I decided to assemble the lasagna, but not cook it until the next morning. So I whipped up some Béchamel sauce to go with the meat sauce.
Bechamel Sauce ~ A Traditional Recipe
1 small yellow onion, peeled and cut into small dice
1 small carrot, peeled and cut into small dice
½ celery rib, cut into small dice
½ C unsalted butter
1/3 C unbleached all purpose flour
4½ C milk
salt and freshly ground black pepper
freshly grated nutmeg
small bouquet garni

* Scald the milk. Remove from heat and set aside.
* Heat the butter in a small saucepan until the foam subsides, then add the diced vegetables. Saute until the onions are translucent.
* Take the pan off the heat and stir in the flour. Put the pan back on the heat and cook about 5 to 7 minutes, stirring occasionally.
* Remove the pan from the heat and slowly whisk in the scalded milk.
* Return to heat and bring up to a boil, stirring constantly with a woodem spoon.
* Season with salt, pepper and nutmeg. Add the bouquet garni, lower heat and simmer for 35 minutes.
* Remove and strain the sauce, without pushing on the vegetables.
**Note: I pushed on the vegetables. I couldn't help it. I'm sorry.
* Cool the sauce in a cold water bath and store in the refrigerator for up to 2 days. May be frozen for up to 3 months.

Now, for the assembly.
* Preheat oven 400°F.
* Cook lasagna in abundant boiling water. When not quite al dente, stop cooking, drain and lay each noodle on a damp towel in preparation for assembling.
* Using a baking dish about 2 inches deep, butter bottom of dish. Line with layer of lasagna. Cover with a thick layer of meat sauce, a little béchamel and some grated parmigiano cheese. Repeat layers in same order. Spread last layer with bechamel and dot with butter.
* Bake in preheated 400°F oven for 20 - 30 minutes or until very browned. Let rest for 10 minutes before serving.

The lasagna turned out great, and as you can tell from the picture at the top, it went very quickly.

Gotta go now. Only two more days of craziness before I can relax.

Wednesday, December 06, 2006

Blah

Sick. Feeling yucky. Baked cookies. Slept a lot. Thinking in monosyllables. Um, except for that one. Why is that such a long word? Anyway, back at work today after being off since Monday afternoon, but as I sit here typing this I'm questioning the wisdom of that decision. Got my orange juice and DayQuil sitting on the desk beside me, and I'm thinking about making some soup.... what was I saying?.... Oh yeah, the cookies....

Tried out another new cookie recipe yesterday, but in my weakened condition, decided not to bother taking pictures. The cookies are called Minnesota Munchers, and I got the recipe a while back from the repository of all good things - Christmas-Cookies.com. Here is the original recipe. It looked like a good enough recipe as is, but me being me I took the liberty of simplifying it a bit.

Minnesota Munchers
makes about 4 dozen cookies

1 C butter, softened
1½ C brown sugar
2 eggs
2 tsp vanilla extract
2½ C all-purpose flour
1 tsp baking powder
¼ tsp salt
1½ C crushed Skor bars
½ C semisweet chocolate chips
1 C chopped pecans

Preheat oven to 350 F. Grease two cookie sheets.
In a medium bowl, cream together butter and sugar. Beat in eggs, one at a time, and then stir in vanilla.
Combine flour, baking powder and salt; stir into creamed mixture.
Fold in semisweet chips, Skor bars and pecans. Drop by tablespoons onto cookie sheet.
Bake for 10 to 12 minutes in preheated oven. Cool on baking sheet for 5 minutes before removing to cool completely on wire racks.


The recipe originally called for a cup of milk chocolate chips and a half a cup of toffee bits. Well, that sounded suspiciously like Skor bars to me so I just used a cup and a half of crushed up Skor bars instead. There's nothing quite so relaxing as smacking the hell out of a ziploc baggie full of Skor bars with a wooden mallet, if it wasn't for all the racket.

As you may be able to tell from the recipe, these are just jazzed-up chocolate chip cookies, but the addition of the pecans and the toffee really gives them an extra something. I was planning to use an incredibly pithy and descriptive word there, but my brain hurts right now. However, the pecans give an extra crunch, and the toffee melts, leaving little pockets of crispy toffee crunchies in the middle of the cookies. If I think of it, I'll take some pictures and insert them later. After my nap.

Friday, December 01, 2006

A Cornucopia Of Cookies

As I mentioned in my last entry, I've started my Christmas baking, and to this end I'm trying out some new recipes and playing around with some old recipes this year. My co-workers and friends have been the biggest beneficiary of this, as I've been giving away dozens of cookies, and bringing some to work with me as well. The two kinds of cookies I've been concentrating on lately are Lime Macaroons and Christmas Cheer Cookies. The macaroons are pretty self-explanatory, and the Christmas Cheer cookies likely are so named because of the maraschino cherries on the top of each cookie which are so festive. Or, maybe it's the half cup of rum. I'll let you decide.

I've made the Christmas Cheer cookies several times before, and I'm starting to get the hang of them. I've found that they really benefit from chilling the cookie dough in the fridge for a few hours, even overnight.

This is a huge recipe, and will yield about eight dozen cookies, depending on how big you make each one. When I whipped up the batch of cookie dough, I baked a few dozen right away without refrigerating the dough. The results are pictured above. They turned out absolutely fine and tasted wonderful, but the next batch I made the following day, after chilling the dough overnight, had a certain je ne sais what that really made them spectactular. The cookies were almost flaky.Now, a few notes about the recipe.

First of all, I found the original recipe here at Christmas-Cookies.com. I took the liberty of making a couple of minor substitutions, replacing the 1/2 cup of whisky with rum. Not a big deal you would think, and I certainly don't have anything against whisky (see previous posts about my adventures with whisky here and here), but I found that the rum gave the cookies a fuller, richer taste. Also, the recipe calls for 'golden raisins'. I used sultanas, because they were on sale at the bulk food store for $.29/100g (about $1.30/lb). Another thing I tried, was to roll the dough into a log, then slice it into little puck-shaped cookies instead of the spoonful-drop method. I found it easier with this method to control the size of the cookies, and to figure out how many I would end up with when I ran out of dough.

So here's the recipe I used:

Christmas Cheer Cookies
makes 8 dozen cookies

1 C butter, softened
1½ C brown sugar
3 eggs
3 C un-sifted flour
1 tsp baking soda
500g (1 lb.) dates, chopped
500g (1 lb.) walnuts, chopped
250g (½ lb.) sultana raisins
½ C dark rum
about 250g (½ lb.) maraschino cherries, drained and cut in halves

Cream butter and sugar until light and fluffy. Add eggs. Beat until ingredients are combined. Mix flour and soda. Stir in dates, walnuts, raisins and rum. Batter will be stiff.
Refrigerate dough a few hours, or overnight.
Preheat oven to 350 F (180 C).
Drop by teaspoonful onto ungreased cookie sheet, or roll dough into a log and slice cookies about 1/2 inch thick. Top each with cherry halves.
Bake 10-12 minutes. Store in airtight container.

Now, for the macaroons. This is THE simplest cookie recipe I have ever made. Four ingredients and minimal prep time make these cookies a breeze.I made a couple of batches of these, and I discovered that it's best to let these cool completely before trying to move them or lift them off the parchment paper. Otherwise they just fall apart on you. I like macaroons quite a bit, but I had never tried the lime-flavoured variety. The tartness of the lime zest really compliments the sweetness of the coconut and sugar. The taste is delicate, and they go really well with a cup of coffee (as I discovered this morning). 'Nuff said, here's the recipe.

Lime Macaroons
makes about 15 cookies

2 C desiccated coconut
½ C sugar
2 egg whites
2 tbsp shredded lime zest

Preheat the oven to 180ºC (350ºF).
Place the coconut, sugar, egg whites and lime zest in a bowl and mix to combine. Roll the mixture into balls. Place on a lined baking tray, flatten slightly and cook for 10-12 minutes or until light golden. Let cool completely.

I can't for the life of me remember where I found this recipe, but it's been sitting in my 'to do' pile for quite a while now. I'm glad that I finally got it, because this recipe is a keeper.

Thursday, November 23, 2006

A Few Changes...

Hi guys, GG here. You may have noticed some changes with my blog. I am currently in the process of converting to the new 'Beta' version of Blogger, so it may take a few days to work out all the kinks. Technical difficulties are temporary (I hope).

Meanwhile, here's a fantastic and simple recipe for Cinnamon Snickerdoodles.
I found the recipe at "In The Kitchen With Krista" - here. My Christmas baking has officially begun. These are VERY tasty cookies, and one of the easiest recipes I've ever found. The most important part of this recipe is to refrigerate the cookie dough for at least four hours (I had them in the fridge overnight) before baking. It seemed to make the cookies fluffier.

Ultimate Snickerdoodles
Makes about 4 dozen cookies

1 C Butter (please, no substituting this!)
1½ C Sugar
2 eggs
2¾ C All Purpose Flour
2 tsp Cream of Tartar
1 tsp baking soda
¼ tsp salt
2 tbsp PLUS 2 tsp Cinnamon (divided)
2 tbsp Sugar

* In a small bowl mix the 2 tsp Cinnamon and the 2 tbsp Sugar, set aside.
* In a bowl, lined with a sifter or sieve, place flour, cream of tartar, baking soda, salt and 2 tbsp Cinnamon. Set aside.
* In large mixing bowl, cream butter and sugar until light and fluffy. Add eggs 1 at a time, continue to beat. Scrape sides as necessary. Add flour mixture - 1 cup at a time to the butter mixture until well blended.
* Refrigerate dough for at least 30 minutes (see note above).
* Preheat oven to 375.
* Form dough into walnut sized balls. Roll balls into sugar/cinnamon mixture, coating well.
* Place balls 2" apart on a cookie sheet.
* Bake about 10 mins until a golden brown. Remove and cool on rack.
Note: they will puff at first when cooking, then flatten - this is normal.

Wednesday, November 08, 2006

Ready, Set, Cook! #21: Spooky Chili

November has arrived, and it has started to get coooold here in Toronto. No snow as of yet, but it can't be too far away. What a perfect excuse to make some hot, tasty, stick-to-your-ribs kind of comfort food. Of course I'm talking about chili. I had just gotten home from the football game on Sunday - the Toronto Argonauts had beaten the Winnipeg Blue Bombers in a stunning fourth quarter come-from-behind victory to advance to the next round of the playoffs - and I thought that a big pot of chili would be just the thing to help celebrate. This was another first for Yours Truly, and completes the trifecta of Ready, Set, Cook! recipes I have created over the last month or so.The recipe is for Pumpkin Chili, and in celebration of Hallowe'en, I decided to serve the chili in a hollowed-out pumpkin. Isn't that SPEC-ial. The eyes are the tops from the jalapeno peppers. I used the bottom half of a yogurt tub to line the pumpkin, because I really didn't feel like eating chili out of a raw pumpkin. The thought gives me the chili-willies. Ha! I made a funny. The original recipe can be found here at the incomparable Anne's (of Cooking With Anne) site. The recipe I actually used has been reproduced below. For once, I stuck almost exactly to the original recipe.

Pumpkin Chili
makes 1 ginormous pot 'o chili

500g (about 1 lb.) ground beef
1 large onion, chopped
2 medium orange bell peppers, chopped
5 cloves garlic, minced
1 798ml(28oz) can crushed tomatoes
1 15oz can pureed pumpkin
1 large can of red kidney beans
1 C sherry (or red wine, or chicken stock)
4 large jalapeno peppers with seeds, chopped
1 small can of niblet corn
1 tbsp chipotle pepper flakes
1 tsp cumin
1 tsp salt
fresh ground black pepper
grated Monterey Jack cheese
toast pieces

* Heat a little oil in a large pot over medium-high heat. Add the onion, bell pepper, garlic and some fresh ground black pepper. Cook until the onions and peppers have started to soften, about 5 minutes.
* Add the ground beef, and cook until the beef has completely browned.
* Add the sherry, the tomatoes, the kidney beans, the pumpkin, the jalapenos, the corn and the spices. Stir to combine.
* Bring to a boil, then reduce heat to low and let simmer, covered, for anywhere between four and twelve hours, depending on how patient and/or hungry you are. After asking around at work today, the concensus is that you should let the chili reduce by about an inch or so. I was both impatient and hungry, and declared it done after 1 1/2 hours.
* Spoon into your handy-dandy hollowed-out pumpkin (or a bowl if you don't happen to have one handy) and top with grated cheese.
* Serve with toast or pita bread or toritlla chips.


For a first attempt, I was pretty happy with the way this turned out. The hardest part of this whole deal was carving the pumpkin. Oh, and waiting for it to be done. A friend at work suggested the distraction method for making sure the chili cooks long enough: while the chili is cooking, make a casserole for dinner so you're not constantly jonesing over the chili.The pumpkin was an interesting addition. I couldn't really taste it in the final product, but it seemed to add a nice creamy texture. Also, the next time I make chili, I will add a chunk of smoky bacon to the pot. And maybe omit the corn.

With the addition of the four whole giant jalapenos (including the seeds), plus the heaping tablespoon of chipotle pepper flakes, there was some heat, but not as much as I expected. I guess simmering longer would take care of that. I found that the chili was hot enough to leave a nice tingle on the tongue and in the back of the throat, and made my nose run a little bit, but I didn't start sweating profusely, or have all of my sinuses drain at once. Oh well, maybe next time. The best thing about this chili is that it has lasted for three days, and been five meals. I'm going to take a break from chili now.