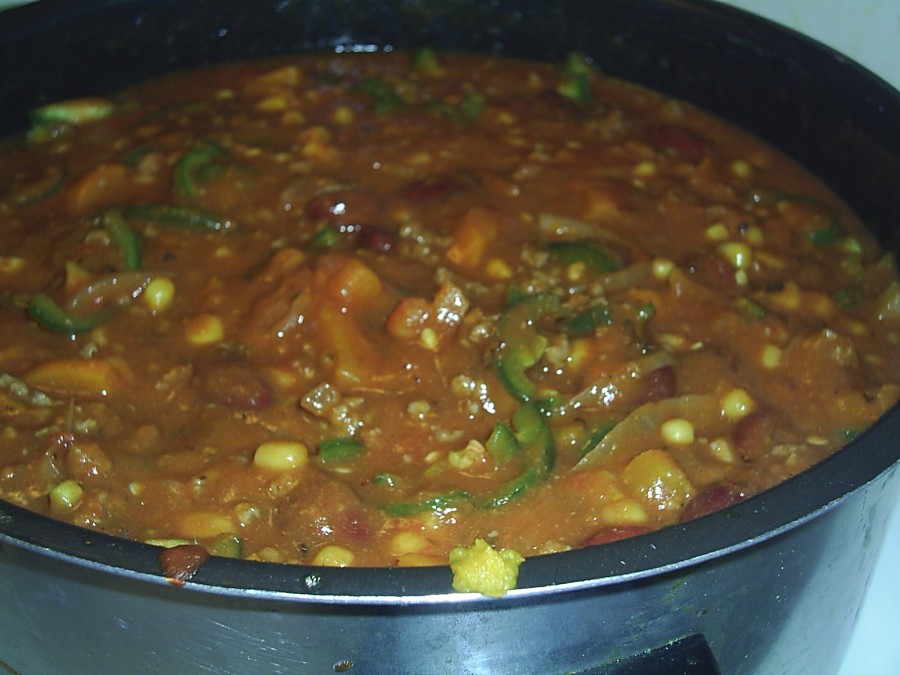
November has arrived, and it has started to get coooold here in Toronto. No snow as of yet, but it can't be too far away. What a perfect excuse to make some hot, tasty, stick-to-your-ribs kind of comfort food. Of course I'm talking about chili. I had just gotten home from the football game on Sunday - the Toronto Argonauts had beaten the Winnipeg Blue Bombers in a stunning fourth quarter come-from-behind victory to advance to the next round of the playoffs - and I thought that a big pot of chili would be just the thing to help celebrate. This was another first for Yours Truly, and completes the trifecta of Ready, Set, Cook! recipes I have created over the last month or so.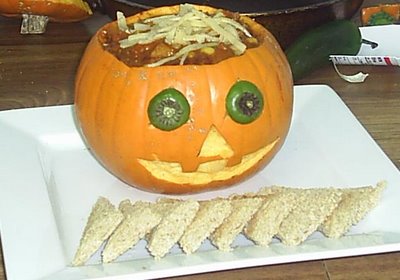 The recipe is for Pumpkin Chili, and in celebration of Hallowe'en, I decided to serve the chili in a hollowed-out pumpkin. Isn't that SPEC-ial. The eyes are the tops from the jalapeno peppers. I used the bottom half of a yogurt tub to line the pumpkin, because I really didn't feel like eating chili out of a raw pumpkin. The thought gives me the chili-willies. Ha! I made a funny. The original recipe can be found here at the incomparable Anne's (of Cooking With Anne) site. The recipe I actually used has been reproduced below. For once, I stuck almost exactly to the original recipe.
Pumpkin Chili
makes 1 ginormous pot 'o chili
500g (about 1 lb.) ground beef
1 large onion, chopped
2 medium orange bell peppers, chopped
5 cloves garlic, minced
1 798ml(28oz) can crushed tomatoes
1 15oz can pureed pumpkin
1 large can of red kidney beans
1 C sherry (or red wine, or chicken stock)
4 large jalapeno peppers with seeds, chopped
1 small can of niblet corn
1 tbsp chipotle pepper flakes
1 tsp cumin
1 tsp salt
fresh ground black pepper
grated Monterey Jack cheese
toast pieces
* Heat a little oil in a large pot over medium-high heat. Add the onion, bell pepper, garlic and some fresh ground black pepper. Cook until the onions and peppers have started to soften, about 5 minutes.
* Add the ground beef, and cook until the beef has completely browned.
* Add the sherry, the tomatoes, the kidney beans, the pumpkin, the jalapenos, the corn and the spices. Stir to combine.
* Bring to a boil, then reduce heat to low and let simmer, covered, for anywhere between four and twelve hours, depending on how patient and/or hungry you are. After asking around at work today, the concensus is that you should let the chili reduce by about an inch or so. I was both impatient and hungry, and declared it done after 1 1/2 hours.
* Spoon into your handy-dandy hollowed-out pumpkin (or a bowl if you don't happen to have one handy) and top with grated cheese.
* Serve with toast or pita bread or toritlla chips.
For a first attempt, I was pretty happy with the way this turned out. The hardest part of this whole deal was carving the pumpkin. Oh, and waiting for it to be done. A friend at work suggested the distraction method for making sure the chili cooks long enough: while the chili is cooking, make a casserole for dinner so you're not constantly jonesing over the chili.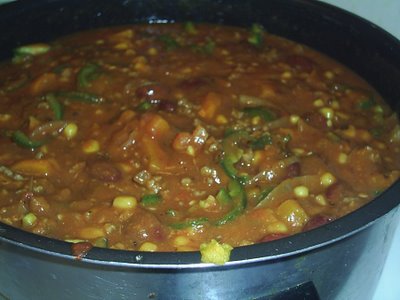 The pumpkin was an interesting addition. I couldn't really taste it in the final product, but it seemed to add a nice creamy texture. Also, the next time I make chili, I will add a chunk of smoky bacon to the pot. And maybe omit the corn.
With the addition of the four whole giant jalapenos (including the seeds), plus the heaping tablespoon of chipotle pepper flakes, there was some heat, but not as much as I expected. I guess simmering longer would take care of that. I found that the chili was hot enough to leave a nice tingle on the tongue and in the back of the throat, and made my nose run a little bit, but I didn't start sweating profusely, or have all of my sinuses drain at once. Oh well, maybe next time. The best thing about this chili is that it has lasted for three days, and been five meals. I'm going to take a break from chili now.

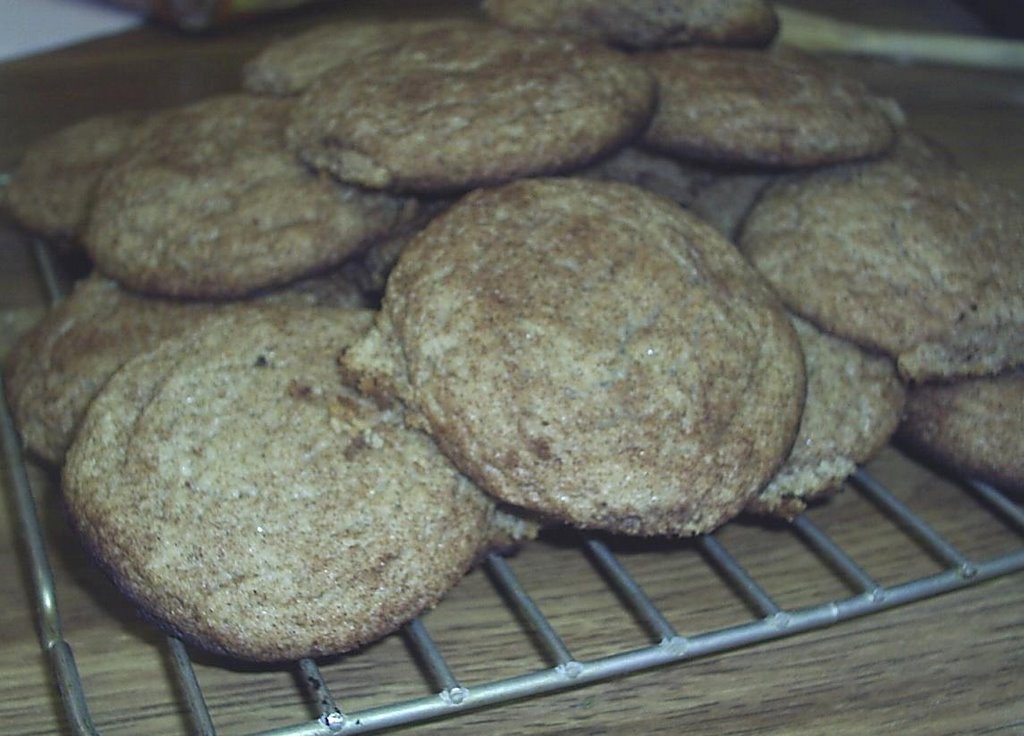 I found the recipe at "In The Kitchen With Krista" - here. My Christmas baking has officially begun. These are VERY tasty cookies, and one of the easiest recipes I've ever found. The most important part of this recipe is to refrigerate the cookie dough for at least four hours (I had them in the fridge overnight) before baking. It seemed to make the cookies fluffier.