Friday, December 29, 2006

Again With The Cookies...

Christmas is over for another year. I tell you, coming back to work feels like a rest. It's not easy entertaining two nephews and niece who are all under the age of five. I love them all dearly, and love spending time with them (and my parents and my brother and sister-in-law, of course), but HOLY COW, those kids do not tire easily.

At one point on Boxing Day I was trying to sit quietly for a few minutes, and young James (who is two-and-a-half) found me, grabbed my finger and kept repeating "play Uncle Ian, play". For some strange reason, when I tried to explain to the boy that Uncle Ian was tired, and maybe he should jump on Uncle Monkey Face (don't ask, it's a long story), he just kept saying "play Uncle Ian, play". So of course, I smiled and said, "OK, let's play".So, with a full house of sixteen people, including five children under ten, we had a very nice buffet-style turkey dinner. My brother has a big dining room table, but not big enough to sit sixteen. As my contribution to the meal, I had prepared gift boxes of cookies for everyone. Tell me you're surprised.

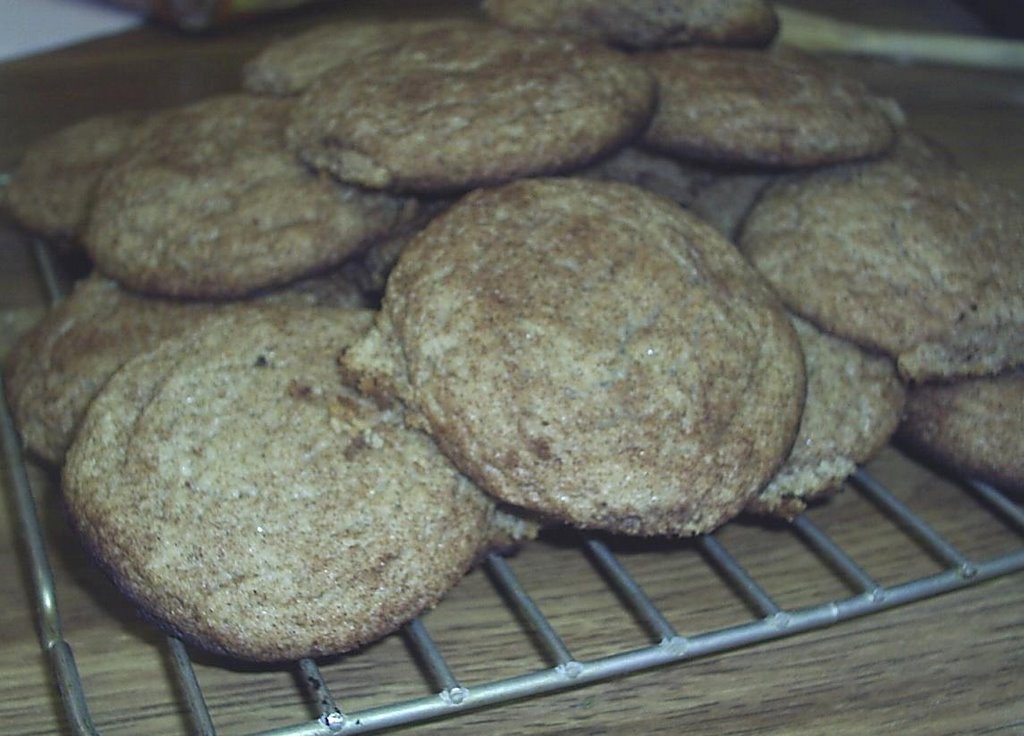
Each box contained some Cinnamon Snickerdoodles, some Chocolate Toffee Holiday Cookies, and some Cream Cheese Sugar Cookies. This was the first time I had attempted the sugar cookies, and I vowed at the time that I would never make them again.Let me tell you why.

When it comes baking cookies, flour and I have an amiable relationship most of the time. However, when a certain Ms. Rolling Pin gets involved, things tend to get messy.

As you may have noticed, all of the cookies I have baked lately have been drop cookies, as in "drop the batter by spoonful on to the cookie sheet". I have taken some liberties with this, but that's basically what they are. These sugar cookies were my first foray into the murky world of rolling pins and cookie cutters. It wasn't really an auspicious start, let me tell you.

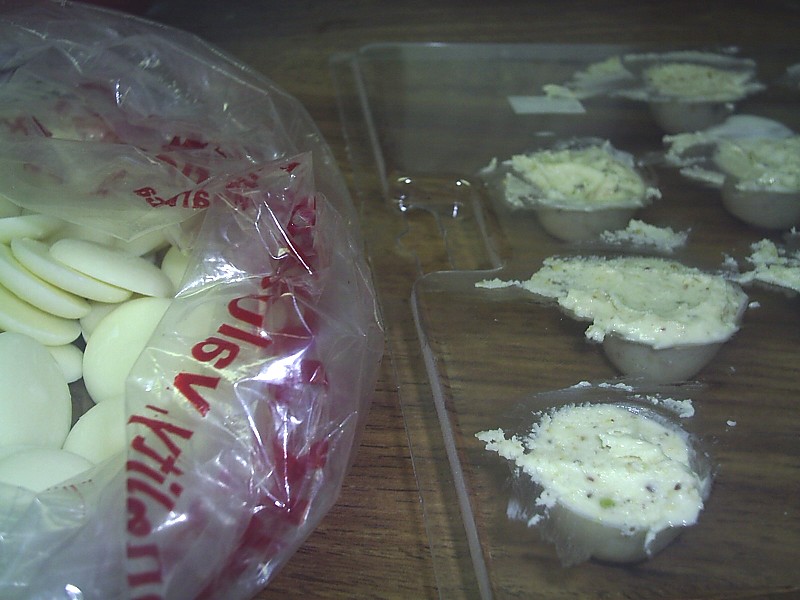
I really wanted these to work out. I went out and bought some funky new cookie cutters and some red- and green-coloured sugar and was all set. When I made up the cookie dough, it seemed to me that it was a little sticky and loose, but I thought that a couple of hours in the fridge would fix that. That was wishful thinking, apparently.

For this last explosion of cookie-baking, I have been using parchment paper instead of greasing the cookie sheet, and without exception it has been a huge improvement. It's essentially a non-stick surface, and means that I don't have to do anything more than wipe off the pan with a paper towel afterwards, if that.

This dough had other ideas.

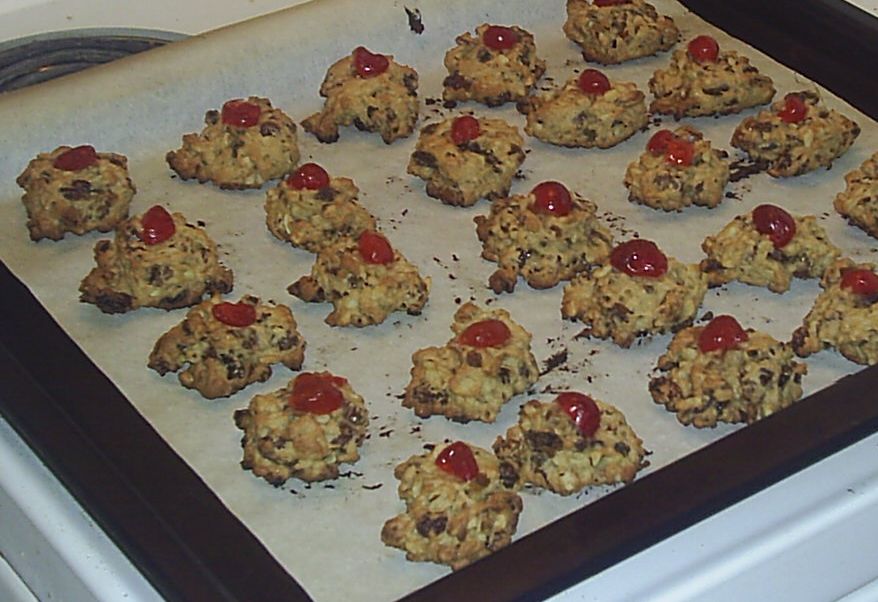
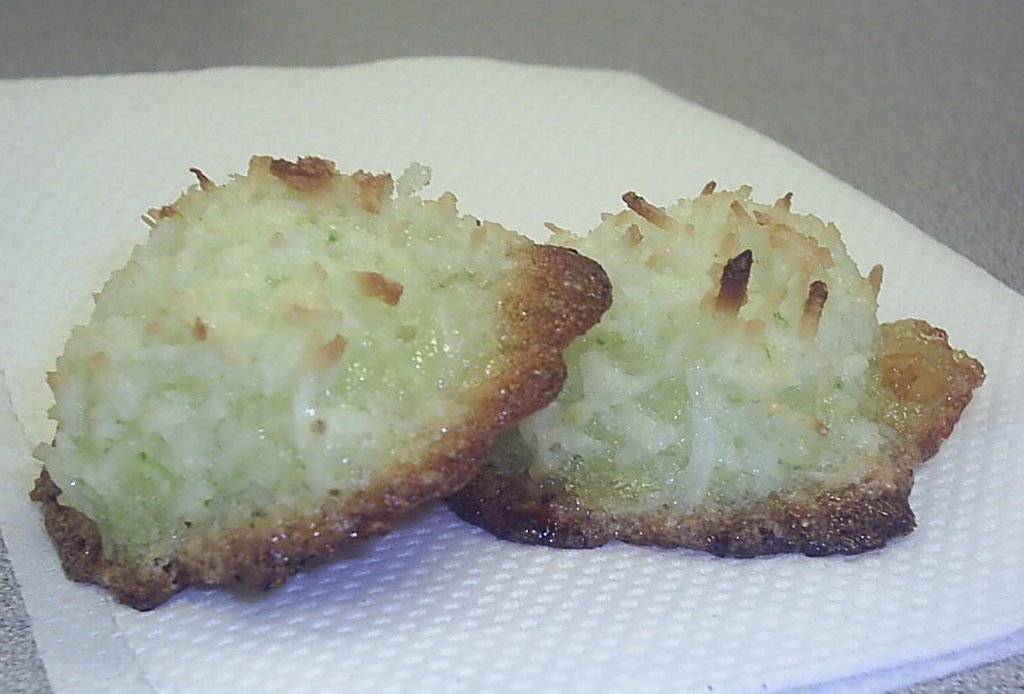
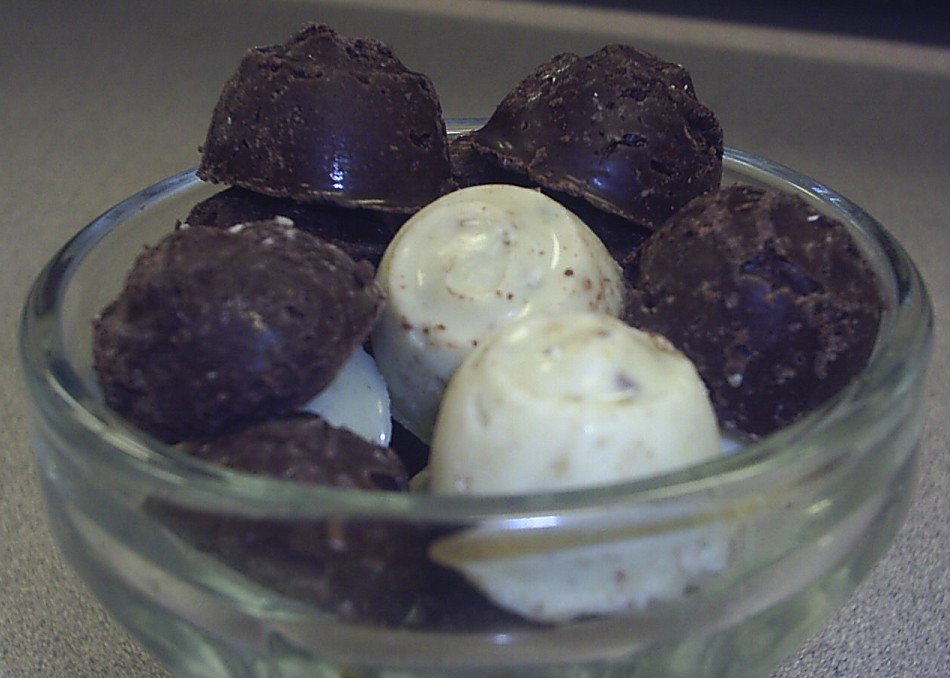
I guess the dough didn't have enough flour in it, because it stuck to everything. EVERYTHING. The rolling pin, the kitchen table, the bowl, the parchment paper... AAAAGGGHHHHH! I managed to get about six snowmen cut out and on the cookie sheet before I gave up with the rolling pin. I ended up simply taking a small spoonful of dough, rolling it into a ball, wetting my finger slightly, and patting it down until it was about an 1/8 of an inch thick. Sixty times.The pictures at the top of this post show the sugar cookies that came out of later batches. You'll notice that they're fairly light in colour, and don't have too much coloured sugar on them. The cookies in the picture above were one of the first pans out of the oven. I oversugared them somewhat, and to me, it looked like the cookies had been in a horrible horrible accident, and the lines of melted sugar looked like blood-spatter. I call them "Drive-By Cookies". Look for them soon in a supermarket near you.

The one thing that saved these cookies was that despite their appearance, they tasted wonderful. Made me re-evaluate my "never again" stance, so I will likely have another go at some point.

Here is the recipe for these cookies. May you have better luck with them than I did.

Cream Cheese Sugar Cookies

1 C granulated sugar
1 C softened butter
1/3 C cream cheese, softened
1/2 tsp salt
1/2 tsp almond extract
1/2 tsp vanilla
1 egg yolk (reserve white)
2 C all-purpose flour

In large bowl combine sugar, butter, cream cheese, salt, extracts and egg yolk; blend well. Stir in flour until well blended. Chill dough for 2 hours. Pre-heat oven to 375F. On lightly floured surface, roll out dough one-third at a time to 1/8-inch thickness. Cut into desired shaped with lightly floured cookie cutter.
Place 1 inch apart on ungreased cookie sheet. Leave cookie plain, or brush with lightly beaten egg white and sprinkle with colored sugar. Bake for 7-10 minutes or until light golden brown. Cool completely on wire racks.

Friday, December 22, 2006

Craziness. Absolute craziness.

'Tis the season to be REALLY REALLY busy.

During the rest of the year, I find myself sitting at home evenings thinking, "I know I could be doing something constructive right now, but Trailer Park Boys is on in ten minutes...."Well, careful what you wish for. Over the last two weeks, I have conducted and performed with a small brass ensemble for a Carol Service at a local church (incidentally, the same church at whose book sale I scored a whole pile of cookbooks), organized the annual holiday potluck lunch at my office, baked about fifteen dozen cookies and a four-pound lasagna, and still managed to (almost) finish my Christmas shopping. Oh yeah, and my full-time job.In addition to all of this, the friend of mine who I visited in New Orleans back in May flew into town for the holidays (and boy are his arms tired), so copious partying was required.

The cookies pictured above are an adaptation of the Minnesota Munchers I mentioned in my last post. However, after some more modifications and alterations I have made these my own now, and they will now forever be known as (drumroll) "The Gallumphing Gourmand's Chocolate Toffee Holiday Cookies". Kinda trips off of the tongue, doesn't it? The reason I don't have more pictures of these, is that the little suckers tend to disappear quickly when I bring them to work with me.I have to tell you about the lasagna, though.

I got the idea (and the basic recipe) from my friends Rob & Rachel at the incomparable Hungry In Hogtown, but as a good meat sauce is different for everyone, I consulted several recipes before settling with the one below. Plus, instead of the standard ricotta cheese, I made a nice Béchamel sauce, and bought a big chunk of fresh parmigiano reggiano cheese. The bonus in this whole thing, however, was the fact that the mother of one of my co-workers offered to make me some fresh pasta (thank you, Mrs. Ignagni).She made me sixteen noodles that were about six inches wide and between ten and twelve inches long, and they were all individually wrapped in plastic wrap. This was the most beautiful pasta that I have ever worked with, and definitely improved the taste of the lasagna.

Now, to the nuts & bolts:

Lasagna Bolognese

First, I made the meat sauce and let it rest in the fridge in a sealed container for a few days.
Ragu Bolognese (the meat sauce):
500g (1 lb) extra lean ground beef
500g (1 lb) ground veal
500g (1 lb) mild italian sausage
125g (¼ lb) pancetta, diced
5 tablespoons canola oil
3 tablespoons butter
1 carrot, finely, diced
1 medium onion, diced
1 rib celery, finely diced
4 cloves garlic, crushed and diced
1 can whole roma tomatoes, with liquid
1 C milk
1 C chicken broth
¼ C sherry
Kosher salt and freshly ground black pepper
Parmigiano-Reggiano, for grating

* In a 6 to 8-quart, heavy-bottomed saucepan, heat the olive oil and butter over medium heat.
* Add the onions, celery, and garlic and sweat over medium heat until the vegetables are translucent and soft but not browned, about 10 to 15 minutes.
* Add the ground beef, veal, sausage, and pancetta and stir into the vegetables.
* Turn the heat up to high, stirring to keep the meat from sticking together until it's all browned.
* Add the tomatoes, milk, wine and sherry and stir to combine. Snip the tomatoes into smaller pieces with kitchen scissors. Simmer over medium-low heat for at least 3 hours. You could even turn the heat right down to low, and let that bad boy go the whole day. I simmered my sauce for only three hours due to time constraints. Season with salt and pepper, to taste, and remove from the heat.
* If not using it right away, place in sealed container and store in the fridge. This can also be frozen for up to a couple of months.

On the night before the potluck lunch, I decided to assemble the lasagna, but not cook it until the next morning. So I whipped up some Béchamel sauce to go with the meat sauce.
Bechamel Sauce ~ A Traditional Recipe
1 small yellow onion, peeled and cut into small dice
1 small carrot, peeled and cut into small dice
½ celery rib, cut into small dice
½ C unsalted butter
1/3 C unbleached all purpose flour
4½ C milk
salt and freshly ground black pepper
freshly grated nutmeg
small bouquet garni

* Scald the milk. Remove from heat and set aside.
* Heat the butter in a small saucepan until the foam subsides, then add the diced vegetables. Saute until the onions are translucent.
* Take the pan off the heat and stir in the flour. Put the pan back on the heat and cook about 5 to 7 minutes, stirring occasionally.
* Remove the pan from the heat and slowly whisk in the scalded milk.
* Return to heat and bring up to a boil, stirring constantly with a woodem spoon.
* Season with salt, pepper and nutmeg. Add the bouquet garni, lower heat and simmer for 35 minutes.
* Remove and strain the sauce, without pushing on the vegetables.
**Note: I pushed on the vegetables. I couldn't help it. I'm sorry.
* Cool the sauce in a cold water bath and store in the refrigerator for up to 2 days. May be frozen for up to 3 months.

Now, for the assembly.
* Preheat oven 400°F.
* Cook lasagna in abundant boiling water. When not quite al dente, stop cooking, drain and lay each noodle on a damp towel in preparation for assembling.
* Using a baking dish about 2 inches deep, butter bottom of dish. Line with layer of lasagna. Cover with a thick layer of meat sauce, a little béchamel and some grated parmigiano cheese. Repeat layers in same order. Spread last layer with bechamel and dot with butter.
* Bake in preheated 400°F oven for 20 - 30 minutes or until very browned. Let rest for 10 minutes before serving.

The lasagna turned out great, and as you can tell from the picture at the top, it went very quickly.

Gotta go now. Only two more days of craziness before I can relax.

Wednesday, December 06, 2006

Blah

Sick. Feeling yucky. Baked cookies. Slept a lot. Thinking in monosyllables. Um, except for that one. Why is that such a long word? Anyway, back at work today after being off since Monday afternoon, but as I sit here typing this I'm questioning the wisdom of that decision. Got my orange juice and DayQuil sitting on the desk beside me, and I'm thinking about making some soup.... what was I saying?.... Oh yeah, the cookies....

Tried out another new cookie recipe yesterday, but in my weakened condition, decided not to bother taking pictures. The cookies are called Minnesota Munchers, and I got the recipe a while back from the repository of all good things - Christmas-Cookies.com. Here is the original recipe. It looked like a good enough recipe as is, but me being me I took the liberty of simplifying it a bit.

Minnesota Munchers
makes about 4 dozen cookies

1 C butter, softened
1½ C brown sugar
2 eggs
2 tsp vanilla extract
2½ C all-purpose flour
1 tsp baking powder
¼ tsp salt
1½ C crushed Skor bars
½ C semisweet chocolate chips
1 C chopped pecans

Preheat oven to 350 F. Grease two cookie sheets.
In a medium bowl, cream together butter and sugar. Beat in eggs, one at a time, and then stir in vanilla.
Combine flour, baking powder and salt; stir into creamed mixture.
Fold in semisweet chips, Skor bars and pecans. Drop by tablespoons onto cookie sheet.
Bake for 10 to 12 minutes in preheated oven. Cool on baking sheet for 5 minutes before removing to cool completely on wire racks.


The recipe originally called for a cup of milk chocolate chips and a half a cup of toffee bits. Well, that sounded suspiciously like Skor bars to me so I just used a cup and a half of crushed up Skor bars instead. There's nothing quite so relaxing as smacking the hell out of a ziploc baggie full of Skor bars with a wooden mallet, if it wasn't for all the racket.

As you may be able to tell from the recipe, these are just jazzed-up chocolate chip cookies, but the addition of the pecans and the toffee really gives them an extra something. I was planning to use an incredibly pithy and descriptive word there, but my brain hurts right now. However, the pecans give an extra crunch, and the toffee melts, leaving little pockets of crispy toffee crunchies in the middle of the cookies. If I think of it, I'll take some pictures and insert them later. After my nap.

Friday, December 01, 2006

A Cornucopia Of Cookies

As I mentioned in my last entry, I've started my Christmas baking, and to this end I'm trying out some new recipes and playing around with some old recipes this year. My co-workers and friends have been the biggest beneficiary of this, as I've been giving away dozens of cookies, and bringing some to work with me as well. The two kinds of cookies I've been concentrating on lately are Lime Macaroons and Christmas Cheer Cookies. The macaroons are pretty self-explanatory, and the Christmas Cheer cookies likely are so named because of the maraschino cherries on the top of each cookie which are so festive. Or, maybe it's the half cup of rum. I'll let you decide.

I've made the Christmas Cheer cookies several times before, and I'm starting to get the hang of them. I've found that they really benefit from chilling the cookie dough in the fridge for a few hours, even overnight.

This is a huge recipe, and will yield about eight dozen cookies, depending on how big you make each one. When I whipped up the batch of cookie dough, I baked a few dozen right away without refrigerating the dough. The results are pictured above. They turned out absolutely fine and tasted wonderful, but the next batch I made the following day, after chilling the dough overnight, had a certain je ne sais what that really made them spectactular. The cookies were almost flaky.Now, a few notes about the recipe.

First of all, I found the original recipe here at Christmas-Cookies.com. I took the liberty of making a couple of minor substitutions, replacing the 1/2 cup of whisky with rum. Not a big deal you would think, and I certainly don't have anything against whisky (see previous posts about my adventures with whisky here and here), but I found that the rum gave the cookies a fuller, richer taste. Also, the recipe calls for 'golden raisins'. I used sultanas, because they were on sale at the bulk food store for $.29/100g (about $1.30/lb). Another thing I tried, was to roll the dough into a log, then slice it into little puck-shaped cookies instead of the spoonful-drop method. I found it easier with this method to control the size of the cookies, and to figure out how many I would end up with when I ran out of dough.

So here's the recipe I used:

Christmas Cheer Cookies
makes 8 dozen cookies

1 C butter, softened
1½ C brown sugar
3 eggs
3 C un-sifted flour
1 tsp baking soda
500g (1 lb.) dates, chopped
500g (1 lb.) walnuts, chopped
250g (½ lb.) sultana raisins
½ C dark rum
about 250g (½ lb.) maraschino cherries, drained and cut in halves

Cream butter and sugar until light and fluffy. Add eggs. Beat until ingredients are combined. Mix flour and soda. Stir in dates, walnuts, raisins and rum. Batter will be stiff.
Refrigerate dough a few hours, or overnight.
Preheat oven to 350 F (180 C).
Drop by teaspoonful onto ungreased cookie sheet, or roll dough into a log and slice cookies about 1/2 inch thick. Top each with cherry halves.
Bake 10-12 minutes. Store in airtight container.

Now, for the macaroons. This is THE simplest cookie recipe I have ever made. Four ingredients and minimal prep time make these cookies a breeze.I made a couple of batches of these, and I discovered that it's best to let these cool completely before trying to move them or lift them off the parchment paper. Otherwise they just fall apart on you. I like macaroons quite a bit, but I had never tried the lime-flavoured variety. The tartness of the lime zest really compliments the sweetness of the coconut and sugar. The taste is delicate, and they go really well with a cup of coffee (as I discovered this morning). 'Nuff said, here's the recipe.

Lime Macaroons
makes about 15 cookies

2 C desiccated coconut
½ C sugar
2 egg whites
2 tbsp shredded lime zest

Preheat the oven to 180ºC (350ºF).
Place the coconut, sugar, egg whites and lime zest in a bowl and mix to combine. Roll the mixture into balls. Place on a lined baking tray, flatten slightly and cook for 10-12 minutes or until light golden. Let cool completely.

I can't for the life of me remember where I found this recipe, but it's been sitting in my 'to do' pile for quite a while now. I'm glad that I finally got it, because this recipe is a keeper.

Thursday, November 23, 2006

A Few Changes...

Hi guys, GG here. You may have noticed some changes with my blog. I am currently in the process of converting to the new 'Beta' version of Blogger, so it may take a few days to work out all the kinks. Technical difficulties are temporary (I hope).

Meanwhile, here's a fantastic and simple recipe for Cinnamon Snickerdoodles.
I found the recipe at "In The Kitchen With Krista" - here. My Christmas baking has officially begun. These are VERY tasty cookies, and one of the easiest recipes I've ever found. The most important part of this recipe is to refrigerate the cookie dough for at least four hours (I had them in the fridge overnight) before baking. It seemed to make the cookies fluffier.

Ultimate Snickerdoodles
Makes about 4 dozen cookies

1 C Butter (please, no substituting this!)
1½ C Sugar
2 eggs
2¾ C All Purpose Flour
2 tsp Cream of Tartar
1 tsp baking soda
¼ tsp salt
2 tbsp PLUS 2 tsp Cinnamon (divided)
2 tbsp Sugar

* In a small bowl mix the 2 tsp Cinnamon and the 2 tbsp Sugar, set aside.
* In a bowl, lined with a sifter or sieve, place flour, cream of tartar, baking soda, salt and 2 tbsp Cinnamon. Set aside.
* In large mixing bowl, cream butter and sugar until light and fluffy. Add eggs 1 at a time, continue to beat. Scrape sides as necessary. Add flour mixture - 1 cup at a time to the butter mixture until well blended.
* Refrigerate dough for at least 30 minutes (see note above).
* Preheat oven to 375.
* Form dough into walnut sized balls. Roll balls into sugar/cinnamon mixture, coating well.
* Place balls 2" apart on a cookie sheet.
* Bake about 10 mins until a golden brown. Remove and cool on rack.
Note: they will puff at first when cooking, then flatten - this is normal.

Wednesday, November 08, 2006

Ready, Set, Cook! #21: Spooky Chili

November has arrived, and it has started to get coooold here in Toronto. No snow as of yet, but it can't be too far away. What a perfect excuse to make some hot, tasty, stick-to-your-ribs kind of comfort food. Of course I'm talking about chili. I had just gotten home from the football game on Sunday - the Toronto Argonauts had beaten the Winnipeg Blue Bombers in a stunning fourth quarter come-from-behind victory to advance to the next round of the playoffs - and I thought that a big pot of chili would be just the thing to help celebrate. This was another first for Yours Truly, and completes the trifecta of Ready, Set, Cook! recipes I have created over the last month or so.The recipe is for Pumpkin Chili, and in celebration of Hallowe'en, I decided to serve the chili in a hollowed-out pumpkin. Isn't that SPEC-ial. The eyes are the tops from the jalapeno peppers. I used the bottom half of a yogurt tub to line the pumpkin, because I really didn't feel like eating chili out of a raw pumpkin. The thought gives me the chili-willies. Ha! I made a funny. The original recipe can be found here at the incomparable Anne's (of Cooking With Anne) site. The recipe I actually used has been reproduced below. For once, I stuck almost exactly to the original recipe.

Pumpkin Chili
makes 1 ginormous pot 'o chili

500g (about 1 lb.) ground beef
1 large onion, chopped
2 medium orange bell peppers, chopped
5 cloves garlic, minced
1 798ml(28oz) can crushed tomatoes
1 15oz can pureed pumpkin
1 large can of red kidney beans
1 C sherry (or red wine, or chicken stock)
4 large jalapeno peppers with seeds, chopped
1 small can of niblet corn
1 tbsp chipotle pepper flakes
1 tsp cumin
1 tsp salt
fresh ground black pepper
grated Monterey Jack cheese
toast pieces

* Heat a little oil in a large pot over medium-high heat. Add the onion, bell pepper, garlic and some fresh ground black pepper. Cook until the onions and peppers have started to soften, about 5 minutes.
* Add the ground beef, and cook until the beef has completely browned.
* Add the sherry, the tomatoes, the kidney beans, the pumpkin, the jalapenos, the corn and the spices. Stir to combine.
* Bring to a boil, then reduce heat to low and let simmer, covered, for anywhere between four and twelve hours, depending on how patient and/or hungry you are. After asking around at work today, the concensus is that you should let the chili reduce by about an inch or so. I was both impatient and hungry, and declared it done after 1 1/2 hours.
* Spoon into your handy-dandy hollowed-out pumpkin (or a bowl if you don't happen to have one handy) and top with grated cheese.
* Serve with toast or pita bread or toritlla chips.


For a first attempt, I was pretty happy with the way this turned out. The hardest part of this whole deal was carving the pumpkin. Oh, and waiting for it to be done. A friend at work suggested the distraction method for making sure the chili cooks long enough: while the chili is cooking, make a casserole for dinner so you're not constantly jonesing over the chili.The pumpkin was an interesting addition. I couldn't really taste it in the final product, but it seemed to add a nice creamy texture. Also, the next time I make chili, I will add a chunk of smoky bacon to the pot. And maybe omit the corn.

With the addition of the four whole giant jalapenos (including the seeds), plus the heaping tablespoon of chipotle pepper flakes, there was some heat, but not as much as I expected. I guess simmering longer would take care of that. I found that the chili was hot enough to leave a nice tingle on the tongue and in the back of the throat, and made my nose run a little bit, but I didn't start sweating profusely, or have all of my sinuses drain at once. Oh well, maybe next time. The best thing about this chili is that it has lasted for three days, and been five meals. I'm going to take a break from chili now.

Monday, October 30, 2006

Ready, Set, Cook! #20: Bite-Sized Bacon Bundles.... Booya!

Oh yeah, and some noodles. Another one of my creations from Ready, Set, Cook! looked so appetizing, that I had to attempt it.The original recipe from the event can be found here.

After looking over the recipe, I decided to simplify a few things. First of all, the tasty-sounding ginger-sesame dressing was axed in favour of a much less complicated and slightly more subtle spicy mushroom sauce. Secondly, I had overestimated the pliability of green onions, and after several futile attempts to "tie one on", so to speak, I decided to toothpick them in place.More on that in a bit, but first here's the revised recipe.

Seafood Bacon Bundles with Noodles
serves 2 or 3 (or just one if there's a hockey game on)

Bacon bundles:
1 227g (8 oz) package of imitation crab meat
1 can sliced water chestnuts, drained
12 slices bacon
bunch of green onions, sliced lengthwise

Noodles:
4 bricks dry ramen noodles, with flavour packs ("Oriental" is my favourite)
3 large brown mushrooms, sliced thinly
1 tsp ancho chili flakes
2 green onions, chopped
1 tsp freshly-grated lemon zest
freshly ground pepper
fresh basil (for a garnish)

* Preheat oven to 350F.
* Place one piece of crab meat with two slices of chestnut (one on either side) on a bacon slice and roll up. Wrap with a piece of green onion and secure with a toothpick. Repeat for all peices of bacon.
* Place bacon bundles on a lightly greased baking sheet and cook for 40 minutes at 350F.
* When the bundles are almost done, prepare the noodles as follows:
* Put 6 C of water on to boil in a large pot.
* While the water is boiling, empty the flavour packets into a large bowl, and add the mushrooms, the chopped green onion, the chili flakes, the lemon zest and the pepper. Toss to combine.
* When the water boils, remove about 1/2 C of the boiling water, pour it over the seasoning mix and stir to combine. Place the dry noodles in the water and cook until separated and soft, about 3-4 minutes.
* Drain the noodles, dump them into the bowl with the seasoning mix, toss to combine, and cover with a towel to keep warm until the bacon bundles are ready.
* Remove the bundles from the oven, and check that they're not stuck to the tray.
* Place some noodles on a plate, then arrange four (or more) of the bacon bundles on top, with some fresh basil for a garnish.

One thing you might want to check when starting out is that the toothpicks you're using are not the minty variety(!). Unbelievable. When I popped the first one in my mouth, I had a bit of a shock, and it's not even the same as if I'd put fresh mint in, either. This was the taste of nasty synthesized mint essence-type flavouring. Yeesh. Good thing there was lots of sauce. Also, I have a package of wooden skewers that I bought over a year ago and hadn't found a use for, so I tried threading four of the little bundles of joy onto a skewer as well. That was harder that I thought it was going to be. The green onion kept ripping, and I had to re-skewer a couple of the bundles several times. I almost pulled out the duct tape. It was a close thing.Despite all of that, the bacon-bedecked bundles of beauty tasted absolutely excellent, with the nice creamy texture of the seafood contrasting the crunchiness of the water chestnuts and the smoky salty taste of the bacon. Oh, and the ghostly minty taste from those flippin toothpicks.

Monday, October 02, 2006

Ready, Set, Cook! #17: High-Class Spuds

It's fall once again, and Anne over at Cooking With Anne has started up her Ready, Set, Cook! events every Tuesday. The rules are simple: using the three ingredients provided, and whatever other ingredients you want, create an original recipe. No actual cooking is required to participate, just the submission of the recipe.Last week, the three theme ingredients were:
* any kind of mushrooms
* heavy cream
* boiled ham

My original recipe submission can be found here. The recipe looked so tasty, I decided to actually attempt it. Here is the revised recipe that I actually used.

High-Class Spuds
Makes Two Huge Potatoes

2 large baking potatoes
1 small celeriac (celery root), peeled and cut into chunks
2 C chinese mushrooms (any kind will do), cleaned, trimmed, and sliced
3/4 C cooking sherry
(for company I would use cognac, but for myself, the cooking sherry was fine)
1 C 35% heavy cream
2 tbsp + 2 tbsp butter
150g sliced ham with rosemary (I got some nice stuff from the deli section at the Grocery Palace)
2 large slices swiss cheese, whole
2 large slices swiss cheese, julienned
2 green onion, chopped
Worcestershire Sauce
fresh ground pepper

* Preheat oven to 400F.
* Bake the potatoes for about 60 minutes until done.
* While the potatoes are cooking, do the following:
* Place the celeriac pieces into a pot, just cover with cold water. Boil, covered, then reduce heat to half, tip the lid, and continue cooking until the pieces have softened.
* Remove from heat, drain, and set aside.* Dry sauté the mushrooms in a medium skillet over medium-high heat for a couple of minutes, then add 2 tbsp of the butter and sauté for another few minutes. Add the sherry, bring to a boil, and reduce liquid by half, about 3-4 minutes. Lower heat to medium, add cream, and simmer 5 minutes. Remove skillet from heat and set aside.
* When the potatoes are done, let them cool a little, then cut a 'cap' off the top of each one, and scoop out the insides leaving about 1/3 inch of potato all the way around each one.* Puree the potato with the celeriac, the garlic, 2 tbsp of the butter, a splash of Worchestershire Sauce and some fresh ground pepper.
* Place a few slices of the ham into the bottom of each potato skin. Then place one slice of the swiss cheese into the bottom of each potato.* Using a piping bag (or a spoon), pipe the mashed potato mixture evenly into each potato skin. I found some cheap piping bags at the local Bulk Barn. I think they were about $1.29 apiece.
* Pour some of the mushroom-sherry reduction over each. With the addition of the celeriac, there will be LOTS of filling, so don't overdo it. You'll probably have a bit left over.Sprinkle the remaining ham, grated cheese and green onion on the top of each one.
Bake at 425F for 15 minutes.

AS I mentioned before, with the addition of the celeriac, there was WAY too much filling. Also, there was WAY too much mushroom-sherry reduction for only two potatoes. If doubling the recipe for four potatoes, do not double the mushrooms, and still only use one small celeriac. I made another whole meal from the leftovers. Mmmmmm....

Ready, Set, Cook! happens every Tuesday at Cooking With Anne. Check it out, it's fun!

Monday, September 11, 2006

A Walk On The Beach

For some reason, today I was moved to write. So I'm writing. It doesn't happen often, and like most positive impulses, I've learned to run with it. Interesting things happen when you let momentum take over. You'll notice I didn't say GOOD things happen, but how much fun would life be if only good things happened to you?

Today, the momentum started with a mistake. I missed my stop on the way home from work. I actually got a seat on the streetcar, and was right into the book I'm currently reading ('Calculating God' by Robert J. Sawyer). When I finally looked up, I was three stops past my street. Not really a problem, as I like to take a walk after work, so I got off and decided to keep walking in the same direction the streetcar was travelling.Normally, when I start walking after dismounting from the Red Rocket, I simply walk east along Queen St. until I feel like turning around, then walk home. Sometimes I walk a few stops, and sometimes I get all the way to the end of the streetcar line at Neville Park. Today, on a whim, I decided instead to walk down to the beach and stroll back along the boardwalk.This is my favourite time of year to walk on the boardwalk. It's started to cool down enough that I wore a jacket to work today for the first time since May. Because of this, the tourists who have been flocking to the beach all summer, have now all gone home to Markham or Mississauga or Mimico, and the beach is mine again. It's so nice to be able to sit on a bench facing the water with a nice breeze from off the lake blowing in my face, and just hear the quiet. Not that it's silent by any means, with the rollerbladers on the bike path and people walking their dogs, and of course the gulls fighting over dropped hotdogs or ice cream cones from the Beach Snack Bar, but still and relaxing.As I walked past the Leuty Ave. Lifeguard Station, I couldn't help but think about bonfires on the beach at that very spot and stolen kisses in the dark back when I was a senior in high school. The Eighties seem a long way off from where I'm standing, and if I had realized how much tougher life was going to get, I would have had a lot more fun at the time.As I continued west along the boardwalk, I could see what appeared to be a bunch of people flying kites up ahead. As I was snapping some pictures anyway, this seemed a fun thing to get some shots of. As I approached, however, I realized that it wasn't just people flying kites, but kitesurfers. I had never seen this before, and I was amazed at the speeds these people were achieving. I saw one guy get pulled completely out of the water and glide through the air for about ten feet. Now, I don't know for sure that it's actually called kitesurfing, but it seems a logical enough name. I hung out there for a few minutes, watching what must have been about twenty people doing this. More power to them, because all I was thinking was that it was going to be chilly swim back to shore.

I realize that this is not in fact a food-related post, but the beach and the boadwalk are part of who I am and where I come from. The most important ingredient in any recipe that you make is you, and what you bring to the table. Also, expressing myself by written word is a relatively new thing for me, and I've found that as with most things, the more I write, the more I get used to writing, and the better I become. Hopefully as my cooking progresses, so too will my writing and my photography. I can only hope.

Wednesday, September 06, 2006

New Toys

Well, congratulate me. I broke my first coffee grinder this past weekend. Blew it up REAL good. I had just spent the day wandering through Kensington Market, and had picked up a big bunch of STUFF! Namely, three or four kinds of dried chilis, some tortillas, some tomatillos, and some sun-dried tomatoes. And of course, what would a trip to The Market be without a stop at El Gordo's for some killer empanadas? Their Mexican Chorizo variety are my favourites. Anyway, when I got home with my swag, I headed straight for the grinder to render the dried chilis into a more usable format. This part of the plan went off without a hitch. Seeing as the chilis are, well, dried and fairly thin, the grinder could handle them no problem. The problem was with the sun-dried tomatoes. Crazy, I hear you say? Perhaps, but while I was grinding the chilis, I was munching on the tomatoes and thinking to myself, "Gee, these sun-dried tomatoes bear a striking resemblance to the chilis. I bet if I ground them up, they'd be a lot easier to use."

So, after I finished with the chilis, I snipped the tomatoes up a little so they would fit in the grinder, and had a go.

The first batch came out OK. Emboldened by this, I kept going and tried to ignore the telltale warning signs the grinder was giving me. For one thing, it was starting to sound like an old outboard motor, and there was an odor that didn't smell like sun-dried tomatoes. Another man might have stopped at this point, and transferred the tomatoes to the handy-dandy blender I had sitting on top of the fridge. But no, there were only a few left, so I pressed on.

Then, not unexpectedly, disaster struck.

I heard a snap, and the sound that the grinder was making went from a labouring outboard motor to a high whine. Upon inspection, the rotating blade had bent almost in half, and had completely broken off from the motor assembly. Oops.

Soooo.... I transferred the remaining tomatoes to the handy-dandy blender from the top of the fridge.... Yes, yes, I know....

Now, to the point of this post (yes, there is one). I was then faced with the task of buying a new grinder. Excellent, new kitchen stuff. I looked around in several places, the first being Canadian Tire, because really, I don't need much of an excuse to go there and wander around. Oddly enough, even after looking at Zeller's and The Bay, I still couldn't find one that suited me.

So I came back to work on Monday dejected and still grinder-less, and what do I find but a store in my building called Personal Edge, which is just packed with some very cool gadgets and doodads, including three different models of grinders. I picked up a spiffy new Hamilton Beach model with variable speeds and a retractable cord. OutSTANDing.

Thursday, August 10, 2006

Cottage Party!

My whole family recently held our annual summer get-together at my parents' cottage, and as it was a potluck type affair, I was expected to bring some nibblies.For a bit of a change, I decided to make some Spicy Potato Samosas. I happen to really like samosas, and spicy ones especially, but they're not the kind of thing that normally makes an appearance at one of our family functions. More about these later.

After a swim and the traditional game of softball in the nearby park, the food came out.The normal menu for one of our shindigs goes something like this: Burgers and hotdogs cooked on the BBQ (normally by my brother, my dad or myself), with a few veggie patties thrown in for my cousin Kristen who's a vegetarian. (Side note: veggie pattie technology must have made great strides in the last few years, because I tried one at this year's party and it was pretty darn tasty. But you didn't hear that from me.) Then a cornucopia of salads including green salads, potato salads, a few pasta salads, and my personal favourite - the marshmallow Jell-O salad. In addition to these, there are always lots of potato chips, the mandatory spinach dip served in the sourdough bread bowl, my mother's excellent crab dip (which is specifically requested by my cousins), shrimp rings with seafood sauce, and whatever weird concoction I've decided to whip up for the occasion.

Then there was dessert. Trays of brownies, lemon squares, Rice Krispies squares, a raspberry-rhubarb pie (love the rhubarb), slices of watermelon and other stuff which I can't remember.

As I metioned above, this year I made Potato Samosas. I found the recipe in a great cookbook I picked up at a church book sale a few months back, called "Street Food". It features recipes for common street food from around the world.My experience with making these samosas was similar to that of making pierogies for the first time back in February. I made the dough, and while that was resting covered with a damp towel, I made up the filling.Mmmmm. That's some spicy comfort food. There's an entire large jalapeno pepper in there. I was hoping that it wouldn't be too spicy for the gang, but everyone seemed to like them.

Rolling out the dough and assembling the samosas was a bit of a chore. This was actually my second attempt at making the dough, because the first time I did something wrong, (I'm still not sure what it was) and the dough just would not stay together. It kept crumbling on me, and no matter what I did it would not adhere to itself and allow me to roll it out. I added a bit more water, then it was too wet, so I added a little more flour, etc etc. Anyway, I ended up chucking the whole thing into the bin. This time however, everything went OK and I had some really nice-looking dough to work with. One thing I changed concerned the butter in the dough. The recipe calls for ghee or clarified butter, but ghee is really expensive and clarified butter is a royal pain to make, so I just used regular butter softened in the microwave. It seemed to work just fine, so I'm going to continue doing it that way.

I ran into a bit of a problem when the recipe said "with a large cookie-cutter or glass, cut out about four six-inch circles." Do you know anyone who owns a glass with a six-inch diameter? Seriously, that's a big glass. None of my cookie-cutters were big enough either, but I discovered that the lid of my food processor is exactly six inches across, so I used that.Assembling the samosas took a couple of tries before I got it right. You take a semi-circle of dough, make it into a cone by moistening and joining the edges, spoon a little of the filling in, moisten the top then fold it over and seal to form a tight little triangular package. The diagram in the cookbook makes it look easy, but it took a little stretching and adjusting of the dough to get the look I wanted. Anyway, I managed to get 27 regular sized samosas and four or five large ones.I deep-fried them all in my handy-dandy deep fryer for about 3 minutes apiece, but they weren't really golden brown when they come out. They were nice and crispy, and they tasted great, so I didn't worry about it too much. Of course, then they had to go into the fridge overnight, and survive a trip to the cottage the next day.

When I got to the cottage, I took them out and had a look. They'd gone a little soft, so before I served them, I put them into a 400F oven for 15 minutes. This worked like a charm and they came out looking like the picture at the top of the post. Fully cooked, nice and crispy and golden brown. Because the family had been nibbling before the rest of the gang arrived, y'know, just to make sure they were OK, I only had about 20 left when the time came to serve them. Everyone got one, and everyone seemed to like them, so mission accomplished.

Like the aforementioned pierogies, due to the messy nature of this recipe, and to the pain-in-the-ass factor of rolling and assembling them, the next time I will double or triple the recipe, make about a hundred of 'em, and just freeze the lot for a rainy day. I think next time also, that I will try the lamb variation in the cookbook.

Spicy Potato Samosas
Makes: 32 Samosas

Pastry
3 C All-Purpose flour
½ tsp salt
3 tbsp ghee or clarified butter
¾ C ice water

Spicy Potato Filling
2 tbsp vegetable oil
1 medium-sized onion, finely chopped
3 C frozen peas, defrosted and drained
1 tbsp finely grated, peeled fresh ginger root
1 fresh hot green chili pepper (I used a jalapeno)
3 tbsp finely chopped cilantro (fresh coriander or Chinese Parsley)
3 tbsp water
1½ lbs new potatoes, boiled in their jackets, peeled and lightly mashed
1½ tsp salt
1 tsp ground coriander
1 tsp garam masala
1 tsp cumin
¼ tsp cayenne pepper
2 tbsp lemon juice
2 C vegetable oil

* Sift the flour with the salt into a deep bowl. Add the butter and combine with your fingertips until the mixture resembles coarse meal. Pour the water over the mixture all at once, knead vigorously,and form the dough into a ball. If it crumbles, add up to 4 more tbsp of water, one at a time until the particles adhere. On a lightly floured surface, knead the dough by folding it and pressing it down and pushing it backward for about 10 minutes, until it is smooth.
* Making the dough can also be done in a food processor. Place the flour and salt in the work bowl. Add the butter, and process with 10 to 12 on/off pulses. Pour in the ice water and process until the mixture becomes a dough. Add a little water, if needed. No vigorous kneading is necessary.
* Form the dough into a ball, brush it lightly with butter or oil, and place it in a bowl. Cover with a damp towel to keep it moist. Let it rest for about 30 minutes. The dough can remain at room temperature for up to 5 hours.
* While the dough rests, prepare the filling. Heat 2 tbsp oil in large skillet. Add the onion, and stir-fry over medium heat for a few minutes, until the onion is lightly brown. Add the peas, ginger, green chili, cilantro, and water. Cover and simmer until the peas are cooked, stirring ocasionally and adding a little more water, if mecessary.
* Add the potatoes, salt, ground coriander, garam masala, cumin, cayenne, and lemon juice. Turn off the heat and allow the mixture to cool. Cover and refrigerate 30 minutes.
* To shape the samosas, divide the dough into fourths. On a lightly floured board, roll out one piece of dough as thinly as possible (very important). Keep the unused dough covered. With a large cookie cutter or a glass, cut out about four six-inch circles. You should be able to get about four circles from each piece of dough. Cut each circle in half.
* Moisten the edges of the dough with your finger dipped in water. Holding the semi-circle of dough in your hand, shape it into a cone. Fill the cone with 1 tbsp of the filling. Moisten and press the top edge over the filling to form a tight triangle. Repeat with the remaining dough and filling. The pastries may be kept on a lightly floured plate, covered, for 2 to 3 hours before they are fried.
* To fry the samosas, heat the 2 cups vegetable oil in a deep heavy skillet, or deep fryer to 375F. Deep-fry the turnovers, a few at a time, for 2 to 3 minutes, turning once, until they turn golden brown. Drain on paper towels. Serve hot. They can be kept warm in a 200F oven in a baking dish lined with paper towels.
* These samosas can be frozen. To reheat, place frozen into a 400F oven for 25 to 30 minutes.

Sunday, July 30, 2006

Canada On Our Plate: Home Is Where The Pot Roast Is

This post is for an event called Canada On Our Plate hosted by Chris and Lea at Canada Eats. The idea is to blog about a recipe that is, in your opinion, typically Canadian. I chose Pot Roast. But this is no ordinary pot roast.An odd choice one would think, and perhaps not specifically Canadian, but this has become a favourite of our family, and it is frequently requested for birthdays and holiday meals. I know I'm at home if this pot roast is on the table.

This recipe is called "Old-Fashioned Pot Roast", and my mother clipped the recipe from the Toronto Star newspaper some years back. The recipe is by Bonnie Stern, who is also Canadian, and who is the founder of the Bonnie Stern School of Cooking here in Toronto. The recipe is at the bottom of this post.

First of all, I would like to say that although I have been at numerous family occasions at which this roast was served, I had never before cooked this myself. So, I found myself on the phone to my mother at several points along the cooking process to make sure that I was doing this the same way as she does. Normally I don't worry about this so much, as I tend to experiment with recipes, but for the purposes of this post, I wanted to duplicate my mother's recipe as closely as possible. Not least because I really REALLY like this particular recipe.

The first thing I had to do for this recipe, aside from buying the ingredients, was to get my hands on a Dutch oven. I found an excellent cast iron model at Zeller's for $11. Can't beat that. After conditioning the pot as per the directions, I had at it.

I rubbed the spice and flour mixture on to the roast, and browned it on all sides in the Dutch oven.After removing the roast from the pot, I added the veggies, gradually adding the wine and the tomatoes. I have to tell you that the smell that was eminating from my kitchen and premeating the house, was just unbelievable. This is the aroma that I smell when I walk in the door of my parents' place when I arrive for a family birthday. Perhaps it's this aroma more than even the roast itself that says "home" to me. Here's a picture of the veggies, then the veggies with the wine added, and then with the tomatoes added to that. Mmmmm....After this, everything was pretty straight-forward. The roast went back into the Dutch oven, the lid went on, and the whole thing went in to the 350F oven for about 3 1/2 hours. I checked the roast periodically to ensure that the liquid wasn't evaporating too fast, but I never had to add any extra water or wine.

The roast came out looking like this:I've got two words for ya: Yeah. Baby. This roast was so tender it was falling apart, and I could cut it with a fork. Instead of slicing it as the recipe suggests, I took two forks and just shredded the roast into pieces. I then scooped all of the lovely vegetables from the pot into the food processor, and pulsed until the mixture was fairly smooth. It's almost worth making this recipe just for this sauce as it is obscenely good, and it goes with anything.
Old-Fashioned Pot Roast

1 beef pot roast (4 lbs), trimmed of excess fat, tied
1 tsp salt
1 tsp pepper
1 tsp cumin
2 tbsp all-purpose flour
2 tbsp olive oil
3 large onions, sliced (about 2 cups)
2 carrot, sliced
1 head garlic, in cloves, peeled
1 tsp dried thyme
1/2 tsp dried oregano
1 bay leaf
2 C dry red wine (or beef or chicken stock) (I used wine)
28oz (796ml) can Plum Tomatoes with juices
2 tbsp coarsely chopped fresh parsley
salt and pepper to taste

* Preheat oven to 350F
* Pat roast dry. In small bowl, combine salt, pepper, cumin and flour. Rub mixture into roast.
* Heat oil in Dutch oven in which roast will fit with about 2 inches to spare around the roast.
* Add roast; cook over medium-high heat, turning until browned on all sides. Remove roast and all but about 1 tbsp of fat from Dutch oven.
* Place onions, carrots and garlic in Dutch oven over medium-high heat and brown slightly, about 5 minutes. Add thyme, oregano and bay leaf. Add wine or stock; bring to a boil and cook uncovered about 5 minutes. Add plum tomatoes, breaking them up with a wooden spoon. Bring to a boil. Add roast. Spoon vegetables and juices over top. Cover tightly and cook 3 to 4 hours in a 350F oven or until very tender.
* Check roast every half hour and add water or stock if liquid is evaporating too fast. There should always be about 2 cups of liquid in the Dutch oven.
* When roast is very tender when pierced with fork or tip of knife, remove from oven. Transfer roast to platter. If there are more than 2 cups of juices, cook over medium-high heat, uncovered, until reduced to about 2 cups. Remove fat from surface, either by skimming with spoon or, after chilling, by lifting off. Discard bay leaf; strain or puree juices.
* Slice roast; place in casserole dish. Taste juices; add salt and pepper to taste. Pour oven roast. Sprinkle with parsley.

Tuesday, July 25, 2006

White Chocolate and Green Fingers

It seems that most of my cooking successes of late have been the results of happy accidents, projects that went awry, or just changed plans.I had originally intended to make some little chocolate cakes with a melty, chocolate centre comprised of a combination of white chocolate and pistachio paste. This of course requires that I make the chocolates first, then embed them into the cake batter. However, after making the little chocolate morsels, I decided that I really didn't feel like making the little cakes, as I now had a nice pile of tasty pistachio chockies.
The first step to making these chocolates was a trip to the local bulk food store (handily located inside the Grocery Palace) for some supplies. I picked up a good-sized bag of white chocolate wafers, one of dark chocolate wafers, a plastic sheet containing fifteen little chocolate rosette molds, and a big bag of pistachios. I then proceeded to shell the nuts, turning my fingers an attractive shade of bright green. What fun.
The next step was to create the Pistachio Paste (recipe below, picture above) that would be mixed with the melted chocolate. I got the recipe for this from a site called The Accidental Hedonist (recipe here). According to the recipe, this concoction is supposed to end up resembling marzipan. Yeah, right. I think it was a combination of not grinding the nuts finely enough, and adding too much water, but my stuff looked more like a mixture of cheap peanut butter and grainy mustard. It tasted fantastic, just looked a little oogly.I then melted some of the chocolate wafers in the microwave. I found that this was the easiest method, rather than messing around with a bain-marie or a double boiler. The instructions that came with the plastic molds say to melt the chocolate for 30 seconds at a time, mixing after each time. It took on average four to five times to get the chocolate smooth enough to work with. The trick with the chocolate was that I had to be quick on the draw after mixing in the pistachio paste, as the mixture cooled rapidly. I spooned a dollop of the mixture into each little mold, attempting to fill in all of the nooks and crannies (a difficult job, let me tell you), and then smoothed off the tops. The sheet went into the fridge for 15-20 minutes to set.
They came out looking like this. I was so pleased with the result, I ate several in celebration. It was at this point that I decided to bag the whole cake plan and make some more chocolates. I repeated the process with the dark chocolate, with equal success. They tasted similar to a crunchy peanut butter cup, although I must say that these were tastier.

Since I already have the plastic mold, and the chocolate wafers are only about $.75/100g (about 1/4 lb), this seems to me to be a cheap way to enjoy one of my favourite things.

Saturday, July 01, 2006

Egg Foo Yum

OK, so maybe it's not strictly Egg Foo Yong, but in my opinion a bean sprout omelette with meat in it is pretty close.Once again, I had a craving but no recipe so I tried to re-create this dish from the memory of my last Chinese food takeaway order. In addition, since I had some nice mozzarella cheese (and for that matter, some tomatoes) left over from the Tomato Mozza salad that I made a few days ago, I incorporated those into my creation as well.

Now normally, Egg Foo Yong contains chicken and shrimp, but I didn't have either of those things on hand so I used a pork cutlet instead. Mmmmmm....pork cutlet....

OK, here's the recipe.

Ian's Egg Foo Yum
Serves 2 people or 1 hungry monkey

1 3oz breaded pork cutlet
2 large mushrooms, thinly sliced
1 large shallot, sliced
1 handful of bean sprouts
4 eggs
2 cloves garlic, minced
½ tsp ground chipotle pepper (optional)
salt & pepper to taste
4 or 5 (or 6 or 7) thinly sliced chunks of fresh mozzarella cheese

* Fry the pork cutlet in a little oil over medium heat until cooked through and the outside is nice and crispy. Slice thinly and set aside.
* Drain some of the pork grease, reserving some for frying the other stuff.
* Increase heat under frying pan to medium-high, and add the sliced mushrooms and shallot. After a few minutes, add the garlic and the pork. Toss to combine evenly.
* Beat the eggs together in a small bowl with the salt and pepper and chipotle.
* Pour the egg mixture over the veggies and pork and stir once or twice to incorporate.
* After the egg starts to solidify, sprinkle the bean sprouts on top, and press down with spatula. Let cook for another few seconds, then flip the whole thing over. Continue cooking for another minute, or until egg looks set.
* Place mozzarella cheese on half of your creation, then fold the other half over, sandwiching the cheese in the middle. Cook for another few seconds until cheese starts to melt. Remove from heat.
* Serve with sliced tomato and some fresh basil.


I really like the combination of fried egg and bean sprouts. This seemed a better way to achieve that, rather than just throwing some egg and some bean sprouts into a pan and making a bean sprout omelette. It turned out really well, and it tastes as good as it looks.

Normally, I have strict rules about combining eggs with cheese; namely, I never do it. It's something about the texture. However, the mozza really worked well with the eggs, and really, who doesn't like ooey-gooey mozzarella cheese?

Friday, June 30, 2006

"C" Is For Cookie

....and that's good enough for me.

I was looking through a food blog called Milk And Cookies, and the latest entry is about a test you can take to determine what kind of cookie you are. Since I am a fan of cookies...um OK, I'm the president of the Cookie Fan Club.... I thought that I would give it a try. Apparently, I am a Chocolate Chip Cookie. See, it says so right there.

You Are a Chocolate Chip Cookie

Traditional and conservative, most people find you comforting.
You're friendly and easy to get to know. This makes you very popular - without even trying!


Nice.

Thursday, June 29, 2006

You Say "Tomato" - I Say, um, "Tomato"

Sometimes, taking a chance can pay off. I'm not normally a big fan of most kinds of cheese, but I've seen this salad on various food shows, and I thought that it looked pretty tasty. The cheese in question is fresh mozzarella cheese, and while I am definitely someone who enjoys a pizza from time to time, I have a hard time simply munching on pieces of cheese. I don't know why this is, but I've been like this for as long as I can remember.
Anyway, this is a Tomato Mozzarella Salad, and after making it a couple of times, I came to realize that, to my complete surprise, the most important ingredient in this recipe is the kosher salt.

"How", you may well ask, "did you come to this conclusion, O wise one?" Well, I'll tell you. But first, the recipe.

Ian's Tomato Mozza Salad
serves 2

2½ C (1 pint) cherry tomatoes, halved
2 large brown mushrooms, thinly sliced
150g (4 or 5 oz) fresh mozzarella cheese, broken into bits
fresh ground black pepper
pinch of kosher salt
olive oil
fresh basil, chopped
fresh flat-leaf parsley, chopped

* Mix the tomatoes, mushrooms, cheese together in a bowl.
* Add the pepper, salt and herbs and mix to combine.
* Drizzle some olive oil over the top.


The measurements are only a guideline, as I really wasn't paying attention to exactly how much of everything I was using. I've made this salad a few times over the past week, and the first time I made it, I didn't add any salt. It was tasty, but there was something missing. When I added the kosher salt to this version, the flavour of the tomato really popped, and it made for a much better salad.

I find this odd that plain old salt was the missing ingedient. The salad didn't taste like salt, it just tasted more like tomato. I know, I know, this is common knowledge, but I've never seen it demonstrated quite as emphatically before.

Thursday, June 15, 2006

Get stuffed!

This is another recipe coming as a result of my trip to New Orleans last month (read the original post here), specifically from the burger I ate at a place called the RiverShack Tavern in Jefferson Parish. They serve a burger called the Shank You Burger, which is a patty of beef and one of hot sausage. It was a good burger, but I thought to myself at the time, "I can do better than this". So, upon my return to the Big Smoke, I endeavoured to put together an exceptional burger.The first stop on this journey, as with most of my culinary exploits, was the Grocery Palace. My intention was to create a burger with a combination of ground beef and pork, so I picked up a pound of lean ground beef, and because the Palace for some reason didn't have any ground pork available, I got four large honey-garlic sausages and just removed the casings later. In addition to the meat, I thought that it would be worth while to have some good bread for the burgers, so I got a nice baguette. Now, here's the fun part. I've noticed lately on various cooking shows, and in some cookbooks, that stuffed burgers are all the rage, so I bought a chunk of smoked mozzarella cheese for the filling. Mmmmmm....smoked mozzarella cheese....The trick with these is to make two thin patties, place the filling in the centre, then mush the two patties together, making sure that the edges are completely sealed so that none of the ooey-gooey goodness escapes prematurely. Here is the recipe I used.

Booya Burgers
Yield: 6 large burgers (and I do mean large)

500g (1 lb) lean ground beef
4 large honey-garlic sausages, casings removed (about 1 lb)
1/2 C oatmeal
1 large egg
1 tsp garlic powder
1 tbsp honey dijon mustard
1/2 tsp cumin
ground black pepper
1 serrano chilli, finely diced (optional)
100g (4 oz) smoked mozzarella cheese, cut into small chunks
** Approximate amount - use enough cheese for the six burgers

* Place all ingredients except the cheese together in a large bowl. Mix gently with your hands (rubber gloves might be an idea), until all ingredients have been incorporated and the mixture looks fairly uniform.
* Place in an airtight re-sealable plastic bag and refrigerate overnight to let the flavours combine.
* Remove from fridge, and form meat mixture into twelve (12) thin patties.
* Place a small mound of the mozzarella cheese on six of the patties, sprinkle with some ground black pepper, and cover each with the remaining patties, forming six large burgers.
* Work each burger with your hands until all of the edges are sealed, and pat down slightly so that the burgers are not too thick.
* Cook on the barbecue until well done. These are pretty big burgers, so they'll take longer than you'd expect.
* Serve on crusty baguettes, with your choice of toppings (I suggest sliced tomatoes, sliced dill pickes and mushrooms)


Now, I had to decide how to cook these wonders of carniverous engineering. Pan-frying them on the stove seemed like a waste of time with burgers like these, so I decided to break out my camp stove, and cook them in the driveway. I love my camp stove. I haven't had a chance to go camping yet this summer, so it was a good opportunity to pull it out of storage and fire it up one or twice. Besides, the smell of the cooking burgers would drive the neighbours up a wall.After cooking the burgers, I dropped the french bread on the grill for a minute to crisp it up a little. There's nothing like fresh bread to go with barbecued burgers. I then garnished my creations with some sliced tomato, dill pickle and some mustard, and had at them. I can honestly say that I have never had a better burger. There was no way I could eat all four of the burgers I cooked, so I wrapped two of them up and put them in the fridge for the next day's lunch and dinner.