When I read that the theme for this month's Weekend Cookbook Challenge was "Cinco de Mayo", I was a little concerned. While I have certainly consumed a fair amount of Mexican cuisine (mostly from Taco Bell), I have never really cooked any. Oh sure, I've fried up some stuff, put it in a flour tortilla and called it a 'soft taco', but nothing that could be identified as definitively Mexican.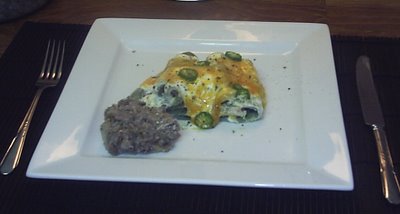
Luckily, I recently acquired a cookbook entitled "The Mexican Mama's Kitchen" by Sofia Larrinua-Craxton, which I have really enjoyed reading, as it outlines how to make some basic Mexican staples, such as Pico de Gallo, Refried Beans, and of course, tortillas, along with some very tasty-looking full meals.
For this Weekend Cookbook Challenge, I decided to make Swiss Enchiladas (Enchiladas Suizas). In case you were wondering (and I know you were), in Mexican cooking, ‘Swiss’ refers to any dish that features cream as one of its prominent ingredients. Here, sour cream provides a lower-fat alternative to double cream. In addition to the enchiladas, the cookbook suggests that refried beans make a good accompaniment for this dish, so I made some of that as well.
Now, before I get into the recipes, my ingredient-gathering expidition was just as entertaining as the cooking part. The weekend before, I happened to be walking through Kensington Market, which is possibly the most multi-cultural section of Toronto with people from at least 30 different cultural backgrounds, including Portuguese, Ethiopian, East Indian, Carribean and Mexican. And all packed into about eight square blocks just west of downtown. Needless to say, grocery shopping, and shopping in general in the Market is a real eye-opening experience.
I found a little grocery shop called Perola's on Augusta Ave., which features products and produce from Brazil and Mexico. They have such an unbelievable selection of fresh peppers and dried chilis, that I just had to stock up.
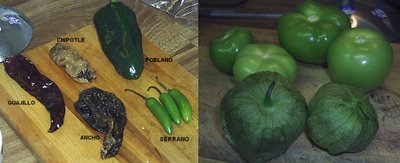 Here are some pictures of some of the stuff I picked up. The enchiladas recipe calls for serrano chilis and tomatillos, neither of which I was familiar with, but Perola's had some. I also got some lovely smoky chipotle peppers (why not?), some dried ancho chilis, some poblanos, some guajillo peppers and some blue corn tortillas. This is also where I got the pinto beans for the Refried Beans recipe.
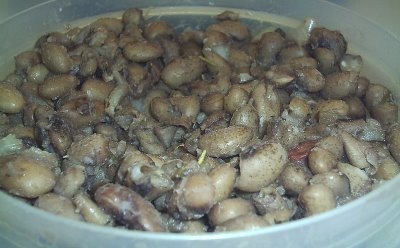
I made the beans a day ahead of time, because it takes a while for the beans to soak before you can cook them. The recipe is below. Actually, there are two recipes, because you have to cook the beans first, then mash them up and fry them again. These are so tasty and they go with everything. I only ended up using a little bit of the beans with the enchiladas, so I had to find creative ways to use about four cups of refried beans. Ahhh....if only all decisions in life were as easy....
Back Burner Beans (Frijoles de la Olla)
400g (about 1 lb.) pinto, borlotti or black beans (I used pinto beans)
2 litres (1 gallon) water
1 large onion, quartered
3 whole cloves garlic
2 bay leaves
1 small bunch of fresh herbs
salt
Put the beans into a large saucepan and cover with the water. Let soak overnight.
The next day, put the pot on the stove and bring to a boil. Skim off any film that comes to the surface. Add the onions, garlic, bay leaves and herbs. Partially cover and simmer gently for about 1 hour or until the beans are fully cooked and soft. Once cooked, season with salt.
Refried Beans (Frijoles Refritos)
2 C Frijoles de la Olla, with a little cooking water
(or the same quantity of canned pinto, borlotti or black beans, rinsed and drained)
1 medium onion, finely chopped
1 tbsp corn or vegetable oil
salt or vegetable bouillon powder
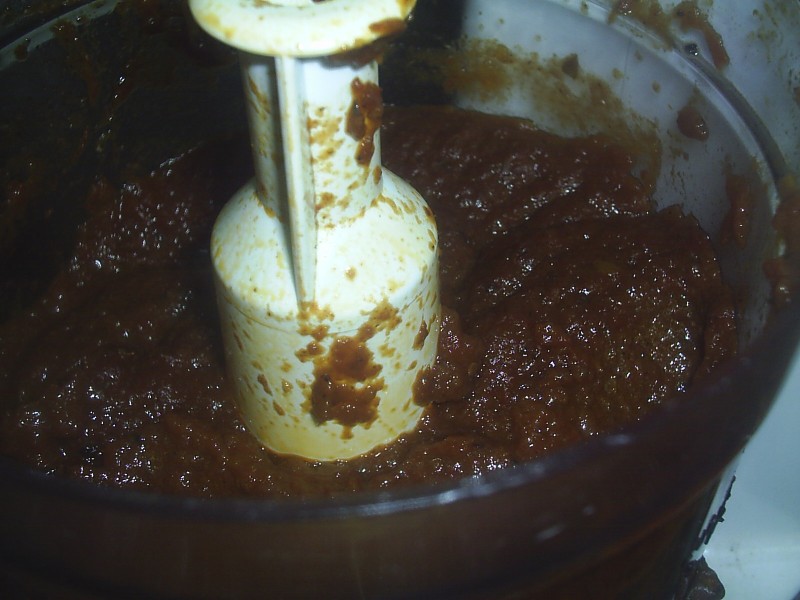
Lightly mash the beans with a potato masher until they form a soft and lumpy paste.
Saute the onion and oil in a medium-sized frying pan until translucent, add the beans and cook for a further 2 minutes. Add water or bean stock if the mixture is too dry.
Season with salt or vegetable bouillon powder to taste.
The next night, I started in on the enchiladas. The first step, I thought, was to make the tomatillo puree that is required as part of the enchilada sauce. You may notice that in the recipe below, it says to "remove the outer leaves from the tomatillos". Well, this is my own correction and clarification, as the original instructions in the book say to "peel the tomatillos". I took this to mean that the outer skin should be removed, so there I was with a vegetable peeler, trying to peel the tomatillos. Yeesh. This semed a little odd to me, so I checked some other recipes for tomatillo puree online (the next day, of course), and found out that removing the leaves was what was meant by "peeling". Oh well. Live and learn. To make a long story short, I ended up with less tomatillo puree than I expected, but just added some more water to the sauce to compensate.
Tomatillo Puree
½ lb fresh tomatillos
1 tsp baking soda
water
Boil the water with the baking soda. Remove outer leaves from the tomatillos, chop in half and add to water. Cook for 2-3 minutes until they turn yellowish and soft, then puree.
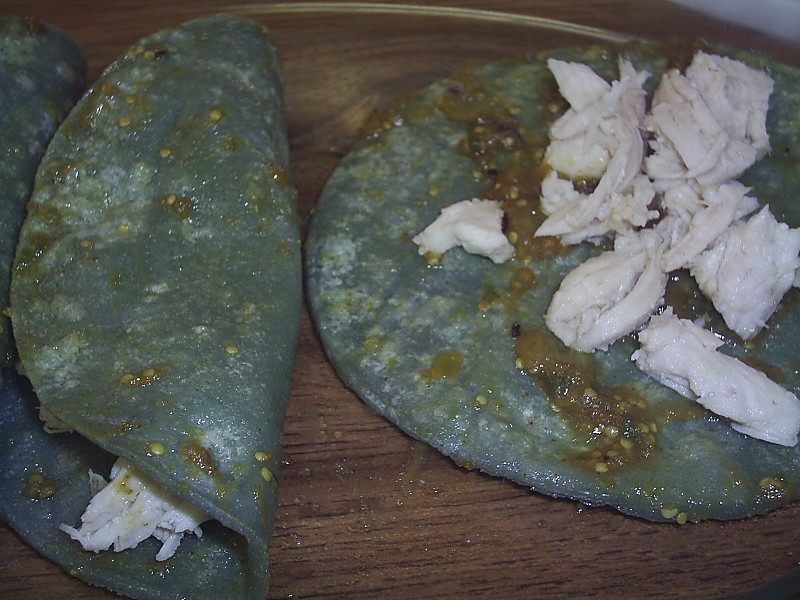
Allrighty then. With all of my ducks now in a row, I started cooking the chicken and making the sauce. The recipe for the sauce calls for the serrano chilis, but I was a little hesitant, as I was unsure of their relative spiciness. I have heard that the rule of thumb for chilis is "the smaller the chili, the hotter the chili". The serranos are pretty darn small, so after chopping one up, and carefully removing the seeds from one little piece, and with a large glass of milk at the ready, I popped it in my mouth. Whew, it wasn't really that hot. I mean, it was a spicy little pepper, but I was expecting to break out into a sweat, and have my sinuses all drain simultaneously. Nope. I would say that the serrano is slightly less spicy than a jalapeno. Excellent. OK, moving on.

After the chicken was finished cooking, I had shredded it and put it aside. The recipe calls for one boneless skinless chicken breast. I didn't think that that sounded like enough, so I used two. Next time I'll use three.
After all of the constituent parts were cooked, the assembly went smoothly. I fried the tortillas in some oil, dipped them in the enchilada sauce, spooned some chicken into each one, folded it in half and placed them into a baking dish. I then covered the tortillas with the sour cream and grated cheese, and, emboldened by my experiment with the serrano, sliced up two more chilis and sprinkled them over the top.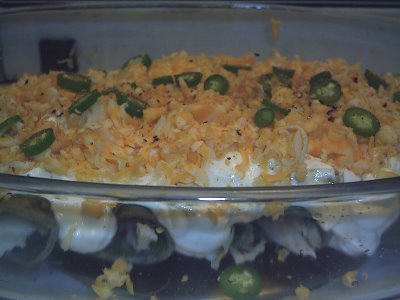 Yummy, yummy.
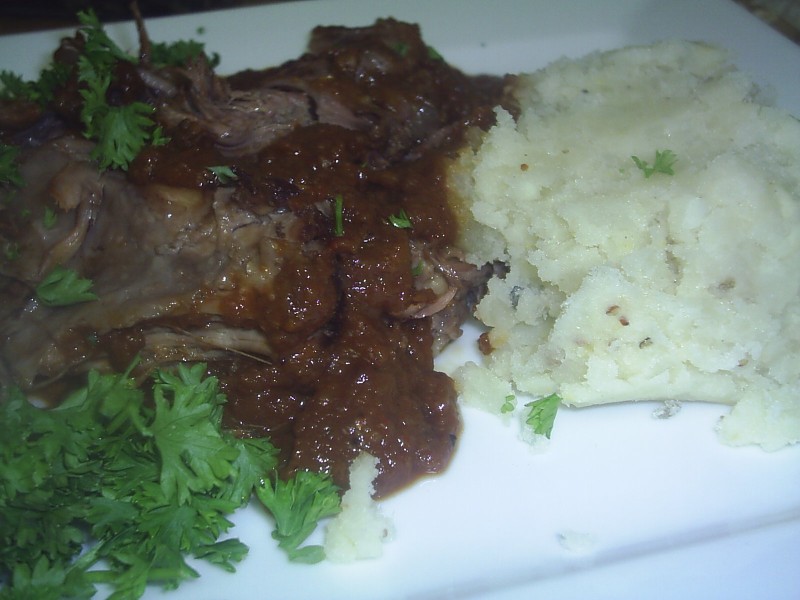
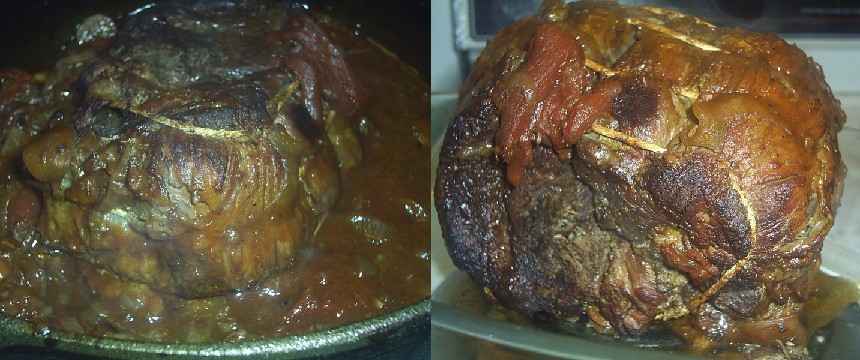
After that, it went into the oven for about 15 minutes, and came out looking like this: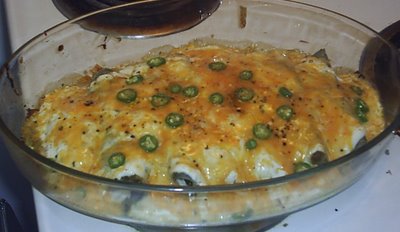
Swiss Enchiladas (Enchiladas Suizas)
The Chicken
2 boneless skinless chicken breasts
750 ml (1½ C) water
2 tbsp onion, chopped
1 tsp salt
1 bay leaf
Enchilada Sauce
3 tbsp corn or vegetable oil
½ medium onion, finely chopped
1 clove garlic, crushed
250ml (1 C) tomatillo puree (see below)
1 tbsp fresh coriander (or ½ tbsp dried coriander)
1 serrano chilli, finely chopped
½ tsp salt
½ tsp sugar
½ tsp baking soda
salt and pepper
Tortillas
250 ml (1 C) vegetable oil
6 soft blue corn tortillas
Topping
300g (1¼ C) sour cream
100g (½ C) grated cheddar cheese
2 serrano chillis, sliced thin
1. Preheat the oven to 350ºF/180ºC/Gas Mark 4.
2. Put the chicken breasts in a saucepan and cover with the water. Add the 2 tbsp chopped onion, salt and bay leaf. Bring to the boil and skim anything that comes to the surface. Boil gently for 20 minutes, until the chicken is cooked. Leave to cool and shred lightly with your fingers. Reserve.
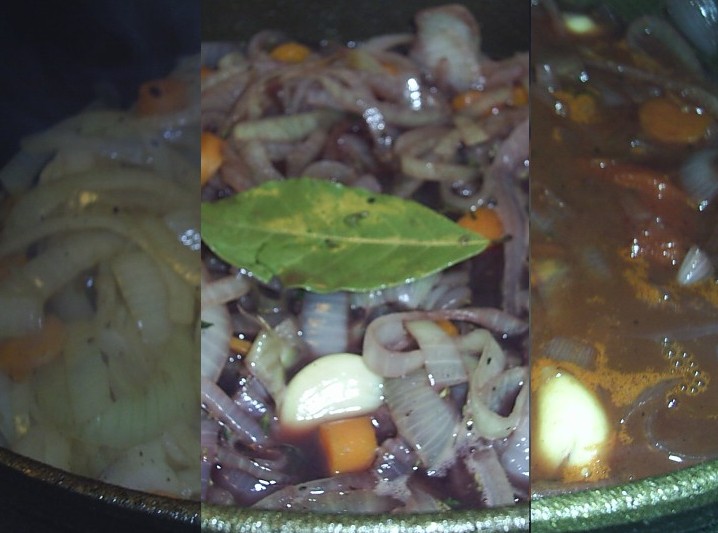
3. While the chicken is cooking, make the sauce for the enchiladas. In a medium saucepan, heat the oil and add the onion. Sauté for 5 minutes, until soft. Add the garlic and sauté for a little longer, making sure that the garlic does not burn. Add ¾ of the tomatillo puree, most of the coriander, the chilli, salt, sugar and baking soda. Cook for 10 minutes, until the sauce no longer tastes too acidic. Add some of the chicken stock to obtain a fairly liquid sauce. Season to taste with salt and pepper.
4. Heat the 1 C of vegetable oil in a frying pan and put the tortillas in one at a time. Try each tortilla for 15 seconds and place on a plate lined with kitchen paper. The tortillas should remain soft.
5. Dip each tortilla in the sauce and place on a medium-sized baking dish. Put a little of the shredded chicken on each tortilla and fold in half. Repeat the process with each tortilla. Top with the rest of the tomatillo sauce, the sour cream, the cheese and the sliced chillis. Bake in the oven for 10 minutes, until the cheese turns golden brown.
6. Garnish with the remaining coriander and serve warm. They taste delicious when served with refried beans (see recipe above).
Weekend Cookbook Challenge

 Normally, when I start walking after dismounting from the Red Rocket, I simply walk east along Queen St. until I feel like turning around, then walk home. Sometimes I walk a few stops, and sometimes I get all the way to the end of the streetcar line at Neville Park. Today, on a whim, I decided instead to walk down to the beach and stroll back along the boardwalk.
 This is my favourite time of year to walk on the boardwalk. It's started to cool down enough that I wore a jacket to work today for the first time since May. Because of this, the tourists who have been flocking to the beach all summer, have now all gone home to Markham or Mississauga or Mimico, and the beach is mine again. It's so nice to be able to sit on a bench facing the water with a nice breeze from off the lake blowing in my face, and just hear the quiet. Not that it's silent by any means, with the rollerbladers on the bike path and people walking their dogs, and of course the gulls fighting over dropped hotdogs or ice cream cones from the Beach Snack Bar, but still and relaxing.
 As I walked past the Leuty Ave. Lifeguard Station, I couldn't help but think about bonfires on the beach at that very spot and stolen kisses in the dark back when I was a senior in high school. The Eighties seem a long way off from where I'm standing, and if I had realized how much tougher life was going to get, I would have had a lot more fun at the time.
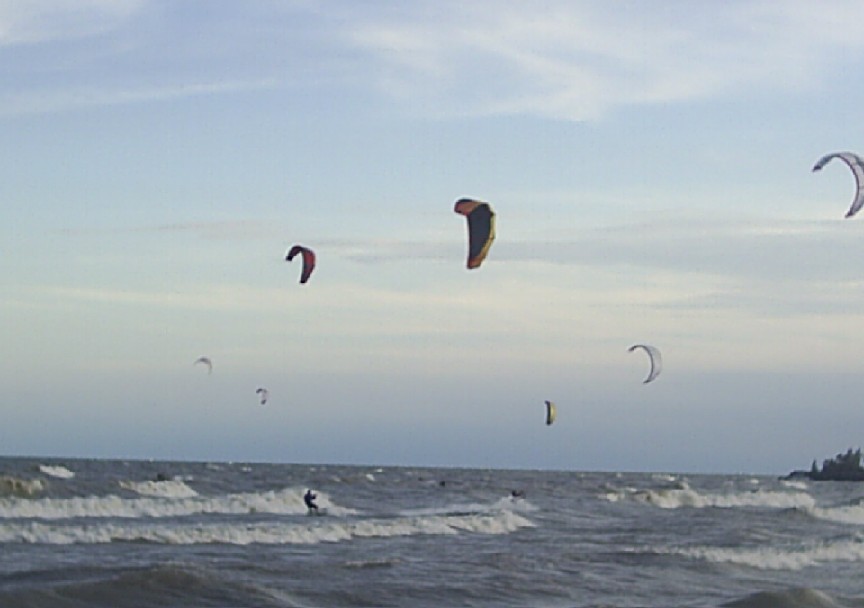 As I continued west along the boardwalk, I could see what appeared to be a bunch of people flying kites up ahead. As I was snapping some pictures anyway, this seemed a fun thing to get some shots of. As I approached, however, I realized that it wasn't just people flying kites, but kitesurfers. I had never seen this before, and I was amazed at the speeds these people were achieving. I saw one guy get pulled completely out of the water and glide through the air for about ten feet. Now, I don't know for sure that it's actually called kitesurfing, but it seems a logical enough name. I hung out there for a few minutes, watching what must have been about twenty people doing this. More power to them, because all I was thinking was that it was going to be chilly swim back to shore.


 Normally, when on a road trip with friends, we play the LCBO Game to pass the time. For those of you not familiar with this game, I will explain. In Ontario, the only place you can buy liquor is the LCBO store (Liquor Control Board of Ontario). Consequently, there is an LCBO outlet in every single little town in the province. The game is to be the first person to spot the LCBO sign as you pass through each little town, shouting out "LCBO!" and pointing at the sign. Of course, when road tripping through the States, this doesn't really work so well, but after driving through Ohio for a while, we noticed that there seemed to be a place called the Waffle House in pretty much every single little town along the interstate. So, we played the Waffle House Game. I am the king of the Waffle House Game. To be fair, Joe did all the driving, so he couldn't exactly spend all his time searching for the signs, buy hey, a win's a win.